Showing posts with label Halloween card. Show all posts

Wednesday, July 26, 2017

Wicked

Hi everyone!
I am sharing one of the cards I made using some of the new Halloween Sizzix dies.  Follow along and I will show you how I created it!
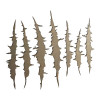
The first die is called CLAW MARKS.  I admit, at first I thought why would I need this die?  But then once you use it, it becomes quite clear what fun you could have with the Thinlit.  Each claw mark is an individual shaped die so you can add as many slashes as you wish.  There are 4 large and 3 small claw marks included in the set, which gives you plenty to choose from.
This photo might help you see what I mean.  I cut my Dapper paper to the size I needed for the card front.  I then chose three of the claw marks (two large and one small) and placed them on the paper, cutting side down.  As you can see, I used a bit of washi tape to keep the claw marks in place when I ran them through the Vagabond machine.
Next I needed something to appear through the slashes...I chose a Found Relative card that I tinted with Distress Markers.  Just color the image and wipe away the excess ink with a soft cloth or bit of a paper towel.
So after I colored the Found Relative I decided to cut away the background (that's how it goes sometimes!).  I thought a piece of Mirrored would be just a bit spookier and for this purpose it seemed appropriate!
I squeezed drops of Mushroom Alcohol Ink onto the surface of the Mirrored (remember to peel back the protective plastic coating on the Mirrored before doing this step).   I followed that up by dripping Alcohol Ink Blending solution over the top to dilute the solid drops of ink.  You end up with a very cool background.
I went back to the "claw mark" paper and inked the edges with Walnut Distress Ink.  I also flicked water over the paper to create the dried water marks you can see here.  Once dry, I stitched around the paper a few times.  I used some tape to keep the layered found relative/mirrored in position before adding the entire thing to the card foundation. PLEASE NOTE: the stitching is ONLY on the slashed paper - not through the Mirrored product.
 The next die I used was Vintage Spirits.  These are just so fun to use!
 I adhered a piece of red cardstock to heavystock paper then ran it through the Vagabond. 
 I smeared on Vintage Collage Medium to tone down the bright red and give it aged matte finish.
Once dry (which is not very long) I added it to the card front with Scrapbook Adhesive Foam Squares.  As you can see, I added the card front to a piece of Textured Surfaces (Burlap) and a dark brown card base.  The stitching looks like I sewed through the entire card but in reality it's just the top layer.
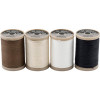
 Craft Thread, Craft Thread I just can't get enough of you! 
I used the colored Craft Thread to wrap around the card front and tie a long, one loop bow.  I added the tiny keys from the Adornment pack just because they were really cute! Can you say that about a card using claw marks?
 Seriously, my favorite card.  The Mirrored effect is wonderful when you tilt the card back and forth!
Thanks for joining me today!  I'll be back with another card next week.
now carry on,
paula


Friday, July 14, 2017

Ornate Owl Card

Hi all,
Popping in to share a card I made for the Tim Holtz Sizzix Halloween release (which is awesome by the way).  If you were part of Tim's Facebook Live event this morning then you will have previewed the card as well as MANY other cards our team created for the release.  If you missed the live event you can see the rebroadcast on Tim's Facebook page  or YouTube channel later today.

Today's card was made using the new Ornate Owl and Skull Damask Texture Fade.  It's an easy card to make so let me show you how I did it...
Since the Ornate Owl die is so intricate, I ran the black cardstock through my Xyron machine to add a sticky back (that is the white paper you see in the photo).  This way, when you are ready, you can just peel away the paper backing and adhere it to the surface, which in my case will be Metal Foil.
 I used a fine glitter over the surface of the owl to create a visual texture.
I adhered a sheet of Metal Foil Tape to a piece of Distress Heavystock (the tape is self-adhesive).  Then I used a pen to trace the outside shape of the owl.
 Cut out the shape.
I used my Blending Tool with a felt pad to add Alcohol Ink (Oregano and Amethyst) over the Metal Foil Tape.  Remember, Alcohol Ink is best when layered so wait 10-15 seconds before adding the next layer to get more dept of color.
 Now pull the white protective sheet off the die-cut owl and adhere to the foil surface.
For the background, I ran green cardstock through the Vagabond using the Skull Damask Texture Fade.  It created a great surface for the background of the card.
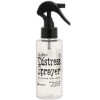
I used the mini Black Soot Distress Ink to rub onto the raised surface.  These minis are the perfect for this technique because you can control the how much ink goes on.  After I was happy with the color, I spritzed the surface with water using the Distress Sprayer to let some of the ink run into the background and dried it with a heat tool.
 I flicked a bit of gold paint over the surface and set that aside to dry.
A linen surface was prepared using a piece of Distress Heavystock and linen Textile Surface (one of my absolute go to product for self-adhesive fabric).  Instead of keeping it a brown linen surface, I added Black Soot Distress Ink to the edges.
Both the linen surface and the green cardstock were added to a purple card.
I colored some Tim Holtz Craft Thread (thick thread for crafting and hand sewing projects) with Walnut Stain Distress Ink an water to use in the background.  So add the string with Collage Medium (the glue is hidden behind the owl).
Use foam squares (my favorites are made by Scrapbook Adhesives) to adhere the Owl to the card front.  Wrap the string around the ends of each branch.
I made a VERY small tag (the hole is the small hole of the Cropadile) using Distress Heavystock and a Clippings sticker.


 Mini Fasteners were added to each corner.

Well, I hope you liked the Ornate Owl card.  This die is just amazing with all the cutout detail!  The Halloween dies will be shipping at the end of July so I will add a link once they are available for pre-order on Simon Says Stamp.
I will be back on Tuesday with another Halloween card so stay tuned!
carry on,
paula