Saturday, July 17, 2021

Prize Ribbon Distress Ink

Hello friends,

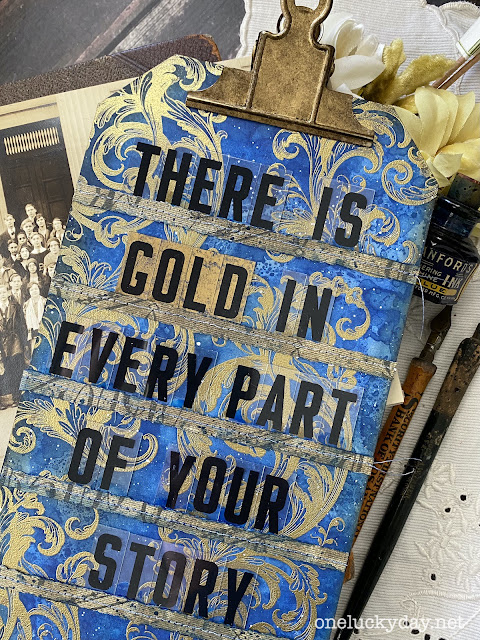
Glad to be here to share in the fun of the new Distress color, Prize Ribbon! It is such a beautiful bright blue but if you saw Tim's YouTube Live today, you can see how it wicks out to a lighter color depending on paper and use.  I created this swatch so I could have a visual of how it fit into the darker blue range of Distress.  
The project I am sharing today is something I had in mind since the first time we released the idea-ology Mini Marquee letters.  YOU get so many letters in the bag that I could create this saying using 4 E's and still have more left.  Total bargain in my opinion.
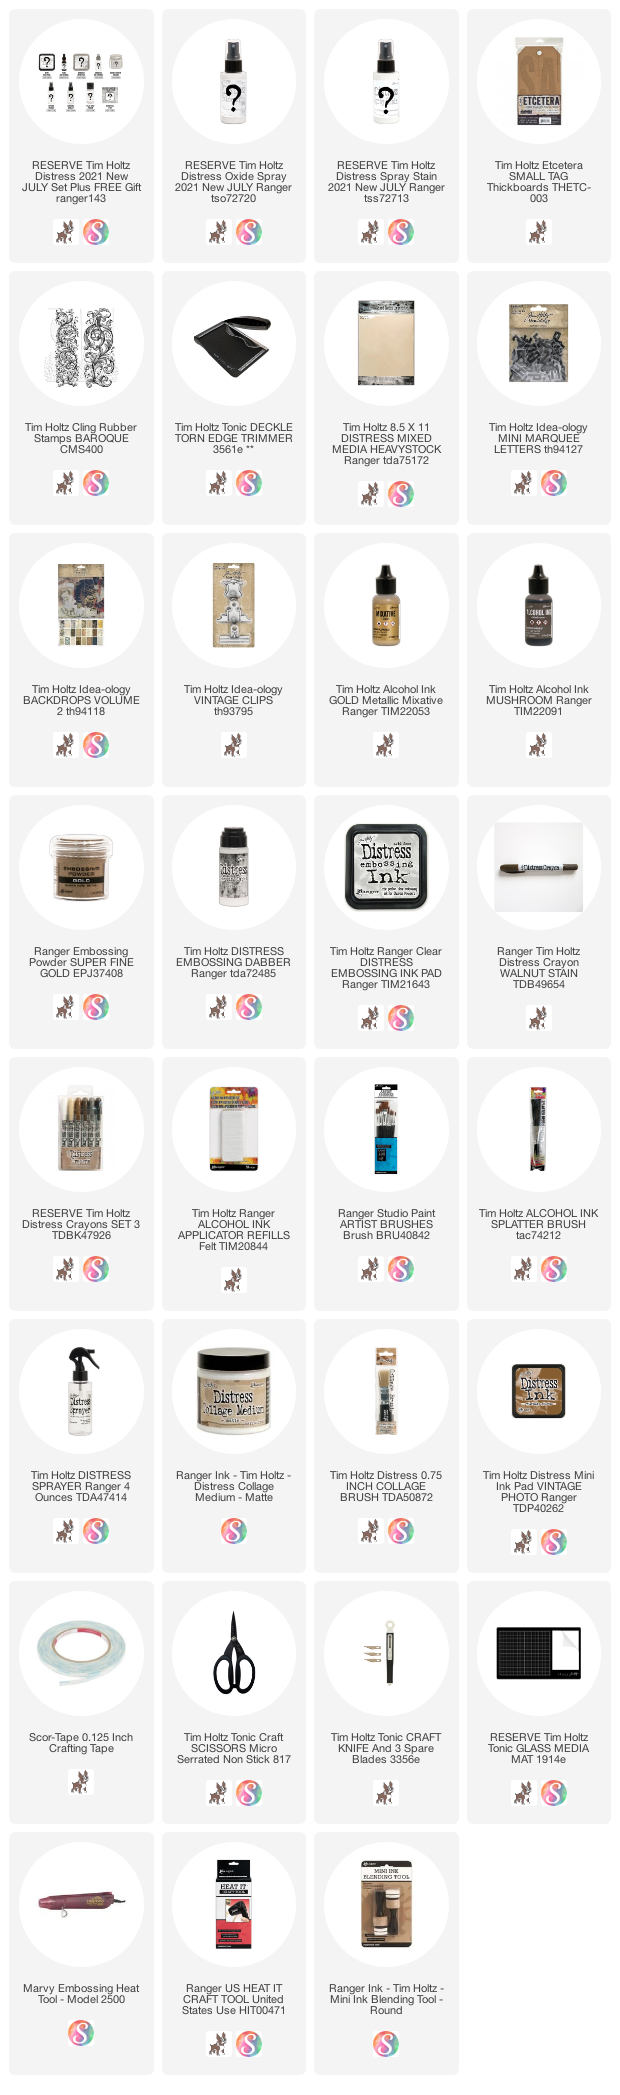
I cut a piece of Heavystock paper to fit the small Etcetera Tag.  Using one of the images from the Baroque stamp, I repeatedly stamped and embossed with Ranger Super Fine Gold Embossing Powder.
I sprayed both Prize Ribbon Distress Stain Spray and Oxide Spray onto a craft sheet. I added a little water with the Distress Sprayer and pressed the embossed paper into the ink to create the bright blue background.  I repeated the...press, dry, press, dry, a few times to make sure the ink covered the paper.
Just to give it another layer, I used the Ranger Splatter Brush to add a splatter of white Distress Paint across the blue ink.
Once the paint was dry (and it did take a bit) I adhered the embossed paper to the small Etcetera Tag with Collage Medium making sure all the edges were secure (a great time to break out your brayer).  Once secure, flip the tag over onto a self-healing mat board and using the Tonic Craft Knife to remove any excess paper.  Set aside.
I chose of piece of Backdrops paper that looks textured for this next step - you can find this piece in Backdrops Volume 1.
Stitch across the 6" length of the paper, five times. I kept the stitching of the five lines close so I only had to cut between the lines, but you can stitch as for apart as you are comfortable.  Once I had the five lines of stitching, I used my Tonic Deckle Cutter to cut between the lines, creating five strips.  You can see by the lines on the Deckle Cutter that the strips are just over a 1/4" wide.
I wanted to add a bit of Prize Ribbon to the color the paper and the neutral stitching, so I spritzed Prize Ribbon Spray Stain onto the glass mat and pressed the paper strips repeatedly into the small beads of ink.  I love how the thread is now blue!
Next, cut the strips to the width of the Etcetera Tag, then add 1/8" double stick tape. You can use any brand like Scor-tape - this was just the one I had on hand.  As you can see, I added the tape to one side of the stitching line so I could slip the plastic letters underneath (on the side with no tape).
The stitched strips are 1 1/2" apart.  It was easy to see the placement using a ruler and the lines on the Glass Media Mat.
The Mini Marquee letters are so fun to use. Each letter has a little more plastic at the top so they can be clipped or sewn to something. In my case, I was slipping them just under the paper strip so I only had to make sure I spelled everything right and that the extra space was at the top.
For the word GOLD, I decided to use Ranger gold Mixative on the back to draw attention to the word. Super easy to do. Just add a pea size circle of gold to a Blending Tool with felt and pounce away.  Let dry and then you are ready to use.
The Mini Marquee letters were added to the tag with Collage Medium.  
Things to remember:
  1. Place the letters on the tag to get the right spacing before adding Collage Medium.
  2. You need less Collage Medium than you think.
  3. Only add the Collage Medium to the lower 1/4 of each letter. 
I used the same gold Mixative and Blending Tool for the Vintage Clip.
Then added Mushroom over the top to take the edge off the gold.  I left it to dry completely before adding it to the top of the tag.


I hope you like this project. It was easy and fun to do.  You can use any quote you like and any size board.  This could be super fun for a shower or wedding sign in table or so many other things since you can personalize it!
now carry on,
paula

Wednesday, July 7, 2021

Stampers Anonymous Floral Outlines

Hello friends!

I'm sorry it has been so long since I have posted but there have been so many things going on behind the scenes preparing for all the summer releases!  This is always an exciting time of the year! Two of the release dates have been announced with more to come!

Sizzix Chapter 3 YouTube Live - July 10th
Ranger New Color YouTube Live - July 17th

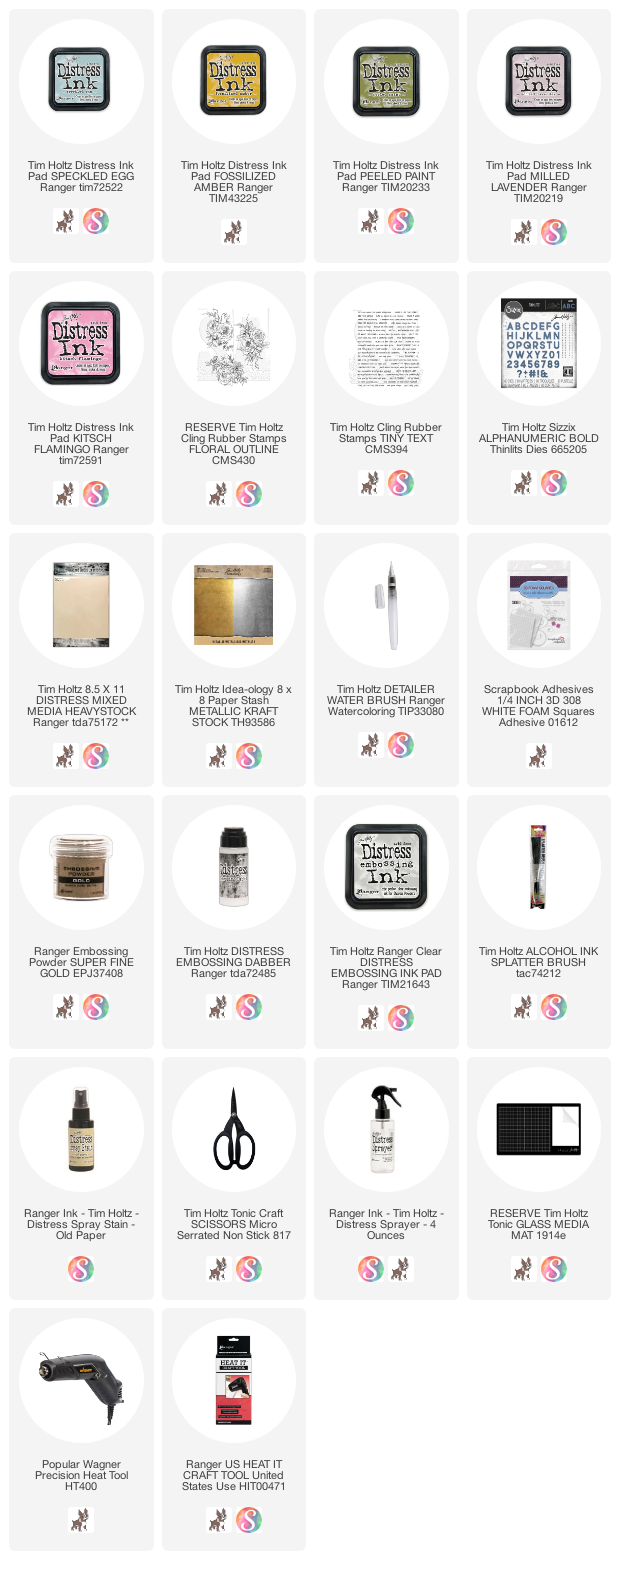
Todays tutorial is an easy one!  It is for two cards I created for the Stampers Anonymous release using the Floral Outlines stamp set (CMS430).  I decided to give you two versions of the same card, so depending on time and occasion, you have a choice on how far you want to go...just embossing or adding in the watercolor coloring.  Follow along and I will show you what I did.

Start with a piece of Mixed Media Heavystock paper. Spray with Antique Linen Spray Stain. I am not a fan of large splotches of ink (for this kind of card) so I like to spray and wipe the dots away, leaving a smoother look (but you do you!).  I like just enough to color the paper and give it a bit of interest.
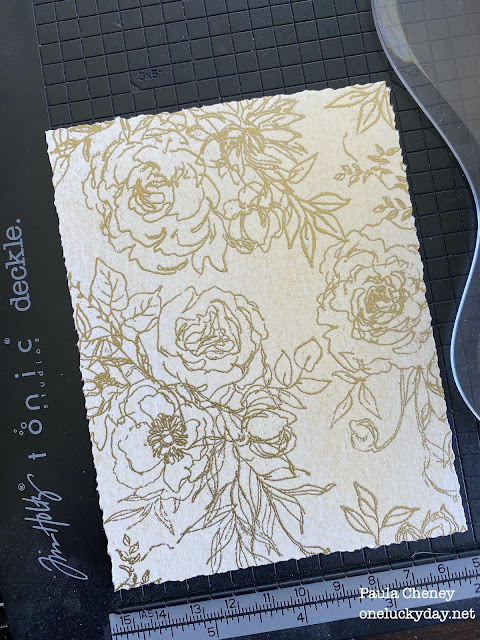
Next we need to arrange the stamps how they will appear on the finished card.  You could do this on a platform but I like to do it one at a time with a stamp block.  
Once all the images have been stamped with Embossing Ink and the gold Embossing Powder has been poured over the top, you are ready to emboss with an embossing gun.  I love how the flowers fit together even though they are each different shapes.  
I used my Tonic Deckle cutter to cut the edges of the card.  I knew I was going to use the Deckle Cutter, so I cut my original paper slightly bigger than I wanted my finished card to be, giving me just enough excess paper to cut away.
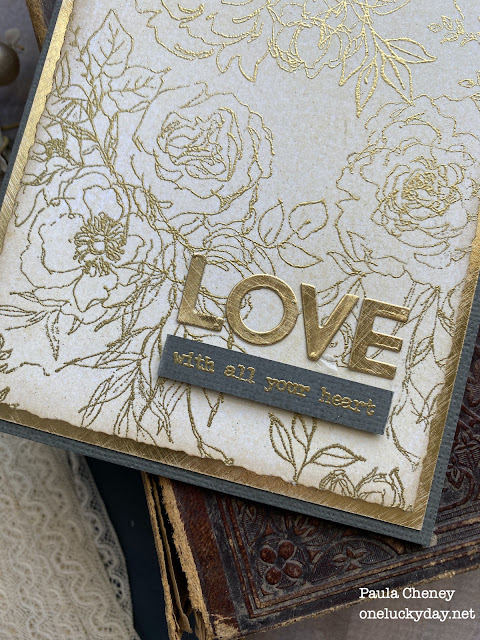
I added a bit of Walnut Stain Distress Ink on the edges of the card with a Blending Brush.
For a bit of shine I added gold Metallic paper.  I like to create a crosshatch pattern across the paper by lightly skimming the top with sand paper.  It gives the paper more interest (in what little you will see) and a little visual texture.
Once the pieces are put together on a grey cardstock backing (I used foam pads under the embossed card) it makes a beautiful layered card.  My thought was wedding but it really could be for any occasion.
I used more the of gold Metallic paper to cut the letters LOVE using the Alphanumeric Bold die - I love this die set because its the perfect size for cards!  To make it easier, I added a Sizzix Permanent Adhesive sheet to the back of the gold cardstock before I cut it, allowing me to just peel and stick the letters down.  The grey cardstock strip was stamped and embossed with gold embossing powder to match (CMS394 Tiny Text) then added with thin foam pads.
That Deckle edge looks great on the finished card.  So glad I added that extra step.
Continuing on, I wanted to try the same exact card but this time use Distress Ink to watercolor the embossed flowers.  So I repeated the steps to emboss the card, then created a palette of Distress Ink on my Glass Mat.  A Detail Water Brush works best for coloring in tight spaces. 

I colored all the leaves with Peeled Paint Distress Ink.
Then moved to the flowers.  I used Kitsch Flamingo the most with a small bit of Milled Lavender and Fossilized Amber.
Once the flowers were colored, I flicked Speckled Egg Distress Ink over the background.
What an easy technique to create such a pretty card! The Floral Outline stamp is a standout - it is seeming perfect for so many uses and occasions.
Again, the Deckle edge is beautiful against the gold background and grey card.  Loving this combination!

I hope you like the two easy cards.  I can see making multiples of these to have on hand for weddings, birthdays and just a note of encouragement.
Now carry on,
paula


Tuesday, June 1, 2021

Using the Travel Folio

 Hello friends,

Lots of behind the scene work has kept me busy these past few weeks and blogging seems to be the first thing to be scratched off the list.  However, due to the holiday weekend here in the US, I had some extra time to get some things done and posting a project is one of them!

I created this book in January of 2020 for the Creativation show using the Travel Folio.  I was going to share it here when I returned, but we all know what happened in early March.  To be quite honest, I just didn't think anyone (me for instance) wanted to be reminded how they (I) couldn't travel anywhere due to Covid.  Fast forward to last week when Tim and I were discussing the Travel Folio and this project popped into my mind with the words, "you can share it now".  So here I am today, hoping you will accepting of an old project that I love and want to share with you today!

The Travel Folio can be used for many themes.  The inside and outside are covered with ephemera based papers that make it even easier to work with because quite frankly, the hard part of 'covering the cover' is done for you.  Can you change the paper or add more embellishment on the outside? sure, totally up to you...we have just given you the foundation to work with.

The only thing I added to the cover was the black/white sticker (Label Stickers) and metal hardware from the Factory Tags pack.

Open the large flap and I have added these fantastic giant numbers from Layers, Urban pack.  
NOTE: I need to mention that the Urban pack comes with only one number 2, so the numbers will not work if you are documenting 2021 unless you buy two packs.  The way to get around this is if you have the Sizzix die, Countdown.  
The font is the same but the number are smaller than Layers, Urban.  You can see the difference below.
The inside has two large flaps at the top and bottom to keep everything safe inside...no holes for stuff to fall out.
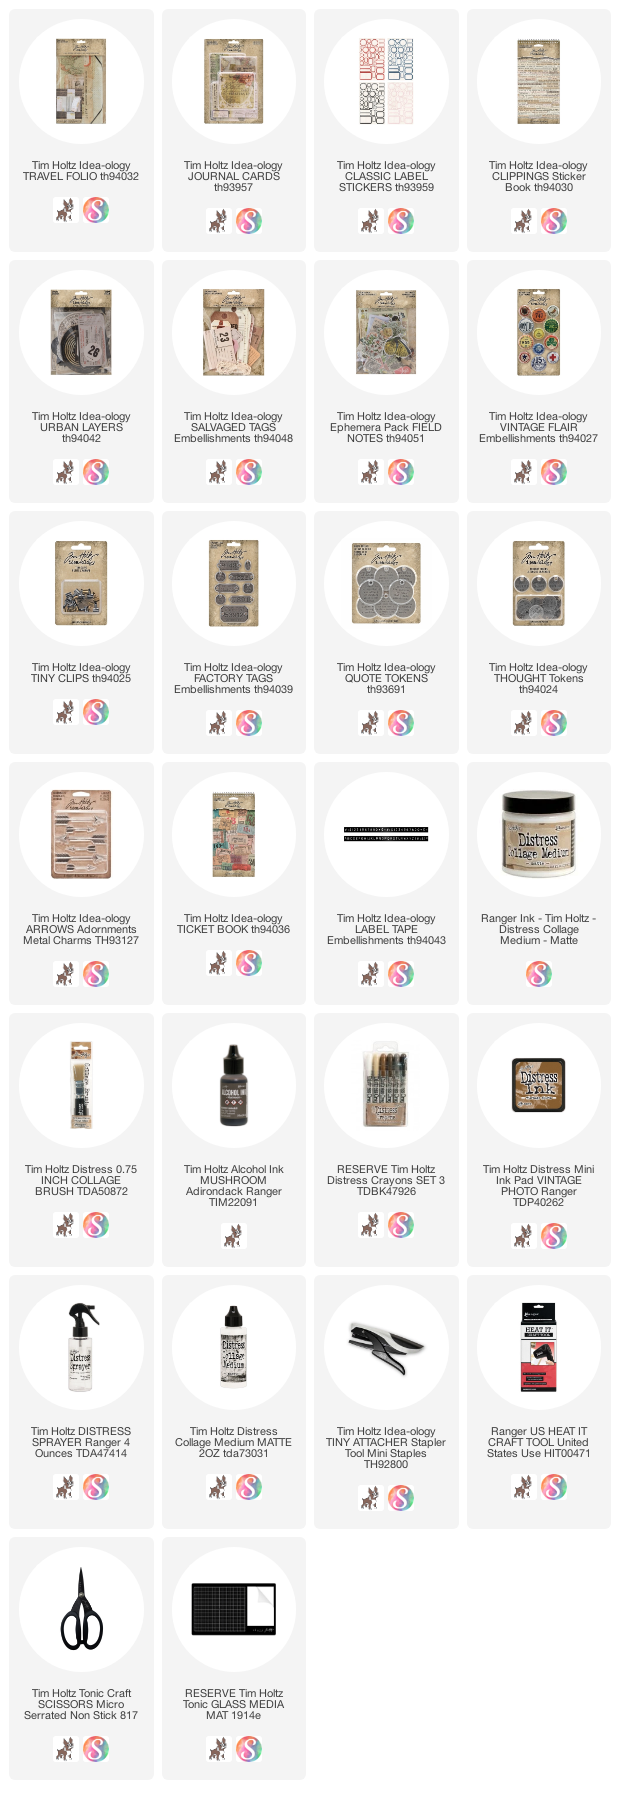
All the "patterned paper" on the inside of my book came from this pack of Journal Cards.  The cards come in four sizes and are printed on both sides, which works well for a project that will see both sides of the paper.  I used the longest size to create pockets by folding them in half...you will see an example of this later.
The "spine" (or the thing that you glue all the papers and tags to...) is sewn into the book, so all you need to do is add the things you want to embellish with.
We traveled to 4 countries so I created the book by date.  It was a lot easier to work out in my mind what I wanted to add when I printed all the pictures on my HP Sprocket printer.  I have traveled with the Sprocket before and the girls printed their pictures every night - that was good for a week but I think doing it for longer would just get annoying.  So this time I printed the pictures out when I got home.  Much less pressure to print after a long day on your feet.
The thing to remember when putting a folio together is that each layer should reveal just a tidbit about the next, without giving it away.  All the large tags are from the Salvaged Tags pack - they work great here because the tags come in a variety of shapes, sizes and colors.  Perfect for a book that should look "gathered" together!
The Journal cards have rounded corners which makes a very finished look without having to do anything special. 
In each section I would look for ways to add journaling and photos.  I also made sure I had both vertical and horizontal photos to work with.
I also love to create whole paragraphs out of Clippings Stickers.  Scotland was on the top of her priority list to visit and there was a sticker that used the very words so I knew I needed to include it somehow!  This label comes printed on the back of the Journaling Card so added the Tiny Clip to the top so it looks like the label is clipped to the page.  #fauxlabel
There are ways to extend the available "pages" of the Travel Folio.  One is to fold and score an edge of a Journal Card to create a hidden space for a photo.  So keep your eyes on the the giant ticket from the Ticket Book.
Here is the backside!  The perfect place to hide a picture, leaving a small spot for words on the part of the Journaling Card that was folded over and glued to the page.  Speaking of "glue" - I used Score Tape in varying widths to add all the pieces to the spine.  
As I transition to another country, I make sure to add the name (even though my handwriting stinks and I sometimes spell things wrong).
The blue paper behind the phone file is actually a long card folded in half and sewn on two sides.  I added another card inside with a folded ticket from the Ticket Book and an eyelet (seriously so hard to find good eyelets these days!)
More tags from the Salvaged Tag pack with added Vintage Flair (clover button) and Thought Tokens (metal coins with words).  "Handle with Care" ephemera is a favorite from Layers, Urban.

Another hidden card inside the folded and sewn Journal Card.  The Thought Token tied to the eyelet is an easy pull tab.  The colored Labels keep coming... the pack has one sheet of each: black, red, pink and navy so it was easy to keep changing up the colors throughout the book.
The text on Salvaged Tag on the right is hidden by another Journal Card that has been folded and scored to work like a door.  
I added the idea-ology fork since I used a picture of the waffles we ate that day.  A ticket from the Ticket Book serves as a tab and hints to the reader to lift the door!
I always love hidden journaling!  In hind site I should have added another picture to the inside of the door!  It's the perfect spot!
This is the last section of the folio.  The thick book that comes with the Travel Folio is placed here but I continued on with my story behind it.
NOTE: the book you see is held to the Travel Folio with an elastic strap.  The book can be easily removed for use or not used at all.
On the other side of the notebook, I was able to add one more photo of our last night in London. 
Details...
The flaps can also be used for more photos. This was a favorite taken on a boat ride in Bruges. As you can see, I was able to find a Clippings Sticker that went with every situation!

I love how this turned out - a sweet remembrance to a wonderful trip.  It's never too late to put your photos and memories into a keepsake that can be kept just for you or given as a gift.  I know Maddie loved this one.

If you liked the idea of using the Travel Folio, you might check out what Tami B did with it HERE! Totally different, yet absolutely wonderful and full of details.

now carry on,
paula

PRODUCTS USED IN THIS PROJECT
Tuesday, May 18, 2021

Vintage Ring Book for Simon Says Stamp

Hello Friends,

I am happy to report that today I am sharing a tutorial over on the Simon Says Stamp blog!  I created a Ring Book with Distress Mixed Media Heavystock cards, Worn Wallpaper Scraps and Paper Dolls.  I hope you will follow the LINK to the Simon Says Blog, to see the easy to steps to create this cute book.  Truth be told, I've also spelled out lots of tips and tricks about working with Distress Crayons.  Hope you will stop by.

now carry on,
paula