
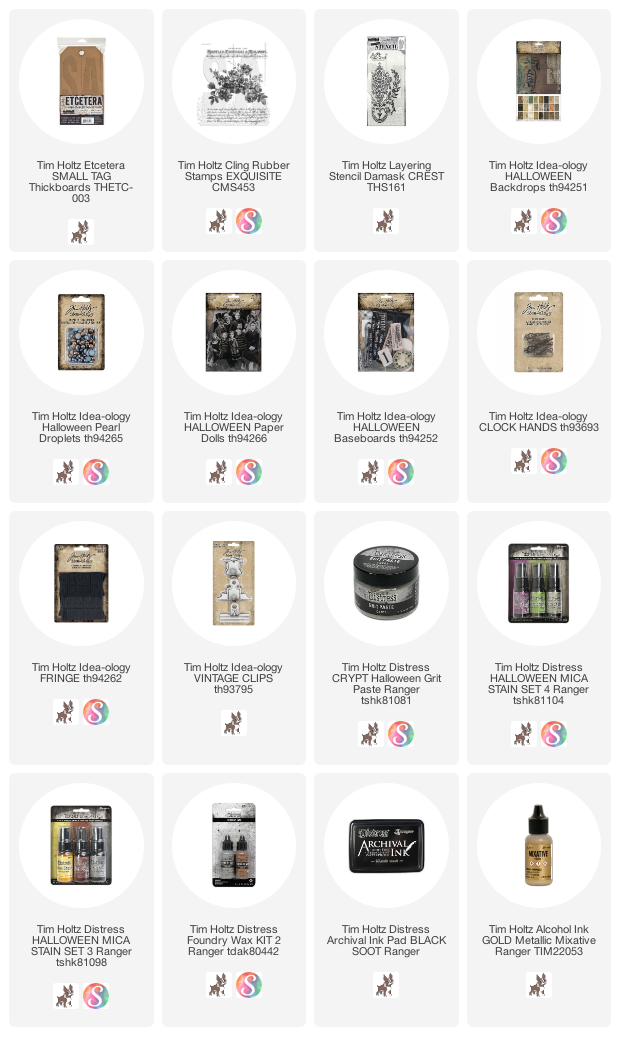
Hello Friends.
With the Stampers Anonymous Halloween release, all I want to think about is making Halloween things! This was such a fun and easy make. The new Damask Crest Stencil was not only the catalyst for the project but a real showstopper! Follow along and I will show you how I created it.
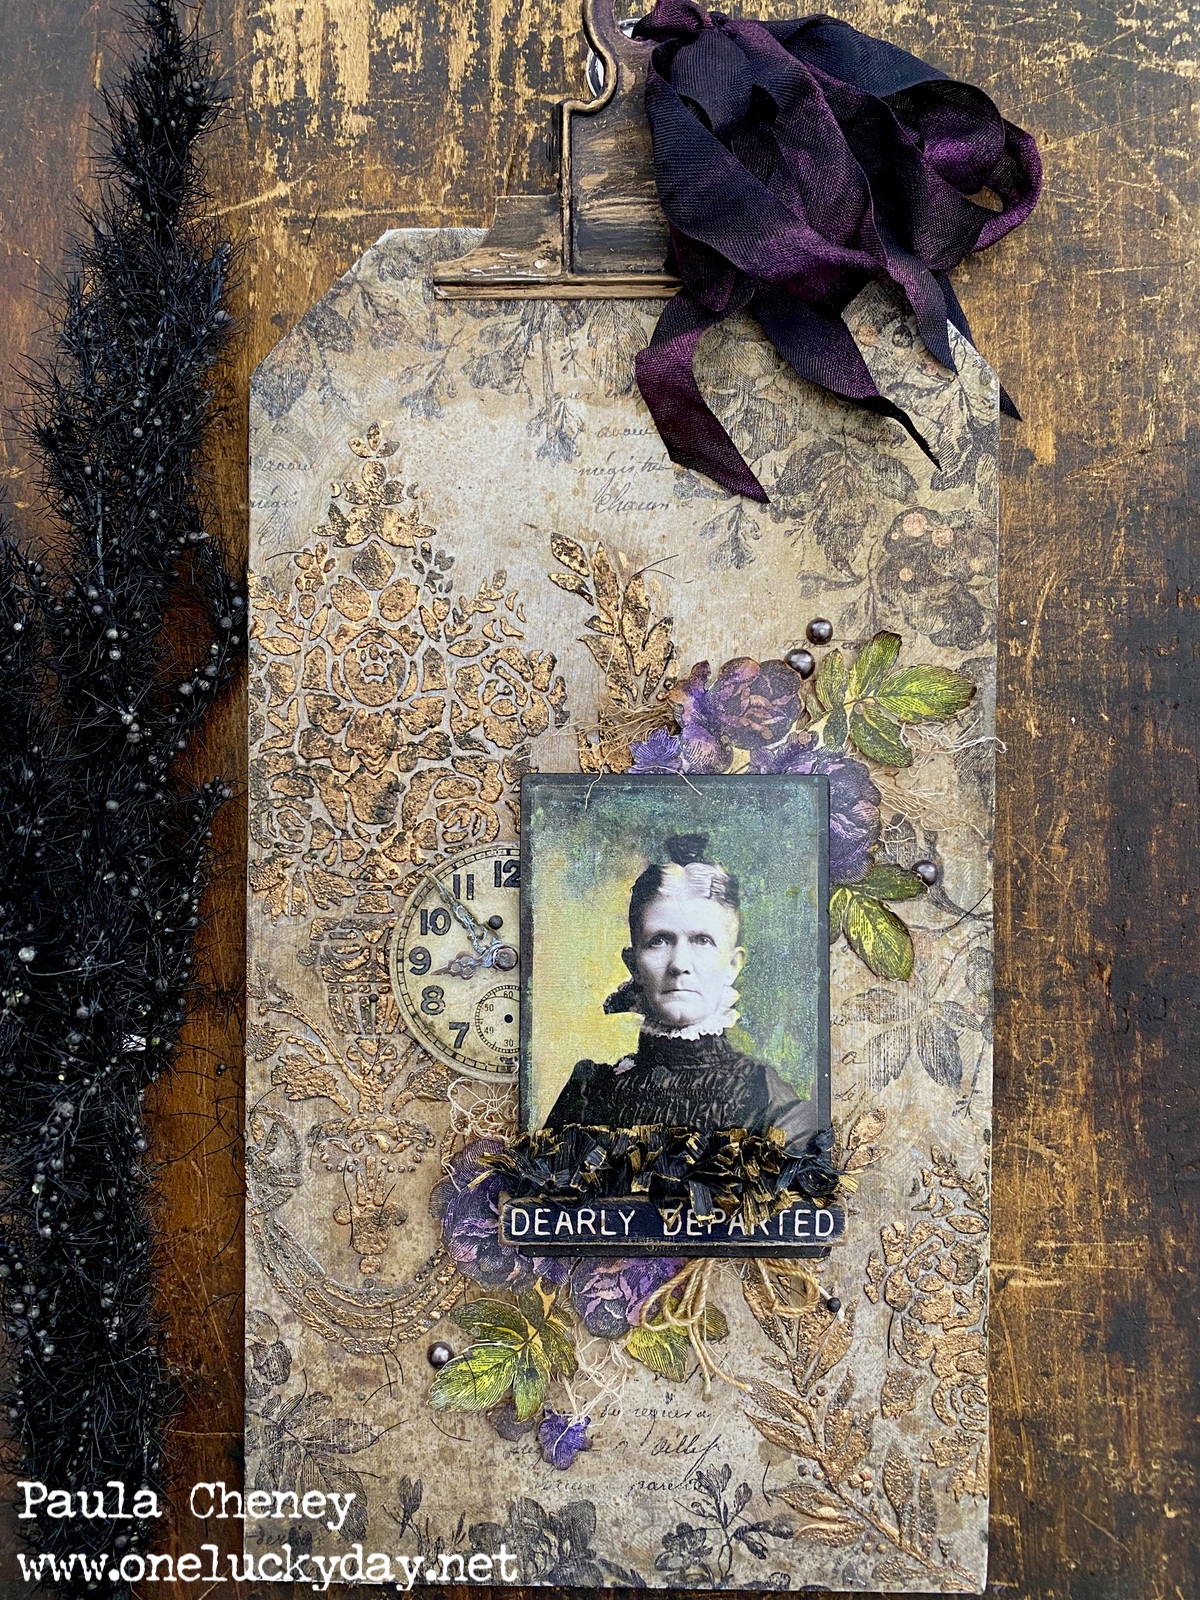
I used a small Etcetera Tag for the substrate. I used Collage Medium and a sheet of Backdrops paper from the Halloween pack to cover the front of the tag. I added a layer of Collage Medium over the top of the paper to seal it before moving on to the next step.
Once the Etcetera Tag was ready to go, I used the new Damask Crest Layering Stencil and Distress Grit-Paste Crypt to add a large textured image on the tag.

It will dry a darker grey so beware of the changing color during the drying process.
 I also added a partial secondary crest on the right side to balance everything out.
 Now you can see the Grit-Paste is starting to dry and change color.


At this stage, I used the Archival Ink in Black Soot and the new Exquisite floral to stamp the edges of the tag. I just kept turning the stamp to get different flowers and leaves.
 Next, I sprayed Mica Stain, Iron Gate over the top of the the stencil pattern. Because the tag was sealed with Collage Medium before I added the Grit-Paste, the tag resists the stain. The Grit-Paste is porous, even when dry, so the Mica Stain soaks right in. Just blot up the excess ink.
 By darkening the Grit-Paste, I created more contrast to I could use Foundry Wax Statue over the top.


- Shake till you hear the mixing ball.
- Squeeze out about a dime size circle. The Foundry Wax will immediately become creamy. It also dries quickly so you need to work fast.
- Use you finger to lightly rub the wax across the surface hitting the high points (you can also use a paintbrush to add the wax). Add as much as you wish, but don't cover up all the black you created with the Iron Gate Spray.

4. Use an embossing gun to heat the Foundry Wax, which will cause it to turn a shiny very quickly. The Foundry Wax is now permanent and cannot be sanded or removed in any way.
5. Use a Walnut Stain Distress Crayon to scribble directly over the Foundry Wax to create another layer of grit.


I set these aside to dry while I get to coloring the Paper Doll.
 To color on the Paper Doll image (from the Halloween pack), I used OXIDE ink and a water brush to color the background.
 Spritzed the card with a little water then dried with a heat tool.
 As the ink dries, it will change color...still vibrant but not this vibrant.


 I folded it in half along the stitching line, then fluffed up the ends.
 Add Collage Medium right above the saying, then push the Fringe into it.
 Add the clock face, also from the Baseboard pack, to the left side, slipping it under the Paper Doll. I did add clock hands to the Baseboard Face.


I mounted the card to the tag with foam squares, then added the "WICKED" saying from the Halloween Baseboard pack. NOTE: You will see that I change my mind on the saying when I add the Fringe...so the saying is longer across the Paper Doll image.

We have Fringe made from real crepe paper this year and I love it. Super sturdy so it can be crumpled and unrolled to get really fluffy Fringe.
The fringe is wide so I cut some off each side of the stitched center so it would not be as wide. Then I took Gold Mixative and squeezed some out in a long line on a deli sheet.
This made it very easy to dip in the ends of the fringe to get the hint of gold metallic.


Slip the colored flowers underneath as well.

 I added some Droplets next to the layered flowers for a bit of shine.
 The black rayon seam binding was sprayed with Fortune Teller Mica Stain. Then tied the ribbon to a Vintage Clip that I had previously painted black and added Foundry Wax to.
 Love how the purple shows us so well over black!
 I just love how the Foundry Wax looks of the Grit-Paste!


Now carry on,
paula
paula
WOW! Definitely trying some of these techniques. That fringe is beyond gorgeous.
ReplyDeleteLOVE all of the FAB details!
ReplyDeleteLovely tag! Thanks for sharing the process of creating it 😊
ReplyDelete