Hi everyone! Glad to be back today with a fun project made with lots of Distress Paint, one of my favortie mediums!
I am starting with Ranger Mixed Media paper as my substrate. I cut one sheet of paper in half lengthwise to get two strips 11 x 4 1/4" wide. I glued the two strips together using a tape runner and then created an accordion fold (about every 3 1/2").
You can better see here how the pieces folded up.
It's a small accordion book but that's what I'm looking for, for my little paint experiment.
Open the book up and paint a layer of Media White Gesso. Take the time to let the front dry before before flipping over and repeating the step on the backside. Once dry, the gesso might leave a little grit on the surface. Use your Sanding Grip to
lightly run over the surface to smooth out just a bit. What I like about the gesso is that it gives a great paper like Mixed Media cardstock the ability to withstand multiple layers of wet medium (
basically it toughens it up). I also like that once I'm done, the paper will feel more like leather. I'm my opinion you can never get that feeling without beginning with gesso.
Warning...this is the part where I warn you that it's going to be bad before it gets good - so stick with me till the end!
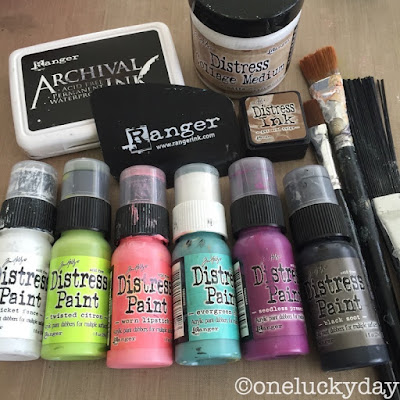
My challenge today was to use paints that I don't automatically reach for (like Ice Spruce). So I have chosen Twisted Citron, Evergreen Bough, Seedless Preserves, and Black Soot. I did get out a second Craft Mat since my project is so long!
I started with the brightest color, Twisted Citron. I used a paint brush to add splotches along the strip.
Next I added Evergreen Bough with the paint brush just like the previous step but then manipulated the color with a wet wipe. I know it's bright (
and seriously, it was even brighter in person).
Next up is the Seedless Preserves. Again, the wet wipe kept the color from taking over.
After drying the paint with a heat tool I added vintage book text with Distress Collage Medium.
This is what it looks like running down the table. No rhyme or reason to placement. I just used my hands to put the glue on the back and then a thin coating over the top the paper pieces. Let dry.
I poured the black paint out of the bottle and used my Ranger Craft Scraper to pick up some paint and add it to the project.
I started out small...
And then just decided to go for it.
After the black paint was dry, I used the
Mini Layering Stencil - Plus and a clean Blending Tool to add Worn Lipstick Paint in random places.
Once the paint was dry, I inked over the Worn Lipstick and Twisted Citron with Gathered Twigs Distress Ink. You can see in this photo that the plus signs on the right have been inked and the ones on the left have not. It's a subtle difference but it makes the pink blend in with the other colors. NOTE:
my Gathered Twigs has been used a lot so you may have to tap off on a paper towel to get the same subtle aging over the lighter colors.
Next up - the all important stamps! I'm using a set called Merchantile for the bold numbers and a fine line advertisement stamp (not pictured here)
I couldn't leave the white paint alone. The Distress Splatter Brush comes to the rescue to judiciously add white splatter over the pages. This brush is really one of my go to tools in my supplies.
Big Chat helps tell the story.
And a little stitching brings in something more than visual texture.
This is how the piece looks now. Very different from where I started with the Twisted Citron!
I have had this die cut from the Adventure Words thinlits set sitting on my desk for at least 8 months. I am totally serious.
8 months.
I refused to throw it away because I was determined to use it on a project. Well today is the day! I added some washi tape from my stash (
I have no idea where I got it or who makes it) and then stitched across the top. I love the way the tiny fine lines contrast the big bold pattern, numbers and color.
I flipped the strip over (
each end square has previously been painted to match the inside) and added tape to the center white portion (
this tape runner is without a doubt my favorite).
The tape allows me to fold the strip to create pages.
I added the same washi to the edge to cover the folds.
A little Distress Stain to color about 25" of Linen Ribbon.
I also added paint and Slate Alcohol Ink to a Hinge Clip and Number Token (my lucky number 7).
Once the book is folded up it is so cute! My favorite part is the texture of the pages. You can run your hand across the paint and it just feels like smooth leather. Thank you Media Gesso - you are the best!
Here is a look at the inside...
Love the tiny heart from the Heartfelt Bigz die! I like to cut the hearts in chipboard and keep them in a bag to quickly add them to any project. You get eleven hearts in different shapes and sizes with every pass!
I sure had a great time making this little book. I think I will be making more of these since it's an easy way to explore color and texture in a fun way!
now carry on,
paula