
Hello Friends,
Grateful to be here today sharing my first make for the Embark Fabric release. I love mixing idea-ology and fabric so this was a match made in heaven!

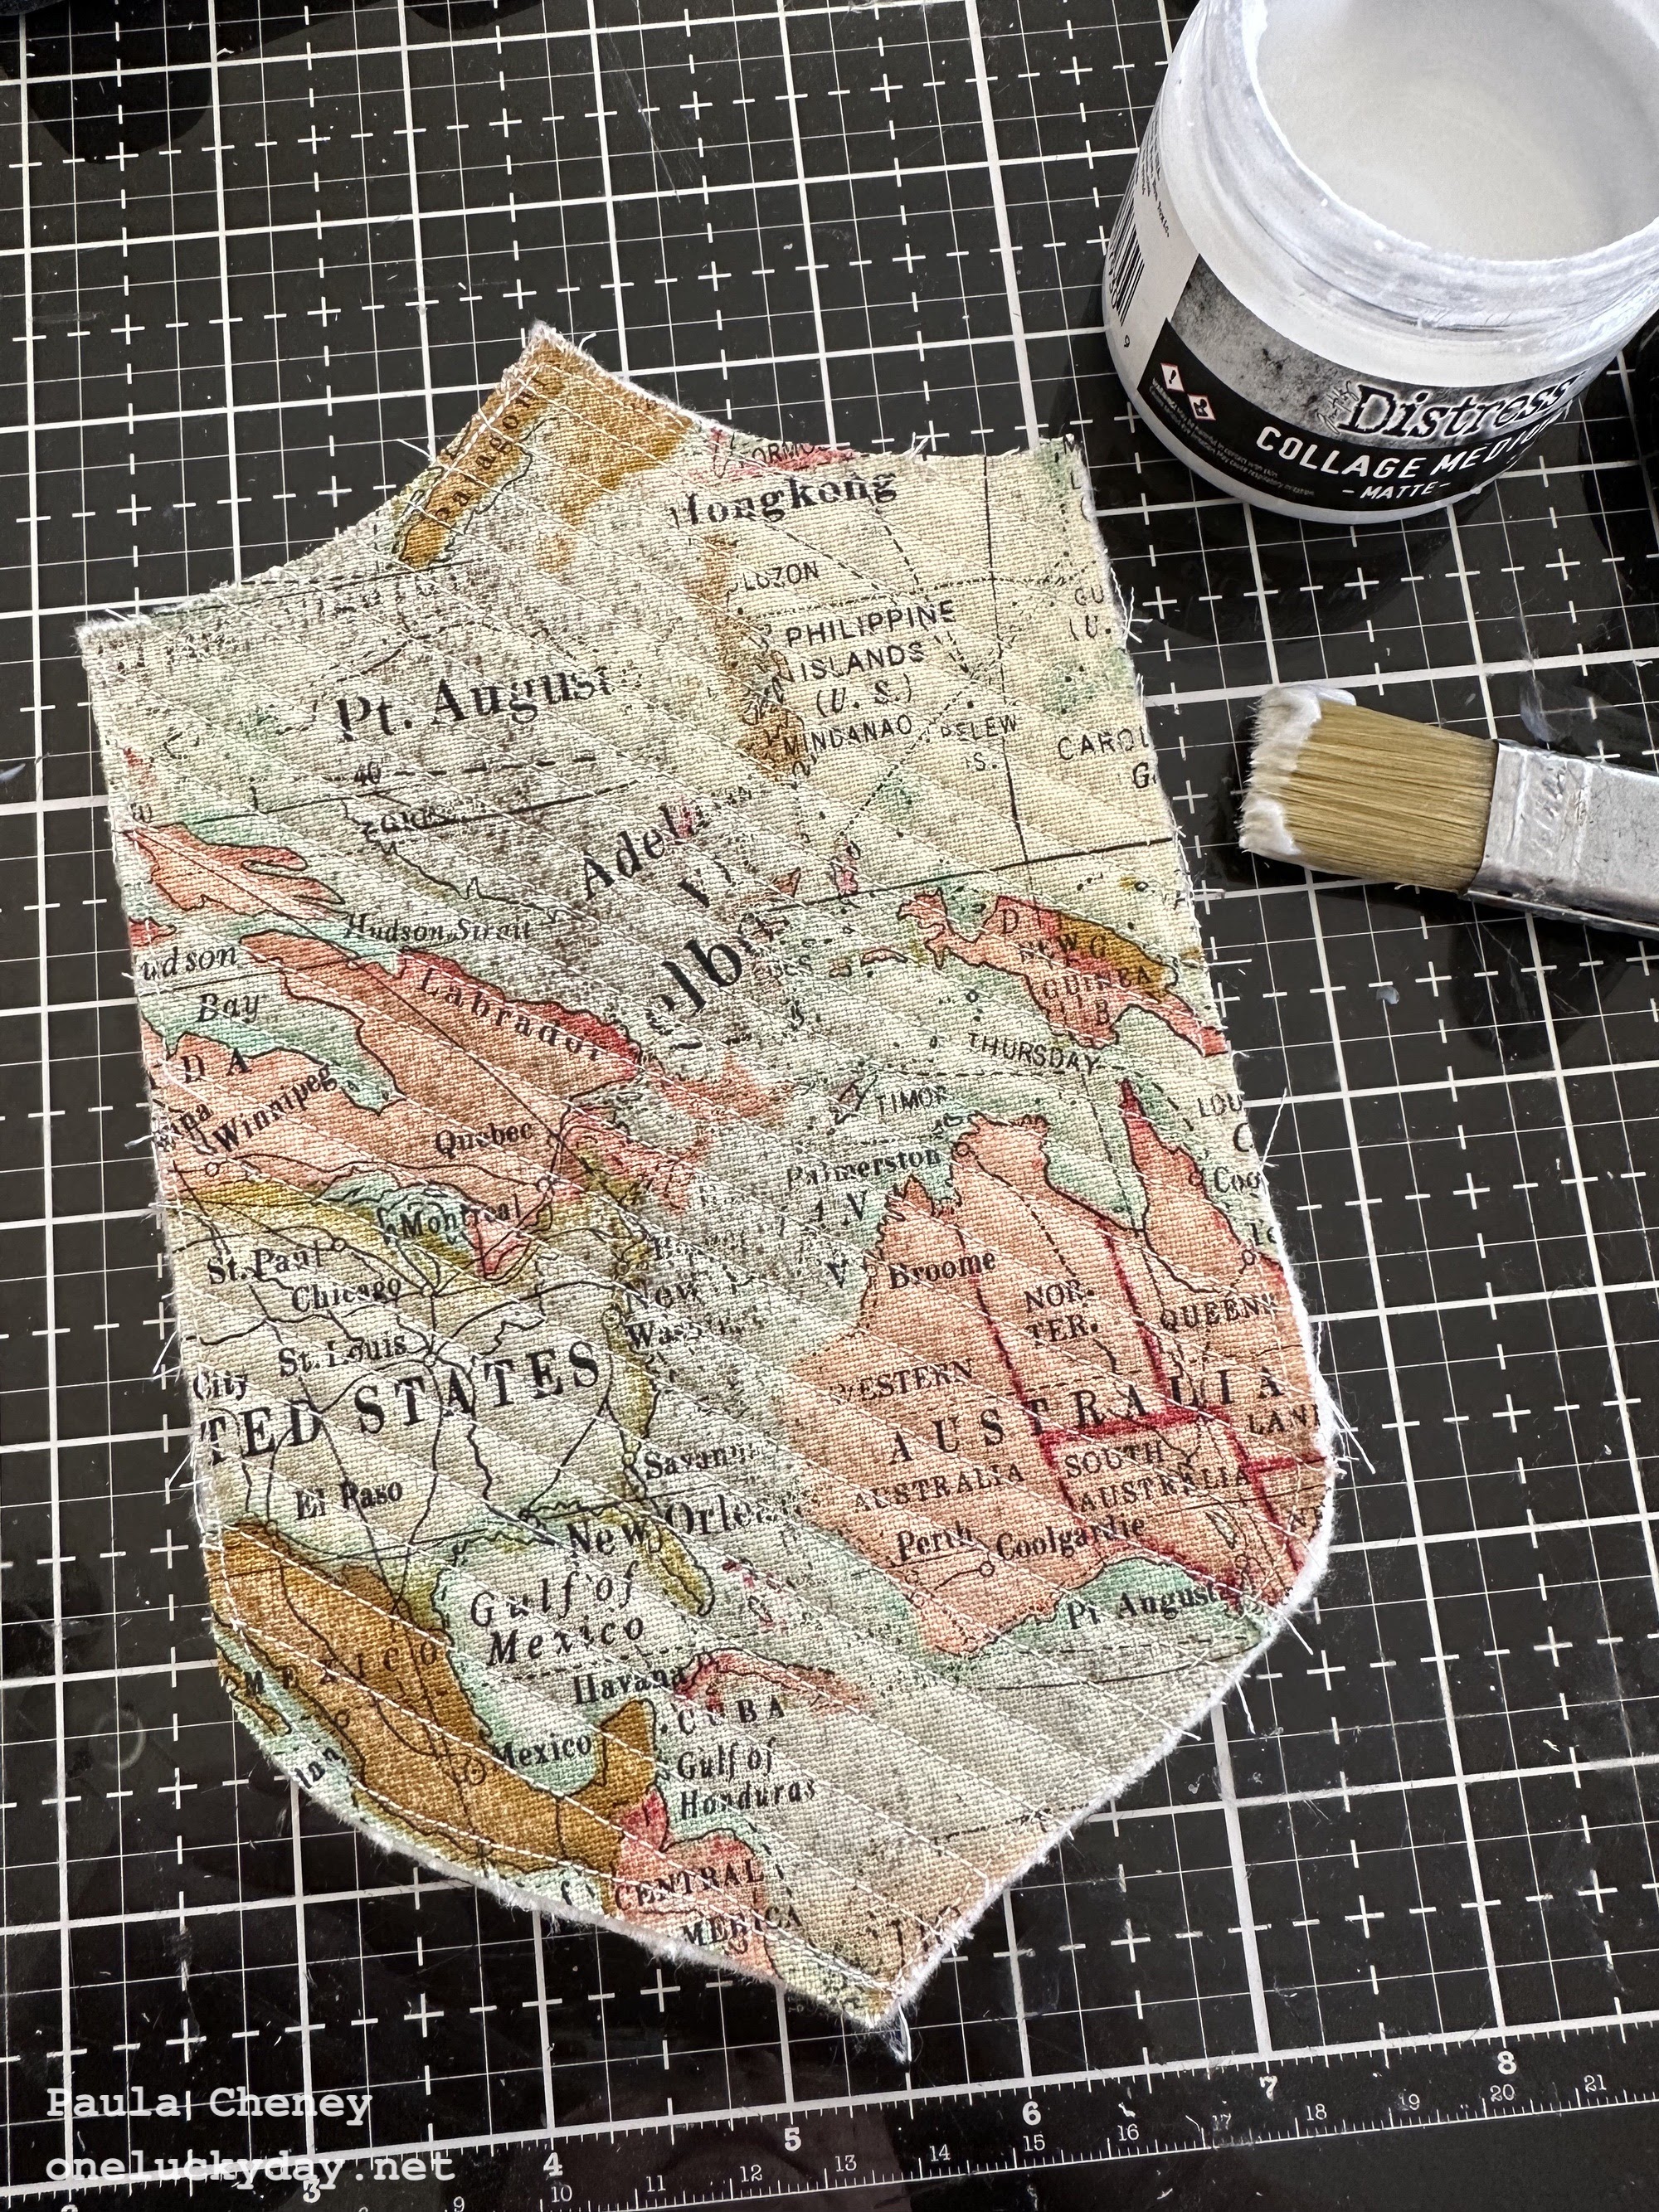
I used the shield shape from the new Etcetera Facades as a template, to cut one piece of fabric and one piece of matching Warm and Natural (cotton batting).

FYI: I wanted more of the fabric to show, so I decided not to cut away the center.

FYI: If you are looking for "craft" size fabric pieces, Simon Says Stamp sells a pre-cut 6 piece bundle. The bundle contains the 6 different canvas cloth designs of Embark, each cut square measuring approx. 10 x 10" for $9.99. They also sell previous collections - just type in Tim Holtz Eclectic Elements and they will populate.

2. Stitch a diagonal line across the center. Use that stitching line to guide the presser foot, creating all the other lines.
 You can see from the back that the lines are evenly spaced apart. That is only because I use the edge of presser foot as my guide.
 Use Collage Medium to adhere the fabric piece to the Facade. Press down until secure.
 Turn over and replace the center circle.
 I am using a small Etcetera Tag as the base for the project. This paper is from Backdrops 4.


Adhere paper to the small tag with Collage Medium.
 Use a cutting knife to remove the excess paper.

Add a layer of Collage Medium over the top to seal the paper.

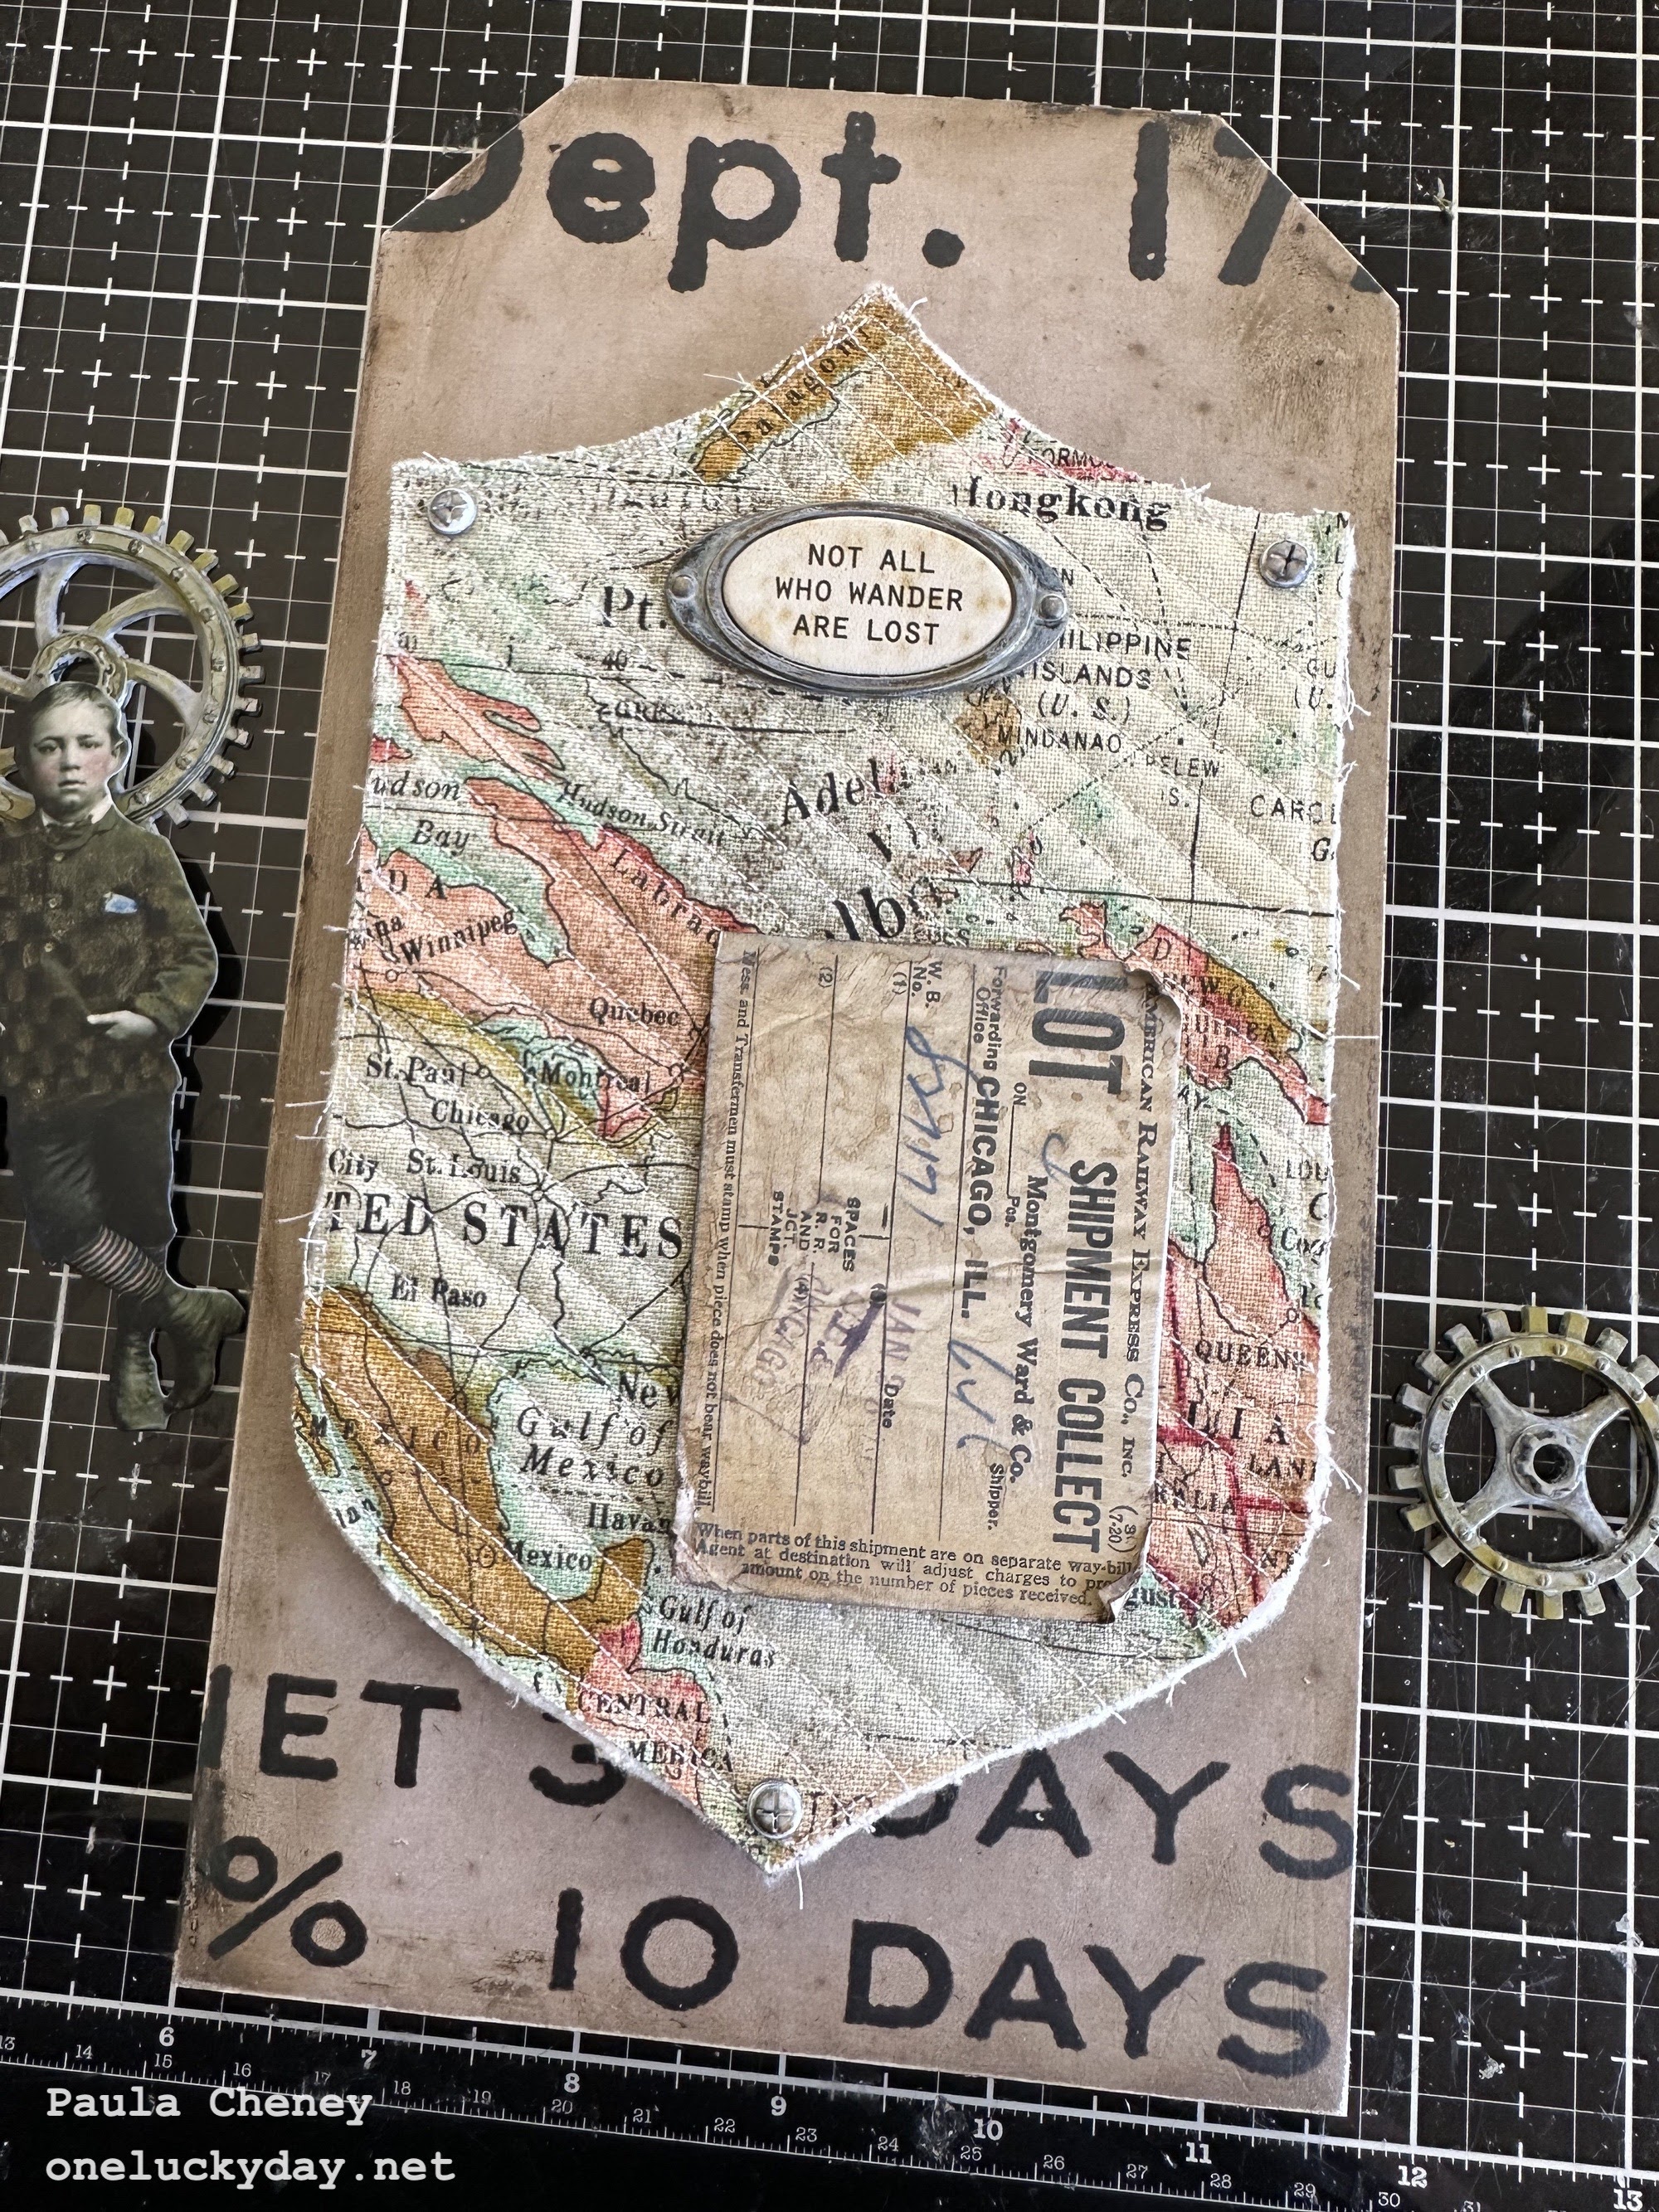
Once dry, scribble Distress Crayon over the edges and rub in with damp fingers. Use a wet wipe to mottle the crayon and get rid of any fingerprints. Use Collage Medium to add two of the "riser" sticks (they come in the Facades package) so the shield will sit up, off the tags.
 Add Collage Medium to the "risers", then add the shield Facade. I put a book on top and let it sit for a bit till I knew it was secure.
 I painted 3 Hardware Heads with Old Paper Distress Paint (one of the "from the vault" colors). Once dry, I pounced Mushroom Alcohol Ink over the top, then added them to the Facade with a dot of Collage Medium.
 So, I have a couple more things to prepare before we can put it all together.


1. Industrial Gears: each have been randomly painted with the three colors of Distress Paint shown here. Once dry, drip *Smolder Alcohol Ink over parts of the surface (*remember to shake first).


Add the Quote Chip "Labels" to a Label Frame and add to the top with Collage Medium.

Add a piece of idea-ology Layers Ephemera (I got this piece from the Layers Collector pack) to the fabric with Collage Medium.
 Next up is to add the Paper Dolls.
I doubled up on Foam Squares so the boys would sit higher than the Industrial Gears.
NOTE: the gear you see here has not been glued yet, it's just there so I know where to place the boys. Start with the small gear. Use Collage Medium to adhere any heavy metal, as it will dry like cement in a few hours.
 Then add the second gear so it fits right under the boys arm on the left.


I chose a Number Strip from the snippets pack and stitched it on one end. My sewing machine made a big knot and left a bunch of string (as it does sometimes) - which was awesome in this case, since it looks as if I did it on purpose. I wiped Collage Medium on the strings so they would stay in this crazy formation (something I do regularly with thread and string). Once dry, I added a thin Foam Square .04 to the back and placed on the boys.
 Well, thank you for stopping by! Glad you are here to see this sample, as many more Embark samples to come in the next couple weeks - some need more skill than others and one is even no sew!


now carry on,
paula
Paula, this is on of my favorite makes! I have all the products and I'm going to give it a go! Love, love this with the new Expedition Canvas Cloth on the Etcetera facade! Perfect! I think fabric is like flexible paper! Beautiful make! Thanks for sharing the technique!
ReplyDelete