
Hello Friends,
Happy to be here today sharing my Halloween Accordion Folio with you. I know many have been asking to see the photos so I'm glad I can finally share with you.
First, I thought it might help to see what the Accordion Folio looks like before I get started. The book is 6 x 4.5" when closed. The accordion in the center is removable, which is helpful when adding paper and other embellishments. The folder can be used with or without the accordion which opens the door for so much innovation.

OUTSIDE
I covered the outside of the Folio with Halloween Collage Paper. Collage Medium makes it very easy to add the paper with maximum sticking power once dry. I always add a layer over the top of the Collage Paper for added strength.
You might notice that I added faux hinges from the Halloween Sticker book to the left side. They look like metal but they are just stickers.

I used a Curio Frame for the focal point on the cover. They look like this when you buy them (that's not the look I'm going for) so I need to make a change.

I just used my finger to wipe black acrylic paint over the top. Once dry, I sanded it with a file. Done deal.
I added the spiderweb transparency to the back of the frame, as well as Bouquet paper flowers that have been sprayed with Distress Spray Stain and Decayed Mica Stain. The black dots in the top corners are new this year, from the Halloween Pearl Droplets pack.


The black seam binding ribbon was also sprayed with Decayed Mica Stain and dried with a heat tool. I love the hints of metallic over the ribbon...really makes it look like ribbon for a Halloween project!

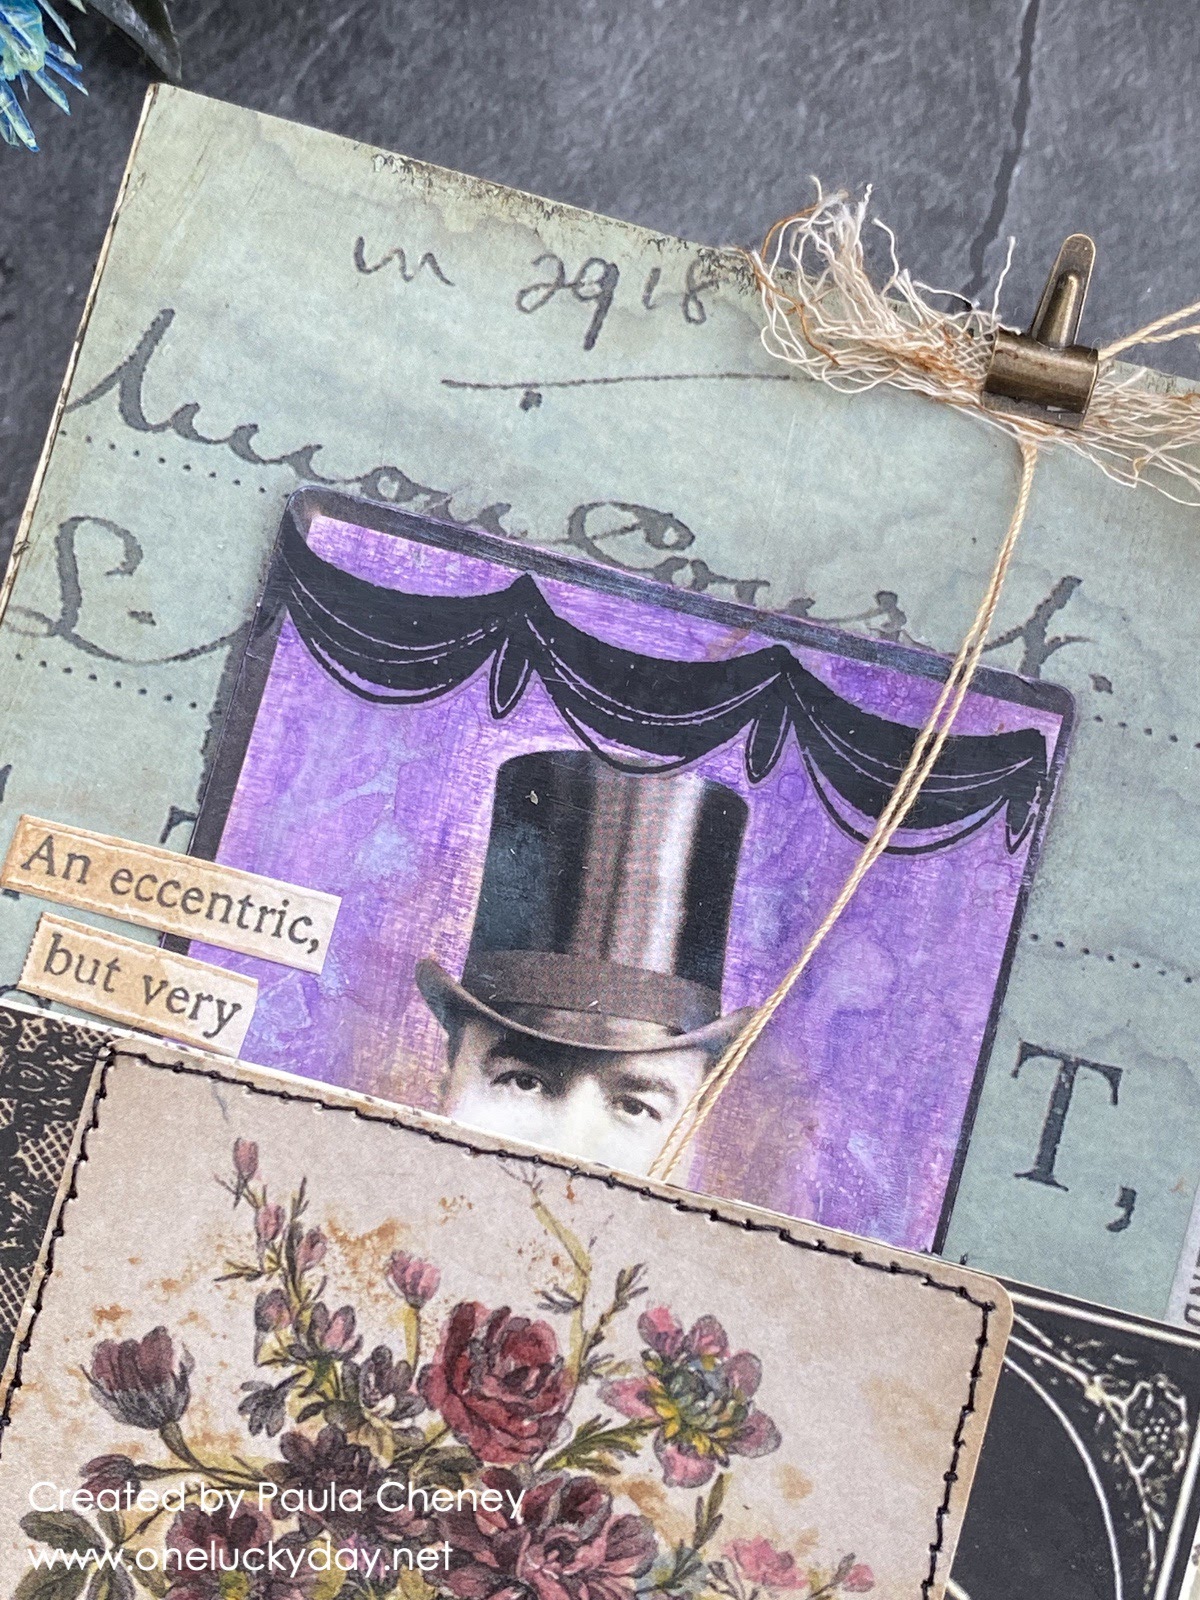
When you open the inside of the Accordion Folio, you can see (if you compare the first photo) that I have cut off the fold-over on the front left side to make it squared off. I wanted it to be the same height as the card with the vase of flowers. I also wanted to create, what I call a "peek-a-boo" with only the mans eyes showing over the top of the door.
 You can see the peek-a-boo much better here!

Loving the new Halloween Remnant Rubs too. Super easy to use along the top of the photo card, even over Distress Oxide background.


 For the right side, I kept it very simple and just used a flashcard from the ephemera pack.
 Okay, I did add the legs I cut off a paper doll. I mean they were on my desk and I thought, why not?


 On the right, I kept the pocket the same size, I just added an eyelet at the top and stitched it closed at the bottom. All the people , words, skull face, and masks are from the Sticker Book.
 The very cool moon and stars are from the Remnant Rubs. I added them to a small tag I had in my stash.
 I love making cards using the Paper Dolls and Distress Crayons. The dark colors work so well over the dark clothing and really bring her to life.

I also added a piece from the Stitched Scraps pack to the side (another small detail).
And yes, I did color that bouquet of flowers with a small brush and Distress Crayon. Worked perfectly.

Open the fold-out to reveal the man.

If you remove the butterfly from the pocket, you can see the mans face.


I like how the right side does not go all the way across so you see a little of what's coming on the inside.


I mean really, who does not need a giant bird as a pet?
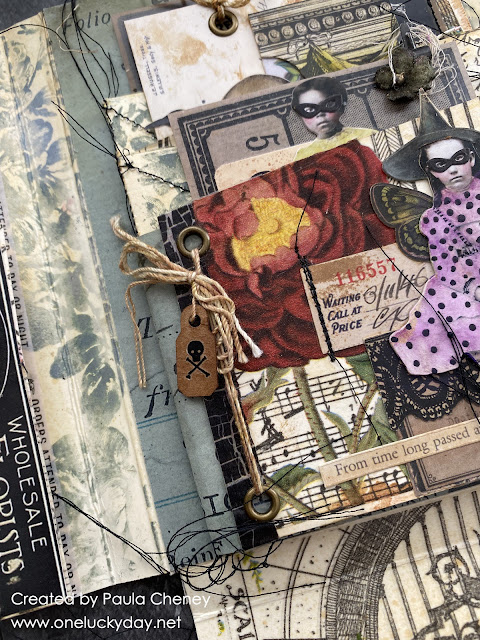
 Back to the center of the book, I just added a few things from the Ephemera and Layers pack. Super easy!
 Then when you open the folder, it reveals the accordion...well it WAS an accordion, but I changed it up and made it a book that can be removed from the folder.
 I did that by adding a small piece of blue paper to the side to make the accordion into a book with 2 pockets.


 I made 2 "cards", one for each pocket I created. Layers are heavier weight pieces of ephemera. They are an easy background for ephemera and stickers. Nice and sturdy, so the card can easily be removed from the pocket.
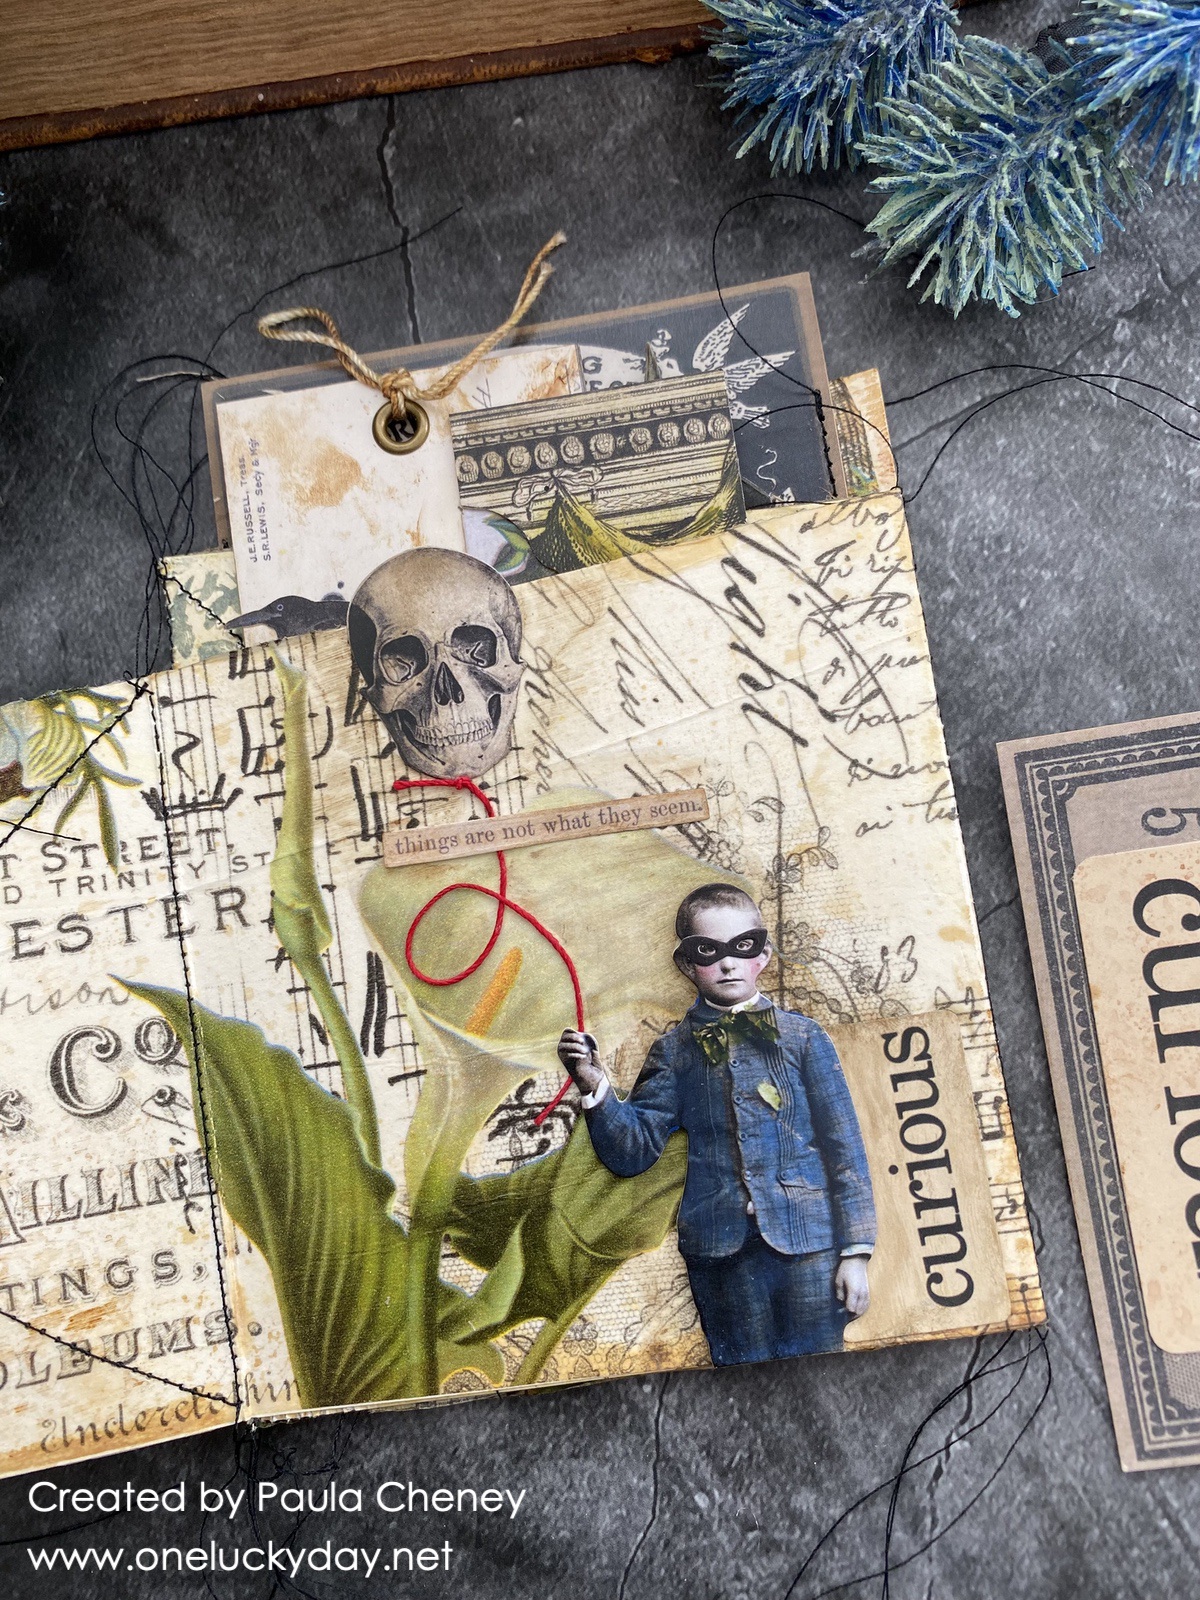
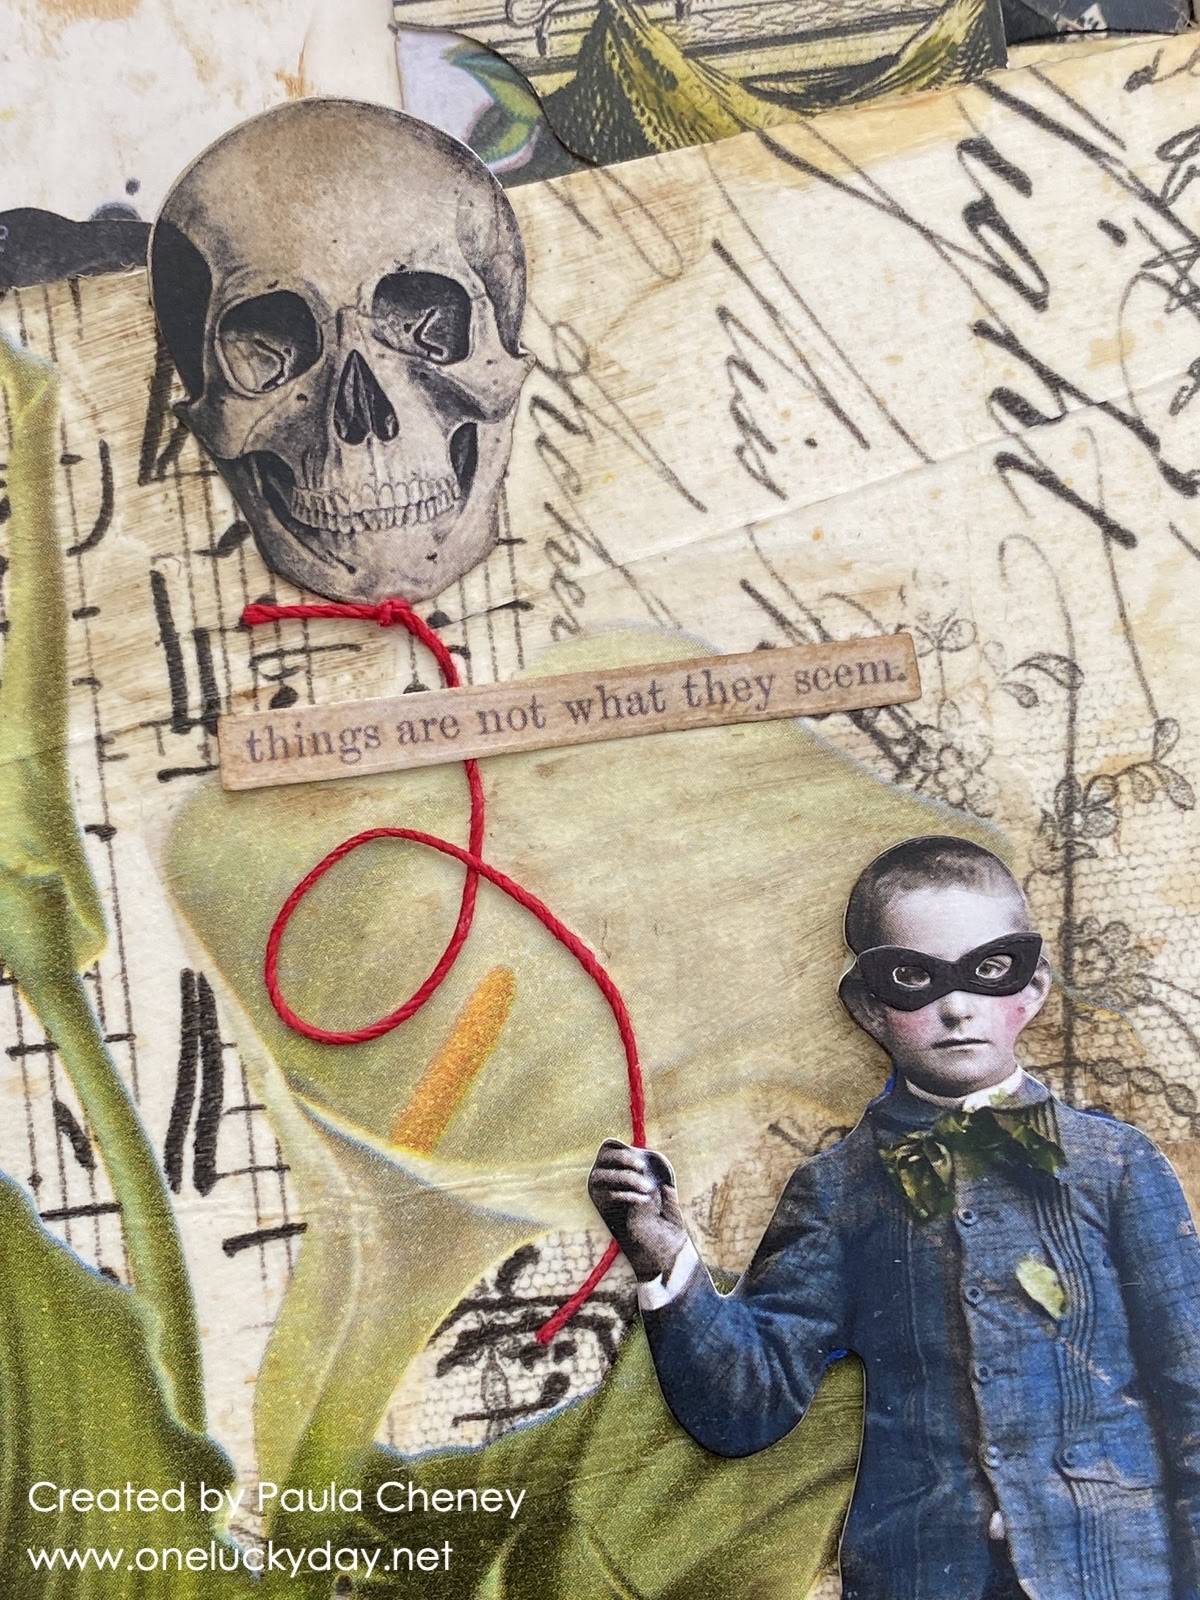
 I love this page of the book. Everyone needs a skull balloon on a string, right?


This is what the back looks like - the blue paper wraps around the edge to the back side, making it open like a book.
NOTE: The stitching seen here is from a card that I stitched to the back page, it has nothing to do with the way I closed the accordion.


All the Paper Dolls were colored with Distress Crayons. I did use a black marker to add stripes and dots. The witches hat is from the sticker book (a great addition to the masks).
Each page was layered with Ephemera and Paper Dolls. Really, anything that was on my desk at the moment.


Now you can see where the "legs"came from.

 This is the card from the second pocket behind the boy. Everything is just layered up.
 And the sewn card on the last page of the book. My homage to Wicked. Elphaba never looked better. I knew there was a sticker in the Metallic Sticker book that said, FOR GOOD, so I had to use it here. (Peeled Paint Distress Crayon worked brilliantly for her green skin!)

Now carry on,


I hope I gave you some insight into this little book today. For me the key was the Collage Paper over the folio. It was so easy and quick to add and does not buckle when the folio closes (sometimes a problem when you add thick paper). I also think the pattern of the Halloween Collage Paper is a great background for all the ephemera and people. Hope sure you will give it a go!
paula
love you book. thanks for all the details. so many things to try. thanks as always for sharing and the inspiration.
ReplyDeleteamazing. paula. love it all..
ReplyDeletePaula, you did a great work. I love it. Thank you also for all explanations, it helps me planning what to do with this accordion that I have in my stash for months. And what I really like is that though there are 2 skulls detected they are not the main object as happens so often in Halloween. For too many skulls is something I don't like at all.
ReplyDeleteThis is fabulous. I need to try collage paper and coloring paper dolls now!
ReplyDeleteOh wow it is absolutely awesome, so much goodness and details!!
ReplyDeleteI have STILL not finished mine that I started EIGHT years ago with the memorabilia we brought home from Japan when we took John's mom home for the last time. One of these days... I love what you did with this one and I am saving it so I can use it when that day finally comes.
ReplyDelete