Showing posts with label home decor project. Show all posts

Friday, June 27, 2025

Flutter Tray

Hello friends,

I'm so excited to share another project featuring the new Simon Says Stamp Flutter Wafer Dies! These dies perfectly coordinate with the Flutter Stamp set from Stampers Anonymous, a stamp set I've loved and used for years. This new die set is an absolute game-changer, with ten individual dies that make stamping and cutting a breeze!
To start, I used Collage Medium to add the Backdrop paper from the neutral pack to the tray. Then I added the dark green Design Tape to the edge.
I also covered the back of the tray with paper from the same pack. Any would do, but I liked the papers with the colored squares, so I added a piece from the blues and one from the reds (you can see the seam across the center).
I gathered three Etcetera Tiles to use in the background. I also covered these with Backdrop paper.
Next, I cut two strips of chipboard 7/8" wide.
And laid them in the tray (no glue!)
These will serve as guides to make sure the three Etcetera Tiles are straight. I added four, 3D Foam Squares to the back of each tile so they would be raised from the tray.
Once you have the tiles in the tray, you can remove the chipboard strips.
I used the Flutter stamp (CMS294) to stamp the images, then cut them out with the Flutter Wafer Die from Simon Says Stamp. I LOVE this set simply because it just makes it EASY to use any or all of the butterflies!

Here is how I did it:
  1. Use Distress Ink to color directly on a Flutter stamp.
  2. Lightly mist with water.
  3. Stamp butterfly onto Watercolor Cardstock and dry with heat tool.
  4. Use a Detail Water Brush to color in each Butterfly with Distress Ink.
  5. Add a 3D Foam Square to the back of each butterfly.
The dies even cut out the antennas!
Add Remnant Rubs to three of the smallest labels from the Classic Labels Sticker Sheet. I used black labels but there are also red, pink and blue in the package to choose from.
Do the quick dip! 
Make a puddle of Gathered Twigs and water. Pick up the sticker with your index finger and dip it into the ink. Dry with a heat tool (I do that while the label is still stuck to my finger). Such a quick and easy technique that I use also every day!
Now add the butterflies and the tiny labels to the tray.
I also added the large Word Plaque with Screw Heads to the tray with 3D Foam Squares. White acrylic paint helps the words to stand out.

I hope this post shows that you can make something really special even using a just a small butterfly!

Now carry on,
Paula

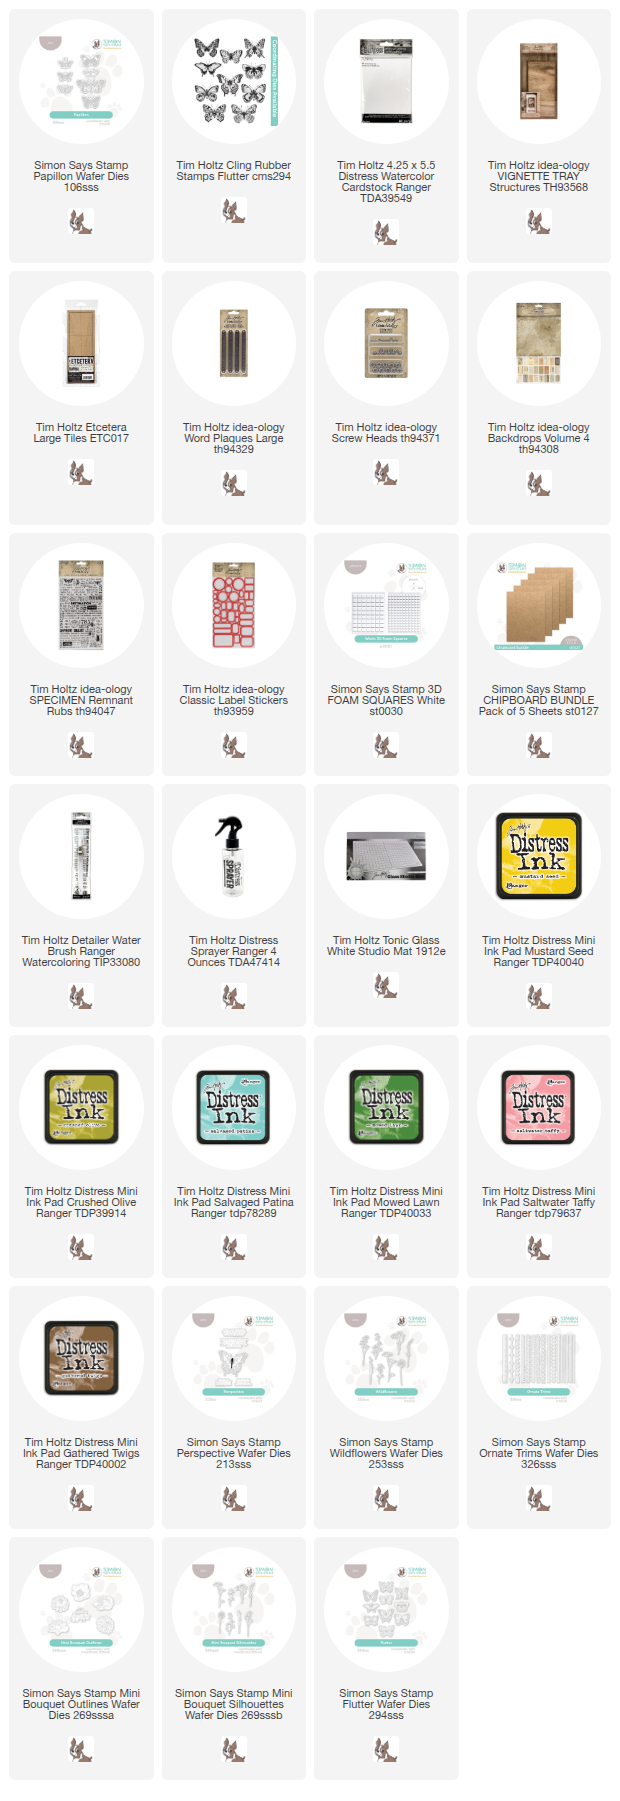
please note: the Flutter butterfly wafer die used in todays project is at the bottom of the list
Friday, February 3, 2017

A Trio of Boxes

Hi all!  I am sharing my second project using Vignette Boxes - but with a very different take than my last post.  This time I turned the boxes over and used the back side to create a Home Decor piece. Since each Vignette Box is a hard surface, it's easy to cover and (my favorite part) you can use tack nails to add things like a Hinge Clip and a Mini Pocket Watch.
This trio of boxes was enhanced using the new Vignette Finial Set (two sets are needed to complete the trio).   The largest set was used with the largest Vignette Box and the smaller finials were used with the remaining two boxes.
Each set was painted with Weathered Wood Distress paint (2 coats).  Once dry, I sanded off a bit of paint then added Crazing Medium over the top.  Once that was dry, I added Distress Ink with my Blending Tool then sprayed it with water so the ink would run into the cracks that were creating with the Crazing Medium.
When the Finial sets were to my liking, I adhered them to the finished pieces with Collage Medium and let them dry over night.
Memoranda paper was adhered to each of the Vignette Boxes with Collage Medium, then a layer of Crazing was added over the top of the paper.  Once the Crazing was dry, I added Walnut Stain Distress Ink and a bit of water to fill in the Crazing cracks. 
Design Tape Rose and Postal, Clippings, and Ephemera Snippets were added to each box.  The Snippets are super tiny pieces of Ephemera (so useful in tight spaces).
Ephemera - Snippets

Design Tape -  ROSE

 Design Tape - Postal
On the smallest one, I added a Mini Pocket Watch (without the back) and a tiny butterfly from the Snippets pack.  The number and the words come from the Clippings Sticker sheet.
Well, I hope this weeks Vignette Box posts have given you a reason to try them if you have been putting it off.  I think we have just scratched the surface of what can be done with the boxes - so here's to new ideas and definitely more creativity! 
Have a great weekend!
Now carry on,
paula


Friday, June 5, 2015

Home is Where the Heart is Frame

One of the projects in the Quilt Market booth a few weeks ago was an home decor piece using Tim's Eclectic Elements Fabric.  You can find the pattern on the Make it Coats Website.

1.  Go to the Make it Coats website.

2. Create a log in (it's very easy).

3. Click on "Discover" on the top tool bar.

4. Click Designer on the left hand tool bar, and then T (for Tim Holtz).  You will find a few projects using Tim's fabric (more to come in the near future too).

I purchased a wood frame at Michaels.  The frame came with a mat which I covered with Rose Parcel, one of the new Wallflower Fabrics.


The pattern from the Make it Coats website has the instructions, house/heart pieces, as well as the background with the sentiment (be sure to print that page on cardstock).
Follow the simple directions on the instruction sheet to create the house.  If you are not a sewer or don't have a machine, you do not have to stitch the edges of the house.
Once the house and heart are added to the cardstock, place in the frame and you are done!  Simple as that.


I'm giving away a nice fat stack of Eclectic Elements fabric so you can create this project (or another of your choosing).  It will include the new Wallflower Rose Parcel fabric!

Leave a comment and I will choose a winner on 
Sunday morning, June 7th.


now carry on,
paula