Hi everyone!
Hope you had a great weekend. Mine was super busy but full of good times!
Today I am using the Botanical Sketch stamp set. This stamp is BIG! As you can see, one main stamp makes up almost the entire set. It is also a little more expensive because it comes with a 5 x 6" acrylic Grid-Block, since most people do not have a stamping block that big!
I'm going to stamp the main botanical image onto Distress Watercolor cardstock (
this surface is very important for today's technique). There is so much detail in this stamp that you might think it would not emboss very well.
But it does.
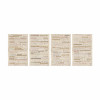
Look at the detail once the image has been stamped with embossing ink and Super Fine Detail Embossing Powder has been poured over the image.
Once the embossing powder has been melted and cooled, I cut an oval in the center of the card using the Sizzix Sized Ovals (
medium).
Now here is where the Distress Watercolor Cardstock comes into play. I'm using Distress Markers and a BROAD water brush. I always seem to pick up the Detailer size, but today I'm using the wider and longer brush. As you can imagine, it holds more water in the bristles. But because I wanted a very fluid look to my card. I had to squeeze water into the chamber a few times throughout the coloring process.
I picked 4 colors to work with - Fossilized Amber, Twisted Citron, Broken China, and Picked Raspberry.
I stared with Twisted Citron (on the right), then mixed TC and Broken China (on my craft mat) for a middle color, moving on to Broken China on the left.
As I continue to move clockwise around the card face, I added Fossilized Amber and then Picked Raspberry.
A little more Fossilized Amber above the Picked Raspberry and then the colors start over again.
Until I get all the way around the circle.
I like keeping it real here so I thought I would share my test card. It is embossed just like the real card - I just didn't take the time to cut the oval in the center. When I'm experimenting with a technique I like a test run. You can see here that I started on the top right with just green and blue then moved clockwise, trying to add in the pink at the bottom. As I come around toward the top I finally decide to add the yellow as a transition color between the pink and green. That works. So I set aside the test run and move on to the real thing.
Even though I love the way the card front looked, it need a bit more detail. I'm using an Industrial Sticker for the center. I didn't want silver so I colored it with Snow Cap Alcohol ink. The Mixatives take a little longer to dry that regular Alcohol Ink so just be patient and wait for drying between the layers. It took about three layers to really make the silver disappear.
Once completely dry I sanded it
very lightly, highlighting the raised dots and bringing back some of the detail I covered up.
Now for a center.
I am using Distress Watercolor cardstock again. This time a mix of Fossilized Amber
, Picked Raspberry and water to create small uneven stripes.
Then go back and pick up left over ink.
So either way...plain stripes or distressed stripes...you choose what works for you.
Now a sentiment - I decided to stamp with Staz-on onto thin plastic. The word FRIEND is from the same stamp set.
I added the "hello" cut from a Remnant Rub sheet.
I gathered all the pieces and layered them onto Core'dination Kraft Core cardstock and a silver Deco Sheet. I added foam tape to the back of the watercolor front so it
hovers over the Deco Sheet.
I also punched a couple flowers (Mixed Media Cardstock) using one of the punches (Daisy) and colored them with Distress Markers.
As you can see, I added a Gumdrop to the center of the flower and a few punched Laurel leaves.
One of my favorite things is the stamped plastic that hovers over the
striped card below. It gives a a lot of
dimension to the card front.
Super happy with the final result.
(please click on photo to enlarge)
I'm off to Burbank, CA tomorrow, where I am teaching at the "Ready, Set, Create" event that is going on Friday and Saturday. Looking for to seeing the students and other teachers. I have a couple of friends traveling with me to work as class helpers. So I'm looking forward to a great girls weekend full of laughs and a little mischief (probably a little Target shopping too).
Hope your weekend is great too!
now carry on,
paula