Hello friends,
Happy to be here today sharing a Vignette Shrine project. I absolute love this new substrate because it can fit so many themes. I also love that it comes with the two base pieces to give it more visual weight to the completed shrine.
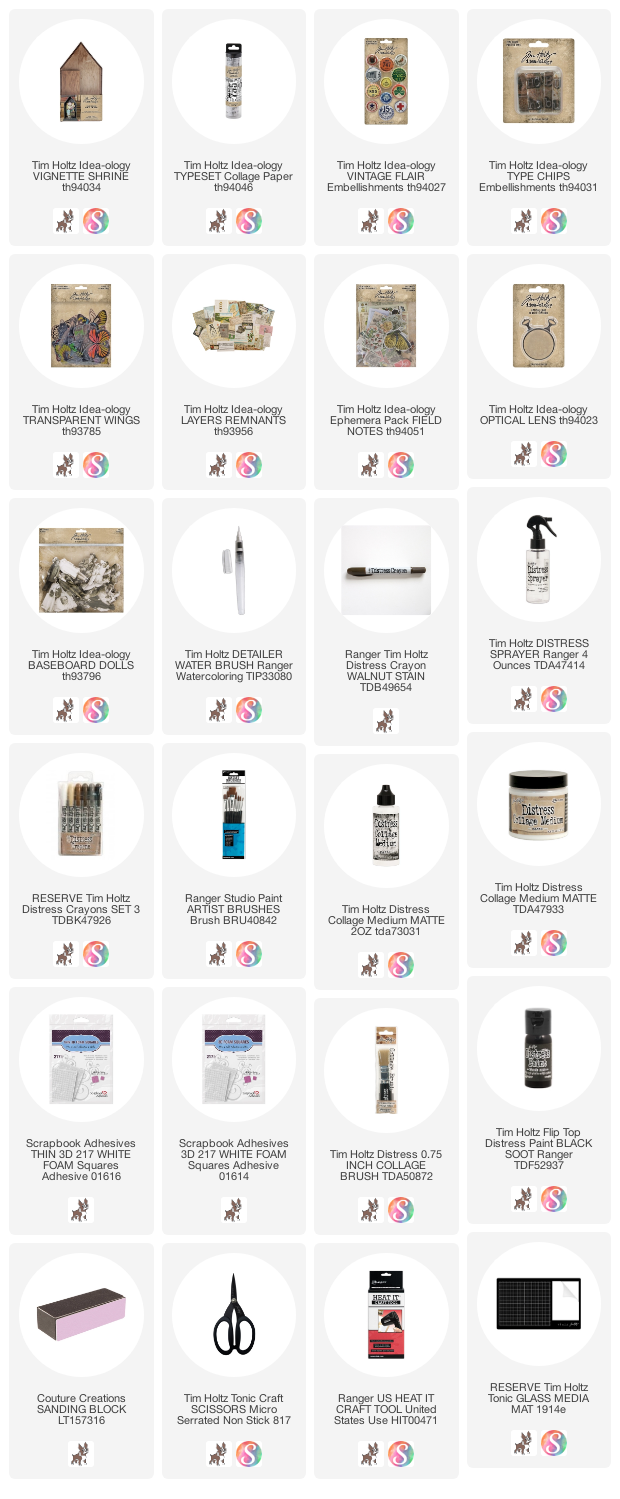
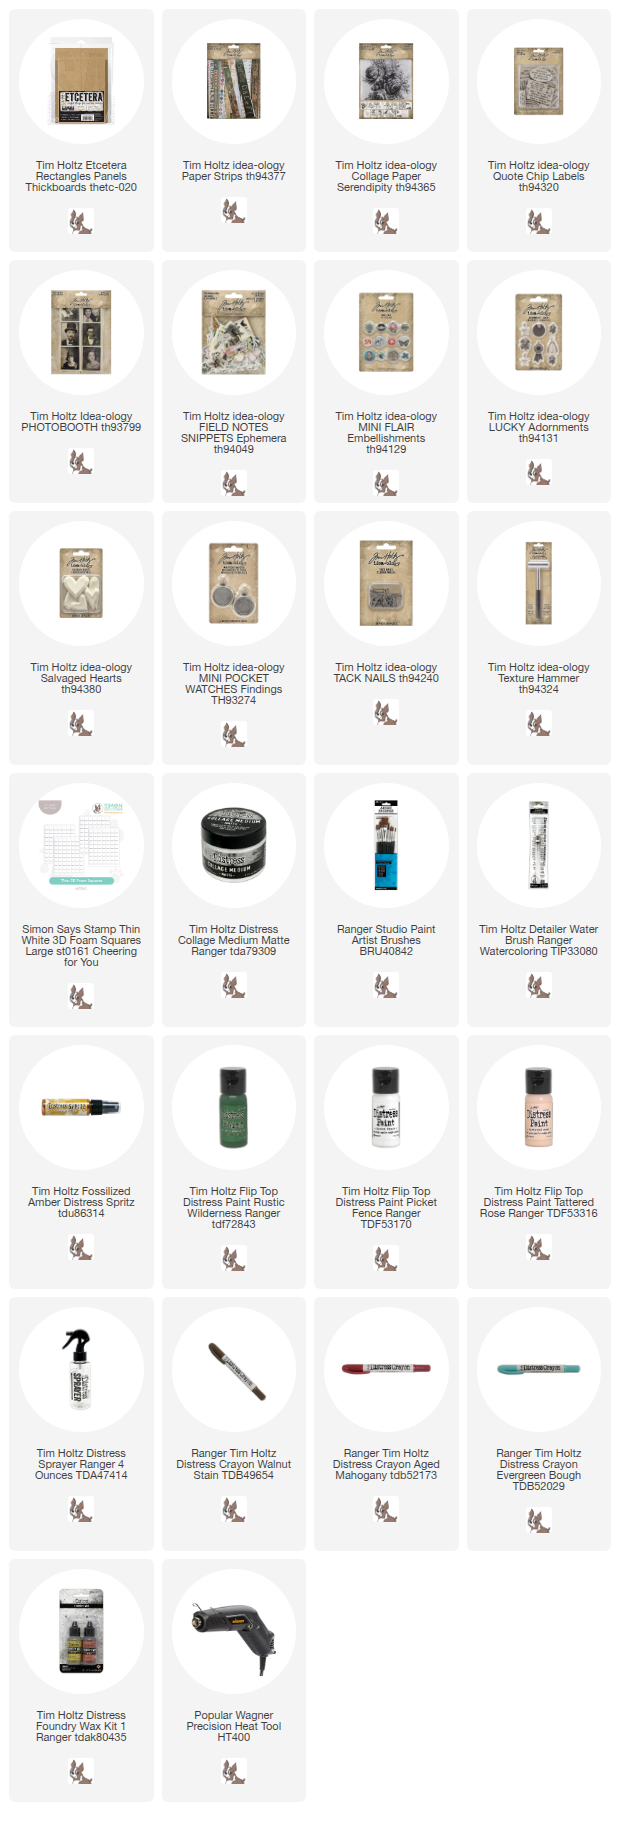
Gather the pieces that you will need for the project. From Collage Paper to a Baseboard Doll to Vintage Flair. This picture shows all the pieces (plus a few other design choices) and includes 4 bingo chips for risers, and foam squares in both thin and standard thickness.
(click to enlarge photo)
1. Paint the two base pieces and the INSIDE of the Vignette Shrine with black paint. Set aside to dry completely (not shown).
2. Once the paint is dry, use Collage Medium to cover the back and sides of the house with Collage Paper Typeset. Remember the key to Collage Paper is having glue both underneath and on top of the paper.
3. Once the Collage Pager is dry (
I use a heat tool to dry the Collage Medium because I'm impatient), use a Walnut Stain Crayon to age the edges. I just scribble it on and use a damp paint brush to move it around. Set aside.
4. Adhere 4 bingo chips to the back of the Report Card. Cut off the right end of the green flower card. Add 4 foam squares to the back. Add both pieces to the Shrine (see main photo).
5. Use small scissors to fussy cut the flowers. Add a few foam squares to the back and adhere to the Report Card.
Just like this!
6. Spell the word LOST, then flip over to adhere together. I adhered a small piece of chipboard to the Type Chips to stabilize them, then added two thin foam squares to add to the shrine.
The word is adhered directly onto the Report Card.
7. Add the Transparent Butterfly wings to the back of the Baseboard Doll, then add a riser. I used some small wood blocks (3/8") but you can use what you have on hand, like a double stack of foam squares.
The Baseboard Doll was, of course, colored with Distress Crayons.
8. Two last things...first the Optical Lens. The round label from the Field Notes Ephemera fits right into the lens, no trimming needed. I did add a small bit of glue on the back around the metal edge to secure in place. Then I added it to the Report Card with a thin foam square. The bingo chips on the back of the Report Card takes the weight of the Optical Lens...without them to stabilize the card, it might fall forward.
9. And the last little detail. Cotton strings (kinda like a nest) surround her feet and ground her to the Shrine. Vintage Flair button added with Collage Medium.
I told you it was easy...it's all about the layers.
now carry on,
paula