Showing posts with label wood panel. Show all posts

Friday, December 17, 2021

Holiday Greetings

 Hello Friends,

Hope your week is going great. We are normally in the thick of Christmas baking for family and friends but this year our oven decided it was done for the season...so there is no baking till the parts arrive from Viking and the heating elements are replaced!  It's already been 10 days of toaster oven cooking at this house!  Let's hope we are not still cooking this way on Christmas or I am going to be cooking one Cornish game hen instead of a turkey! 

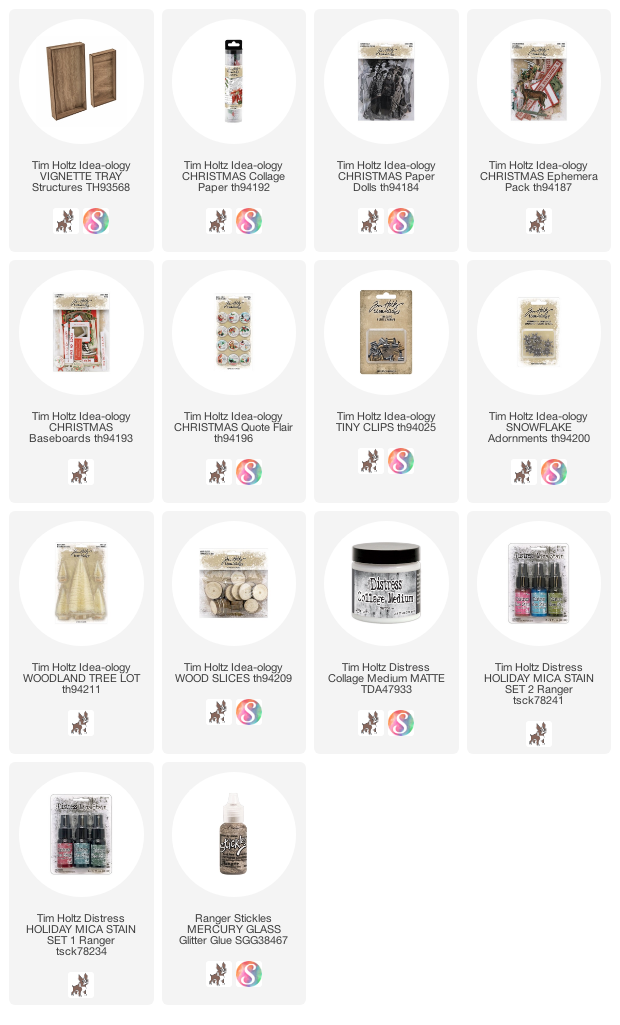
Today I'm sharing another of the makes using idea-ology Christmas.  This time it is my large Vignette Tray! Follow along and I'll walk you through it!

The tray was covered with our beautiful Christmas Collage Paper.  I added the Collage Paper with Collage Medium to the front of the tray.  The Collage Paper is 6" wide and so is the tray. That made it easy to roll out a 12" strip and cut it, to prepare to lay it into the glue.  We all know Collage Medium dries very fast so you must work fast, adding the Collage Medium across the tray surface.  
Once the Collage Paper has been pressed into the Medium, add a coat over the top.  Again, working quickly so the glue does not dry on you.  I had my Mica Stains, Tree Lott and Crooked Broomstick, at the ready so they could be sprayed or dribbled over the surface before the glue was dry.  If you spray after the glue is dry they will sit on the surface (since glue is a sealer) and never dry.
Let talk about the frame in the background.  The frame is part of the Baseboard Christmas pack that has multiple frames and other pieces to choose from.  
I wanted a little sparkle, so I quickly painted the surface with Collage Medium then added Clear Rock Candy glitter over the surface. Once dry to the touch, the frame was added to the the Tray with 3D foam squares. I could have filled in the window but I loved the look of the pine spray and did not want to cover that up.
The Paper Dolls are again, from a Christmas pack.  I used Distress Crayon to color their clothes.  Aged Mahogany was used for her coat and Chipped Sapphire was used for his.  I used the crayons directly over both coats, then wiped away the excess crayon with my fingertip.  For the collar of her coat, I used a Detailer water brush to get the sheer color over the fur.  I also used a detailer water brush to pick up some Fossilized Amber crayon to paint the blades on the skates, buttons on the coats and hats as well as the plaid on his coat. There are no lines on his coat, I just made up the subtle pattern.  Once the Paper Dolls are complete, add them to the surface with bingo chips so they sit a bit above the glittery frame.
I decide to use some of the Christmas idea-ology to create a small collage to the left of the frame. I used the plaid slide frame (also from the Baseboard pack). The rest is from the Christmas Ephemera with the addition of the flair button.
I added glitter to a red star from Baseboard pack.  I could of covered the red with the glitter but I decided to leave it showing like old ornament glitter that has been worn away.
You can see here how many levels there are.  All done using foam squares or bingo chips.  It takes a bit of trial and error before getting the right configuration but I love how it turned out.  
I added glitter to the 25 (Glossy Accents) and tucked a bit of shredded cheesecloth under the Tiny Clip for added texture.
And the little Woodland Tree...
I twisted off the base that is on the tree then sprayed the tree with Bundled Sage Distress Spray Stain and dried with a heat tool.  You only need half the tree, so use scissors to cut off the back of the tree so it can sit flat against the tray.  
I decided to use a Wood Slice for the base because it was thicker.  I used a flat head screwdriver and small hammer to split the wood circle in half.  Then used Collage Medium to glue the small paper measuring tape to the edge.  Once that was dry, I added the tree and base to the tray with hot glue.  The shredded cheesecloth and the metal snowflake were added with a little Collage Medium.
You could add any kind of embellishment to the tree that you wish.  I decided to keep it simple and just add some Mercury Glass Stickles to the tips of the tree.

So happy to share this collage tray with you today. I love Christmas projects and this is no exception.  The Baseboards and ephemera make it easy to find just the right piece to make everything merry!
now carry on,
paula


Saturday, November 27, 2021

Collage Tiles Panel

Hello Friends,

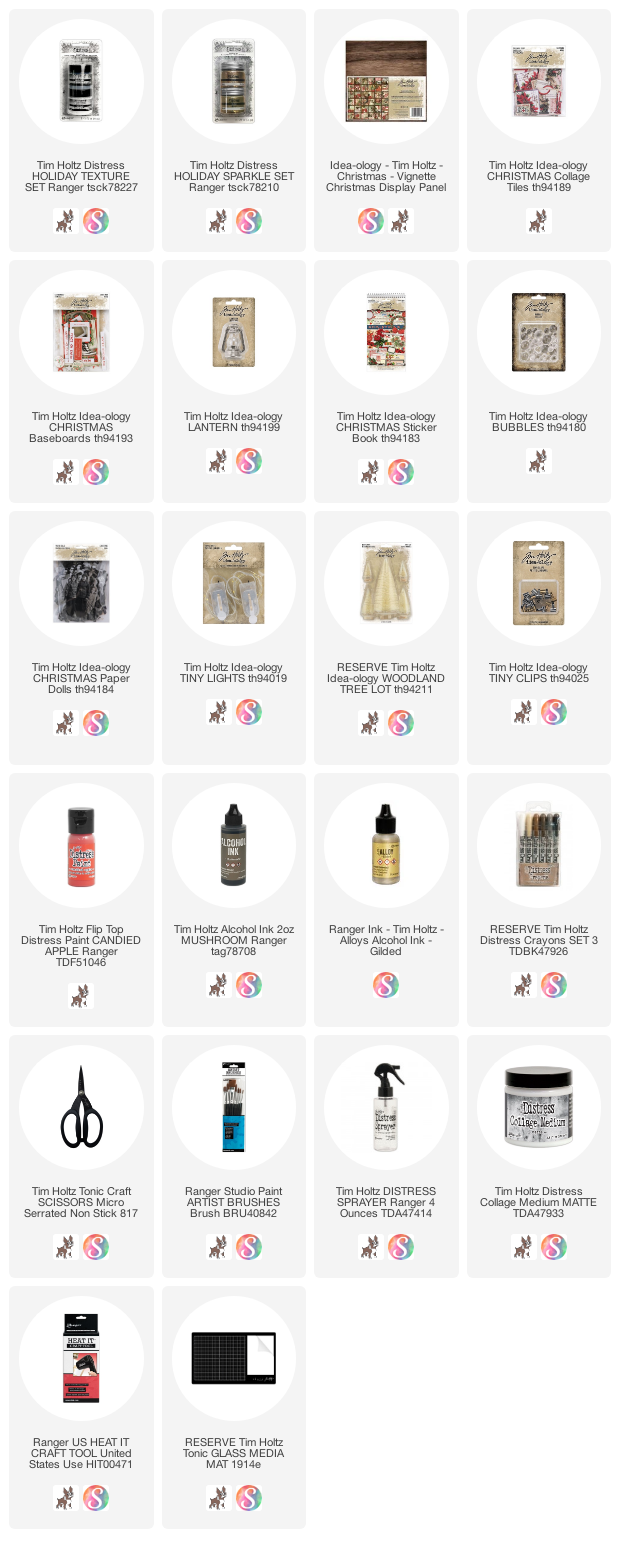
I'm happy to be here to share a tutorial for the 9 x 9" Vignette Display Panel I created using Christmas idea-ology. My favorite thing to do is to mix vintage and new...and this project does just that, because the folding ruler is vintage, mixed with new 2021 idea-ology Christmas.  Much of the detail work is done for you by using the Collage Tiles, which are preprinted collaged squares.  You get 72 Collage Tiles in a pack, so there are plenty to cover the Vignette Display Panel.

Use Collage Medium to adhere Collage Tiles to the panel. As I said, there are plenty of Collage Tiles in the package to cover the panel, but I decided to mix in squares of Backdrops Christmas paper, like ticking, peppermint stripe, and plaid to break up the collage.
Once you have the Collage Tiles adhered the wood panel, add a layer of Collage Medium over the top and dry with a heat tool.
Use Collage Medium to add a strip of Backdrops Christmas paper to the edges of the wood panel.  
Once the Collage Medium is dry, use a Distress Crayon and scribble along the seams.  Rub the crayon into the seams to cover any gaps.  Add more where you need it and use a wet wipe to remove if you get too much.
OPTIONAL: I wanted to add some Distress Mica Spray to the collage but that is challenging to do once Collage Medium has been added, since it is a sealer.  So even though I had added the crayon, I lightly added another layer of Collage Medium then splattered the Mica directly into the glue before it dried.   
*always remember to shake up the Mica Stain before spraying.  Testing the spray on a paper towel before hand is a good idea.  I like to push the nozzle down very slowly to create the splatter.  If that method does not work for you, unscrew the cap and use the plastic tube to shake the Mica Stain over the WET glue.  Dry with a heat tool.  You can always add more Crayon, if needed, once it is dry.
I decided to add some Crackle Texture Paste too! I just smeared it on the corner areas with a Palette Knife and let it dry completely (about 30-40 minutes, depending on where you live) before scribbling Distress Crayon over the top and rubbing it in. While that is drying you can work on the Baseboard Frame.
The Christmas Baseboard pack is tremendous this year!  The large frame, the slide frame, the word strip and the stars all come from the Baseboard pack.
You can use the large frame as is, but I decided to add a bit of glitter using the seasonal Grit Paste Snowfall that has a bit of sparkle.  I cannot get enough of this product!  I added it to the frame around the inner edge where it looked icy, then let it dry.
Add a piece from the Christmas Backdrops pack (I chose music) to fill in the background.
I also cut a long piece of red/white string, folded it in half, then wrapped it around the frame and tied a bow.
The last thing was to add 2 bingo chips to the backside to raise it up off the wood panel (this will help when the lights are added later).  You could also use stacked foam tape or squares.
You can add any embellishment to the center of the frame.  I chose this darling Photobooth photo that comes in the Paper Doll Christmas pack.  I did use some Distress Crayons to tint the photo just a bit.  Faded Jeans for the background and Aged Mahogany for her cheeks and coat.  I just scribbled the color on, then rubbed it away with my fingertip.  
The two very tiny stars I added to her coat are quite frankly the smallest stars I have ever seen! When we first saw them, Tim and I both thought, oh boy! we didn't know they would be that small! But I am now glad we left them in the pack because they are perfect here!
Once she was done, I added a couple foam squares of the back and placed her in the frame.
The next step is to add the folding ruler to the wood panel.  This photo is of the basic things added.  You can see I am still trying to decide where the word strip will go!
Using the frame and ruler together helped me decide where the ruler "shelf" needed to be,  I smeared a good amount to Collage Medium between each layer of the ruler (since it unfolds) to keep it stable, then more to the backside.  Place the ruler on the panel and do not move until secure.  I recommend leaving it overnight to cure.  You can finish the other pieces and be ready to assemble the next day.

LANTERN: Painted with Candied Apple Distress Paint (more information on that in just a bit)

TREE: I sprayed it with Frosted Juniper Mica Spray, then dipped the top half in water and let the ink run out to create an ombre effect.  Rub the tree with a paper towel then dry with your heat tool.  The tree has to sit flat against the panel so I also gave it a hair cut so it is flat on the backside.  If you would like a "greener" tree I recommend using Bundled Sage or a replacement for Frosted Juniper might be Weathered Wood.

TINY LIGHTS: There is more information about the tree and lantern below but I want to address the Tiny Lights while you are looking at this photo. I drilled a hole in the panel behind the lantern to add the Tiny Lights.  I wound 2 lights together and pushed them up into the lantern.  From there, the lights run behind the frame then wrap around the tree until you run out.  Once the lights are in place, you can glue the tree down (hot glue) and secure the lantern (Collage Medium or E6000 because metal and hot glue are not a good combination).
Remember, how I used bingo chips on the back of the frame to raise it up?  Well my tree needed a little stability so I used another bingo chip (slipped half behind the frame) as a riser for the tree.  Use hot glue to secure the tree at both the base and the bingo chip and no one will be the wiser since the bingo chip is covered by the tree.
The small slide frame was added next to the tree.  I used Clippings stickers found in the Christmas sticker book.  It says, "like bright stars may we all gleam".  You can see I also added more of the Grit-Paste to the slide frame and the top of the large frame.  The white under the tree is white Warm and Natural batting that has been pulled and stretched thin,  Using a paint brush with Collage Medium, lightly pounce over the top of the batting, then sprinkle Mica Flakes over the top for a snowy look.
Again, the lantern was painted with Candied Apple Distress Paint.  Once dry, I rubbed Distress Crayon over the top.  You could also pounce Mushroom Alcohol Ink over the top instead of crayon.  Both would work beautifully.

Lets talk about that bow again.  I am a little controlling when it comes to bows.  Probably because what I make goes to Tim for the Lives and I want it to look the same after traveling in a box for a couple days.  So if I use crinkle ribbon or seam binding, I spray it with hairspray to keep its shape.  And if it is string, I put Collage Medium on my fingers (after the bow has been tied) and run the strings in the glue.  It takes a little finesse but it's worth it.  Plus you can sprinkle a little Mica in the bow and it will stay!  That is how a bow done at my work table, looks the same when Tim is handling it on camera a week later.
The tree ornaments were created using Bubbles and Alloy Alcohol Ink.  Super easy to do...just drop the Bubbles you want to color into a disposable plastic cup.  Sprinkle Alloy Ink over the top and roll them around. To break up the Alloy, I squirted a tiny bit of 91% Isopropyl Alcohol over the top and rolled them around again.  Dump out on a paper plate to finish the drying process.
The key is to use the Isopropyl so that the Alloy does not cover the entire Bubble.  The Bubbles were added to the tree with hot glue.  I like to put the hot glue in the tree then push the Bubble into it.
For the snowballs, I scooped up some Grit-Paste Snowfall between two fingers and rolled the Bubble between my fingers till coated, then set them aside to dry. I love how icy it appears!!
A little white paint on two Tiny Clips makes them fit right in with this snowy scene. Just let them dry before adding them to the word strip.  Foam squares cut in half were added to the back to adhere it to the large frame.
The stars from the baseboard pack come in white and red.  I painted 3 of them silver, then added glitter from the Seasonal Sparkle Set.  Just perfect for the background!!


I hope you like this project as much as I do!  Collage Tiles make is look so much harder to create than it was!  I hope you will try them!
Now carry on,
paula

Tuesday, July 3, 2012

The big clean out

The inspiration for today's project started last Wednesday night when I decided it was time to clean out the old to make way for the new...too much STUFF makes my mind cluttered.  Maybe that doesn't make sense to some, but I does to me.  If things are organized around me it gives me the freedom to think creatively instead of worrying about chores.  The next day I got the automatic feed from Story People that I have been getting for years with this Brian Andres quote, "just went ahead and made room for a lot of new experiences".   With all that has been going around here, I figure that is the perfect inspiration for this weeks project.

I started with an old wood board (about 7 x 12") I found in the garage and painted it with Gesso.
Once it was dry I painted about 1/2 of the board with Adirondack Dabber Paint - Juniper.
 Like this.
I found some other things to add as well.
Eco-Friendly acrylic Paint in Sunflower and Coral
Paper - idea-ology Paper Stash - Lost and Found
and maybe some text paper...we'll see as we go along, not sure yet, just know I like the color combination.
I painted the other 1/2 of the board in the sunflower color. 
Like the paint but I found it was VERY easy to squeeze too much out of the tube.  The nozzle is small so there is no putting it back in!
Okay, keep painting until it looks something like this -  no worries if some of the white is showing...I like it that way.
I let it dry just a bit then used the Juniper color again.
This time I opened the bottle and used my finger to mask some of the Sunflower color.  Just a different effect than the brush.
 Here is the result.
 
I used this stamp set from American Crafts to stamp out the quote.

No lines, I just eyeballed it.
Done.
I decided I want to use some chipboard stars (these are from Collections Elements).  I painted them silver with Adirondack paint dabber - silver.
 
I stamped them each with a number series stamp from the Stampers Anonymous set - School Desk
 
Added some texture with modeling paste and a stencil.


For more information about modeling paste, look back at this post.
 
the reveal.
Still need to add in some of that pink paint.  I used a baby wipe to just "wipe" some over the DRY modeling paste like this.


I tore off bits of the paper and use Multi-Medium to adhere to the wood panel in random places.
 
I used another of the stamps from School Desk and Archival Ink in Coffee to add random letters (this one is one of my favorites). 
Ink the stamp.
Then using NO acrylic block, press down in random places.  You might also stamp on a paper towel first, to get variation in the ink color.


It should look something like this.
 Now add the stars.  I just used Scotch Quick Dry Glue (my favorite quick dry glue!)


 Add a few words cut from an old book.
 And we're done. 
(click on image to enlarge)

Cheers for a great week (and a happy 4th of July if you're in the US!)
paula