Showing posts with label CHA. Show all posts

Friday, January 27, 2017

idea-ology Magic

Hi everyone!
It has been TOO long since I have posted anything here on One Lucky Day!  Preparations for Creativation (the new name for CHA) took front seat in November, December and most of January but I hope to get back on track with regular posts now that I have returned home from Arizona.  

I thought it might be fun to see how we gather and use props for the show (a little behind the scenes magic).  Back in December, Mario, Tim and I took a little junkin trip down to Phoenix to shop at a few antique stores including the wonderful Sweet Salvage.  Our goal was to find props that would fit with our idea-ology show booth - did we find them?  We sure did!
Tim spotted this dresser with absolutely stunning crackled paint for the "masculine" side of the booth.  It was missing handles on the top drawers but that was an easy fix.
 Perfect right?
We also spotted a couple of old trunk liner boxes, large wood crates and the frame from an old mirror (can you spot it in the display above?).
 It worked to frame out two samples made by Tim and Kaz Hall.
We had Art (Tim's handy neighbor) add a barn wood shelf inside each box for display. You'll notice that the striped twill handles and ties were left in tack (that was my favorite part).
We needed some gold to add to the "feminine" side of the booth so I gathered old frames from my collection to add to the wall.  A huge shout out to my favorite TX antique dealer Pocket Full of Heirlooms for the fabulous gold frame with the tin center (as well as a few other pieces like the pink prize ribbon).  I bought it a few months back and knew I wanted to use it for the show.  So glad it worked out!
You might notice the smaller frames in the tray liners had to be moved to accommodate the samples, but no matter, they were used in other places in the booth.
The shelves worked perfectly for the samples and the gold frames worked to showcase a couple pieces that I will share another day.
We also ran across this farm table that was shoved off into a corner...we needed something big for the back wall but would this do?  Much too wide for what we needed but it had the right patina.  We searched for other pieces and then came back to it...the blue legs sold us.
You can see just a bit peeking out along the back wall...
This is how we made it happen.  Art split the table in two and braced the two pieces together.  It could not have fit better!
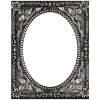
I have just one more transformation to share...do you recognize it?  Well, this is how the large frame looked before my husband cut a new wood center and painted it with chalkboard paint.  He spray painted the frame gold, then I gave it a faux antique finish with some black paint.
Quite the transformation!  But so PERFECT for the booth!  Seriously why has it been sitting in my attic for 3 years?
Well, I sure hope you have enjoyed this little behind the scenes tour of the idea-ology booth.  Hopefully there are some ideas here that might spur your own vintage look at your home.  Don't be afraid to adapt the piece to what you need or even cut it in half to make it work!  Just go for it!

If you are interested in seeing more of the booth, Tim's recap can be found on his blog - the post has more pictures of the booth and many of the projects.  
now carry on,
paula

Wednesday, February 4, 2015

Do Your Best

Many things going on in the house today.  I say "house" because I pretty much have a project going on in every room!
Currently, the kitchen table is set up for photography...and photography means pulling out props for "lifestyle" shots.  When you are photographing 20 + samples, that's a lot of different vintage pieces, backgrounds, and linens.  Just waiting for some afternoon natural light today and I will be done!
The CHA aftermath continues in the living room.  All samples have been organized into their respective boxes for shipment back to the designers on Friday.
And back in the craft room, my work desk is a mess - still working out some class ideas for my spring classes.  Gotta use a little Cracked Pistachio! 
Anyway, as you can see there is always a lot going on and that is GOOD.  Keeps me busy and lucky for me, I'm married to someone who does not give a care if there is a photography studio set up on the kitchen table or a pile of boxes in the middle of the living room.  If fact it probably bothers me more than it bothers him.  No worry though, it's all in a days work!

So on to the project for today...
I'm sharing one of my CHA projects - "Do your Best" cigar box.
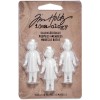
I use a vintage cigar box I picked up in TX last fall to house a assemblage of letterpress, thread, a thimble, a new trophy cup and a Salvaged Doll. 
 
please click on photo to enlarge

I did not change the front of the box because the graphic was just too good to cover up.
On the inside, I used burlap from the new Textured Surfaces and Emporium Ephemera for the background.  And yes, you are seeing that right...I used tack nails to secure the burlap to the wood box.  The Foundry Frame has been painted with Weathered Wood and Brushed Corduroy Distress Paint and Alcohol Inked.  A small Adornments Arrow added (gold alcohol ink).  The photo is from the new Photobooth set.  I also used a Screw Eye and some chain to hang the Shield Charm from the top of the box.
You might notice there is a Mirrored Star on the Letterpress.  I used the star to cover up the "leg" on the Q, as I really needed two O's to spell out the phrase, with one set of Letterpress.  I'd like to buy a vowel please...
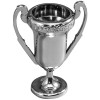
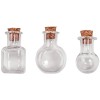
I used the new Trimmings- Lace to add a skirt to the Salvaged Doll.  The metal flower came from a vintage earring that I clipped off.  The little bottle is one of the new Tiny Vials that has been filled with glitter.  In the background you can see the trophy cup that I alcohol inked with silver (to cut back on the shine) and then burnished with very fine steel wool.
Hope you enjoyed today's project.  I sure had a great time making it.  Now it's back to doing the things that need to get done today so I can at least get the kitchen table cleaned off for dinner tonight!

I am teaching in Iowa and CA in March!
Hope you can join me!

Ankeny, Iowa
 March 6 and 7th

Down to Details
Stevenson Ranch, CA
(Valencia area)
Saturday, March 28th
Please contact ginger for more information
gingbugg@cs.com

now carry on,
paula


Saturday, February 5, 2011

Back From CHA

We're home from a very full week at CHA.  It is a wonder to me the amount of work it takes to get everything ready to set up the booth and then two days of set up only to have it come down in a few hours.  We thought you might like to see a few "before" shots of setting up the booth along with the after shots.

BEFORE:
Our good friends Jorge and Hector from the factory bring 4 very large crates that contain all the basic items to make the booth.  You can see the first couple of walls going up.  


 Jorge has the walls and pillars all organized so he knows exactly which parts go together.  Notice some walls have product that has been wrapped in plastic that we put up when we did the pre-set at the factory a couple of weeks ago. 


A lot of thought and care has been taken to build this booth.  The different wall papers, columns, ledges lighting and many other details.  With that said, you would think that someone could have come up with something better than this to label the crates.


 Walls are up, lights on, umbrella/sign in place....but check out the mess!
Notice the large black suitcases, that is what Paula and I fill and lug to the shows.  They carry all the items for the ledges, signage and a hundred other details.  We are VERY good at packing them to the limit of 50lbs.
 More mess....we can make a mess faster than most!


AFTER:
Just a few highlights of the booth. 
Disclaimer - The lighting at the show is horrible to take pictures.  
The overhead lighting or lack of it along with the booth lights make is tough.  
It is so much better in real life.....really!!

Ticket holder display
We sewed multiple strands of the new tickets together (along with some generic tickets for filler) to make this display.  Everyone thought that the sewing would have been the hard part.  Actually the hard part was that the tickets were prototype which meant I had to cut them all apart and punch the little half circle on both ends of each ticket before I could sew them together.
ticket holder - by Paula


Petit Carnet and Stationery Section
If you aren't familiar with 7gypsies Petit Carnet (little books) and Stationery, you are missing out.  They are fabulous and I think sometimes overlooked.  Check them out here.
Notice the cute awning.  When we first made the booth, we asked Jorge if he could make the frame work that attaches to the top of the wall.  Paula made the cute fabric ticking awning that we tie to the frame.


Collage tissue
The first time we were able to get our hands on the new tissue was Friday night before the show.  Paula and I stayed up late in our hotel room making these flowers to put on the wall and additional smaller flower for all the girls in the booth to wear.  We also decoupaged book board with the tissue....it is fabulous, goes on like a dream and looks like the images were printed directly to the board...you're gonna love it!


Camden Collection Wall
Most of this display came from Paula's house.  The vintage sewing cabinet she got for Christmas from Mr. Jay (our infamous guest blogger) who knows how to pick up on a good hint (I think the hint went like this....Paula, "Hey Jay, someone you know might like that for Christmas").  Bonus for us, cause then we can use it in the booth!  The laundry bench is her coffee table, luggage from luggage stack.  Also note the wire cage lights, we each had one and thought they would look cute hanging together.
Notice Paula in photo below....I think she is singing!...or most likely just doing a lot of talking...you do a lot of that at the shows!

Lille Collection Wall
This is my favorite of the two new collections....so much detail.  It is really hard to see what we have done here, but we attached 2 Library Drawers, an Artist Printers Tray, a Letterblock Tray, a 4x6 Photo Tray and a Letterpress tray together for this display.  This photo does not do it justice.  The details and all the little things in each section are so good!  We will do another post later telling you more about it and how you can recreate your own....so be watching.

Notice the frames on the column, they are random frames filled with the 7gypsies ATC Kit Cards.

Up close....sorry, bad picture, but you get the idea!


Other overall pictures of booth 

So glad to be home, now onto the next thing!