Showing posts with label tim holtz Christmas. Show all posts

Saturday, October 3, 2026

Christmas Curio Box 2026

Hello Friends,

I'm here today sharing one of the Vignettes I created for the idea-ology Christmas Live. To be honest, this time last year I had no idea we would be designing more Christmas idea-ology product, so the thought of creating again for a Christmas LIVE was not even on my mind. Fast forward a few months and I flew to Tim's to spend a few days developing the ideas that became the Christmas release. Tim is always inspiring and his house at Christmas is a wonderland. He was kind enough to leave Christmas up till after we had our days together just to be inspired! How lucky is that?
Well enough about the design part, this post is really about the new products and how to use them so lets get started!
First, I should say that developing a new Vignette Box was a dream. We got to pick the size, the depth, to get just what we wanted for future projects. The new Curio measures 5 1/2 × 9 × 1 3/4 inches and features two removable inserts, allowing you to customize the compartments to suit your scene. As you can see, I removed both inserts to create todays project.
I covered the Vignette Curio with papers from the new Christmas Backdrops and added trim tape to the lip edge.
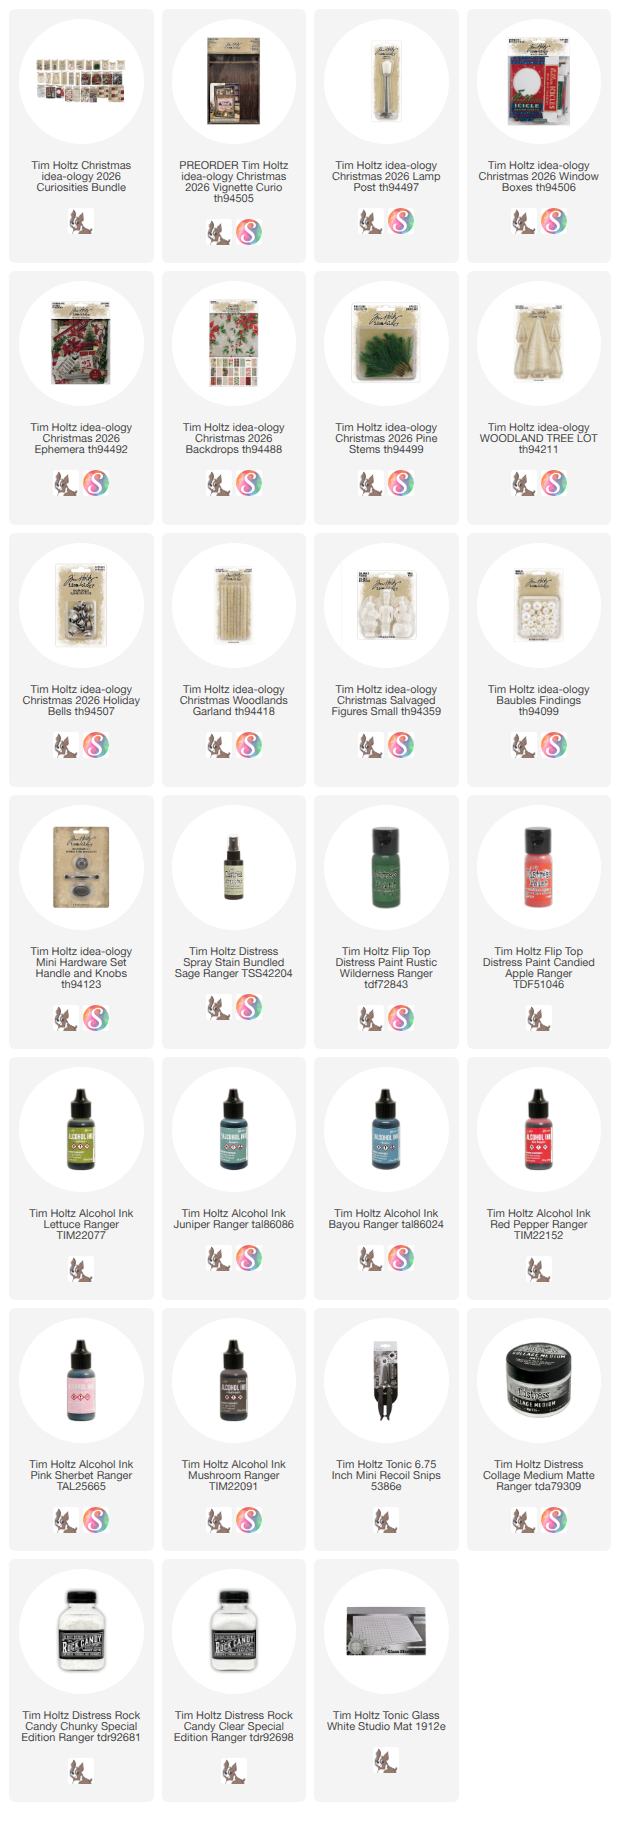
Window boxes are just another of Tim's great ideas. These are such a bargain too - there are 16 Window Boxes in four sizes, in the pack for $9.99! Crazy right? They come flat packed and you just bend the crease marks and it becomes a box. 
I added Backdrop paper to the back wall of each box I will use in this project. Sometimes you can see it and sometimes not, so i'll call this an insurance policy just in case it shows.
Add Cello Sticker Tape to the ends so the box flaps come together - the box will become stronger once you add the tape.
Now add whatever you want! In the largest box I added a small tree and a small painted Salvaged Snowman. The calendar in the background is from the ephemera pack. I added two Mini Fasteners at the top and foam squares on the back to push it out from the back of the box. To fill the empty space, I painted a load of Holiday bells in Candied Apple and loaded them in. I love the big pile of red bells!
On the second box, I just made it really simple by adding ephemera. The poinsettias have a couple small wood blocks on the back to push them forward in the box like they are floating. For the book piece, I covered it with Collage Medium on both sides and then just moulded it with my fingers till the pages were curved. I set it aside to dry while I worked on other things.
Once dry, I used hot glue to add a wood block to the inside of the box so I would have something for the book to rest on. Hot glue was added to the top of the block, then I just rested the book on top of it and held it in place till it cooled.
Now the third box! This one was easy because I already had the Baubles colored and in my stash. I added them to the small box with hot glue and a bit of Glossy Accents. Once they were dry, I added the small banner that is in the new Ephemera pack (we added lots of swags and banners). It fit perfectly on the front of the small box!
Now before we put everything together, we need a couple more additions. 
Wreath: I used one idea-ology Garland to make the wreath. It has been sprayed with Bundled Sage Distress Spray Stain. More Baubles from my stash were added to the wreath with hot glue. The tiny bow is from Hobby Lobby.
I painted the incredible new Lamp Post with Rustic Wilderness Distress Paint, then sanded it a bit with steel wool to age it just a bit. The wreath was added with hot glue. I will add a balloon light to the top so it will light up when the tab is pulled. 
And the trees.
Easy peasy. Two trees from the Woodland Tree Lot pack. Sprayed with Bundled Sage and dried. Bases painted with Candied Apple Distress Paint. Liquid Tinsel Tarnished added to the trees - this stuff is just magical! Instant vintage!
Assembly:
Starting from the bottom, use Collage Medium to add your boxes to the Curio. I practiced where the boxes would go before I even started so this part is easy. You might notice that I used a nail to add a piece of ephemera to the background. I knew where it should be, so I nailed this in place before I started adding the boxes.
Next is the small box and tree at the top.
And then the Lamp Post.
The last little detail is the handle that I painted black. The tiny tag comes from the Ephemera Pack (I need like 10 of these per pack). The added Pine Stem is so delicate that all I needed was a bit of the Liquid Tinsel on it's branches.
Here are a few close-up shots.

See you back here tomorrow with my second Christmas make!

Now carry on,
paula

Friday, December 20, 2024

Christmas Greetings

Hello Friends,
Well, I've got one more project to to get in before the holiday on Tuesday! I wanted to make something using the new Woodlands Garlands so I came up with this fun tag idea. I think the little wreath would also look great on top of a small gift. It is so cute in person!
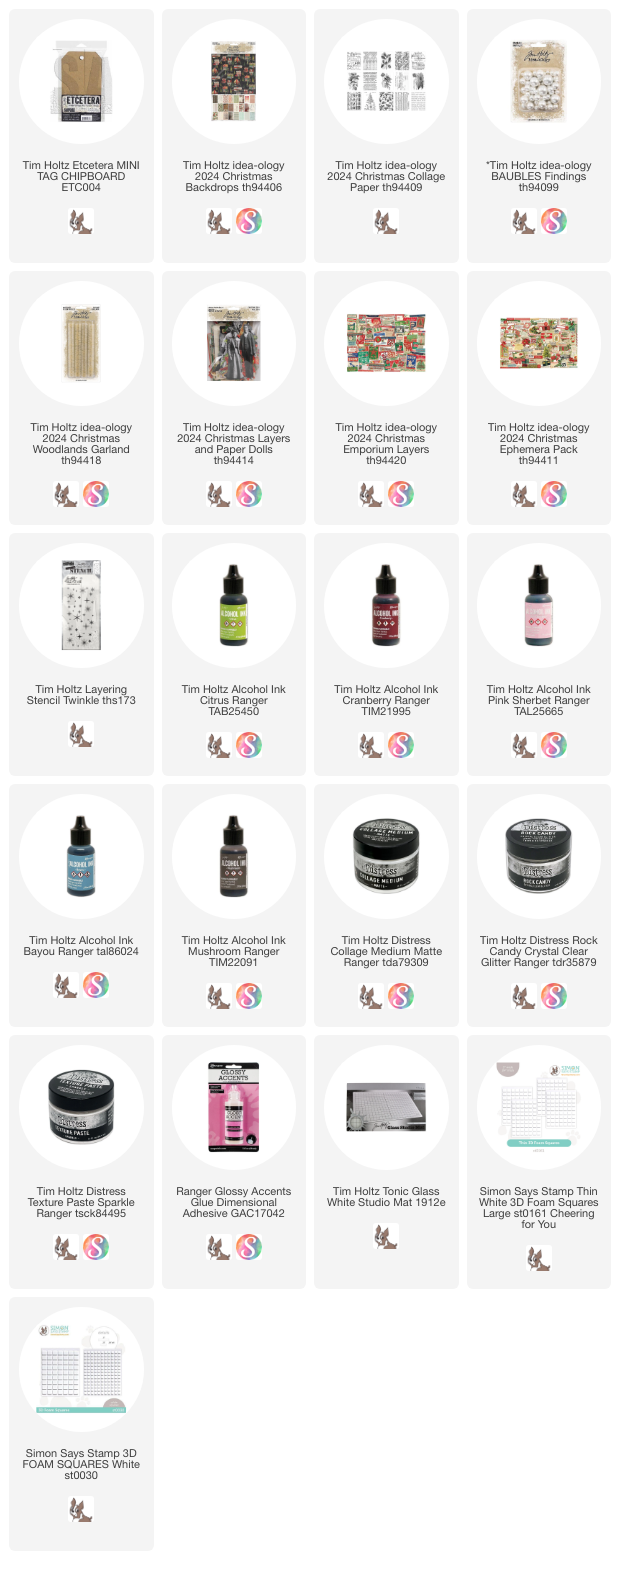
Use Collage Medium to cover a Mini Etcetera Tag with Christmas Backdrop paper. I chose a minty green stripe and my favorite poinsettia print. 
Cut off any excess paper with a cutting knife and sand the edges lightly.
Go over the top of the paper with Texture Paste Sparkle. Once dry, it will give the paper a vintage 50's vibe. The paste portion of the Sparkle Paste will dry clear leaving just the subtle glitter over the paper. Let dry.
I decided to add a Collage Paper element to the tag, so I used a Detailer Water Brush to tear away the excess paper leaving just the tree.
I added Collage Medium to the tag, then laid the tree into the glue. Quickly add another layer of glue over the top of the Collage Paper to adhere it completely.
I like to take my index finger (with a little College Medium on it) and rub over the Collage Paper to make sure it is embedded into the glue. This really helps to make the Collage Paper appear transparent over the printed paper. Once you are happy, let it dry.
Once dry, I went over the tree with more Sparkle Texture Paste so it matched the rest of the tag.
Again, I let the Sparkle Paste dry while I looked for a stencil to use. I decided to use one called Twinkle because of the large star shapes. I laid it horizontally over the tag and added more Sparkle Texture Paste with a Palette Knife. Remember, the Paste dries clear so this will be a very subtle effect. If you want the stars to be colored, then you would need to add Distress re-inker to the paste (super easy to do).

NOTE: Tim has a great video from 2023 all about Sparkle Texture Paste and tinting it.  You can find it HERE on his YouTube channel. There are also time stamps below the video that you can click on and the video will jump to the portion of the video you want. Could not be any easier.
Lift the Twinkle stencil to reveal the stars. Again, these will dry clear with just the subtle glitter showing.
Just like this!
I created a small wreath using one of the Woodlands Garland pieces. I just cut off the back bristles so the wreath would lay flat on the project.
Then I sprayed it with Bundled Sage Spray Stain and dried it with a heat tool.
I glued the two end together and held it tight for a minute or so while the hot glue cooled.
I have a bag of colored Baubles that I poured out on a paper plate (I save the leftover Baubles after each project). I used a hot glue gun to add them to the wreath. Always put the glue into the wreath, then push the Bauble into the glue. The banner comes from the Christmas ephemera pack.
To make it festive, I squeezed a dime size dollop of Glossy Accents onto deli paper and picked it up with my finger tip. That way I could add the Glossy accents to just the top of each Bauble. Then I held up the wreath and poured the Rock Candy from the top to the bottom of the wreath, like the Rock Candy had fallen from the sky.
I also added Stickles (Mercury Glass) to the tips of the pine. I love the detail of the gold sparkle!
I think you can see it all better here. 
This was so fun to make that I think I need to make more wreaths!
While the wreath is drying, I'm going to finish the Mini Tag.
I used a piece from the Emporium pack - but it wasn't long enough so I cut it up the middle to "stretch it", then added it to the tag with THIN foam squares.
I chose a favorite Paper Doll from the Layers and Paper Doll pack to color with Distress Crayons. I used Aged Mahogany for his jacket, Uncharted Mariner for his pants, Rustic Wilderness for his gloves and hat and Ground Express for his boots. I just colored in the clothing, then rubbed the crayon with my index finger till you could see the details again.
I added reg 3D foam squares to the back of the Paper Doll and added him to the scene to cover the break in the Layers ephemera.
Next is a couple embellishments from the Layers and Paper Dolls pack. I made a puddle of Gathered Twigs ink and dipped the Christmas Greeting layer into the ink repeatedly, drying it with a heat tool in between. I takes a little time to build up the ink, but it's worth it to make it look aged.
The bow was cut from a wreath in the Layers pack. There are two wreaths in the pack. This is the bow from the smaller of the two wreaths.
The holly is from the Ephemera pack so it is thin paper. I added Collage Medium to both sides to strengthen the paper. I also added a just a touch of Rock Candy to the bow and the holly. 3D foam squares were added to both before adding them to the top of the tag.
I loved this little ephemera piece (that was cut from a larger one) as a little addition to the left corner. Because I added THIN foam square to the Layers Emporium piece above, I was able to just slip it under the edge with no problem.
And lastly, the wreath! I used hot glue to adhere the wreath to the tag. I did have to add a 3D foam square on the right side to compensate for the foam squares that are under the Paper Doll. It was an easy fix to raise the right side of the wreath.
Such a fin little tag. I love the minty paper, the Collage Paper in the background and that darn wreath! It is so cute! It was so nice to have a whole dish of colored Baubles to work with too! Glad I've been saving them all season long!
now carry on,
paula

Wednesday, December 18, 2024

The Magic of Christmas

Hello friends,
I know it's a busy week out there, but I hope you might still consider this project doable in the time before Christmas. I know lots of us have product that we have bought and have not used yet. Me included. In fact I just ordered a Christmas embossing folder from Simon Says Stamp even though I know I won't be using it this year! Good thing Christmas comes around every year! 
This project started because I had this idea to use the center cutout from the Facades "house shape" (see red square below) in a unique way. I have never added a cutout to a Vignette like this, but it worked out really well. Let me show you how I did it.

I drilled a hole through the bottom of the cutout, then covered it with black Woodgrain paper. I re-punched the hold with an awl before adding the eyelet.
I say, "adding the eyelet" but I really just used a hammer (NOT on my glass Studio mat) to push the eyelet into the hole I made with the drill.
I wanted a brown woodgrain look so I rubbed the ink pad directly over the black woodgrain (you won't be able to see the color on the black paper) then randomly spread Opaque Crackle Paste over the top. The Distress Ink bleeds through the wet paste giving it a brown color. Now leave it to dry so it can do its thing and crackle!
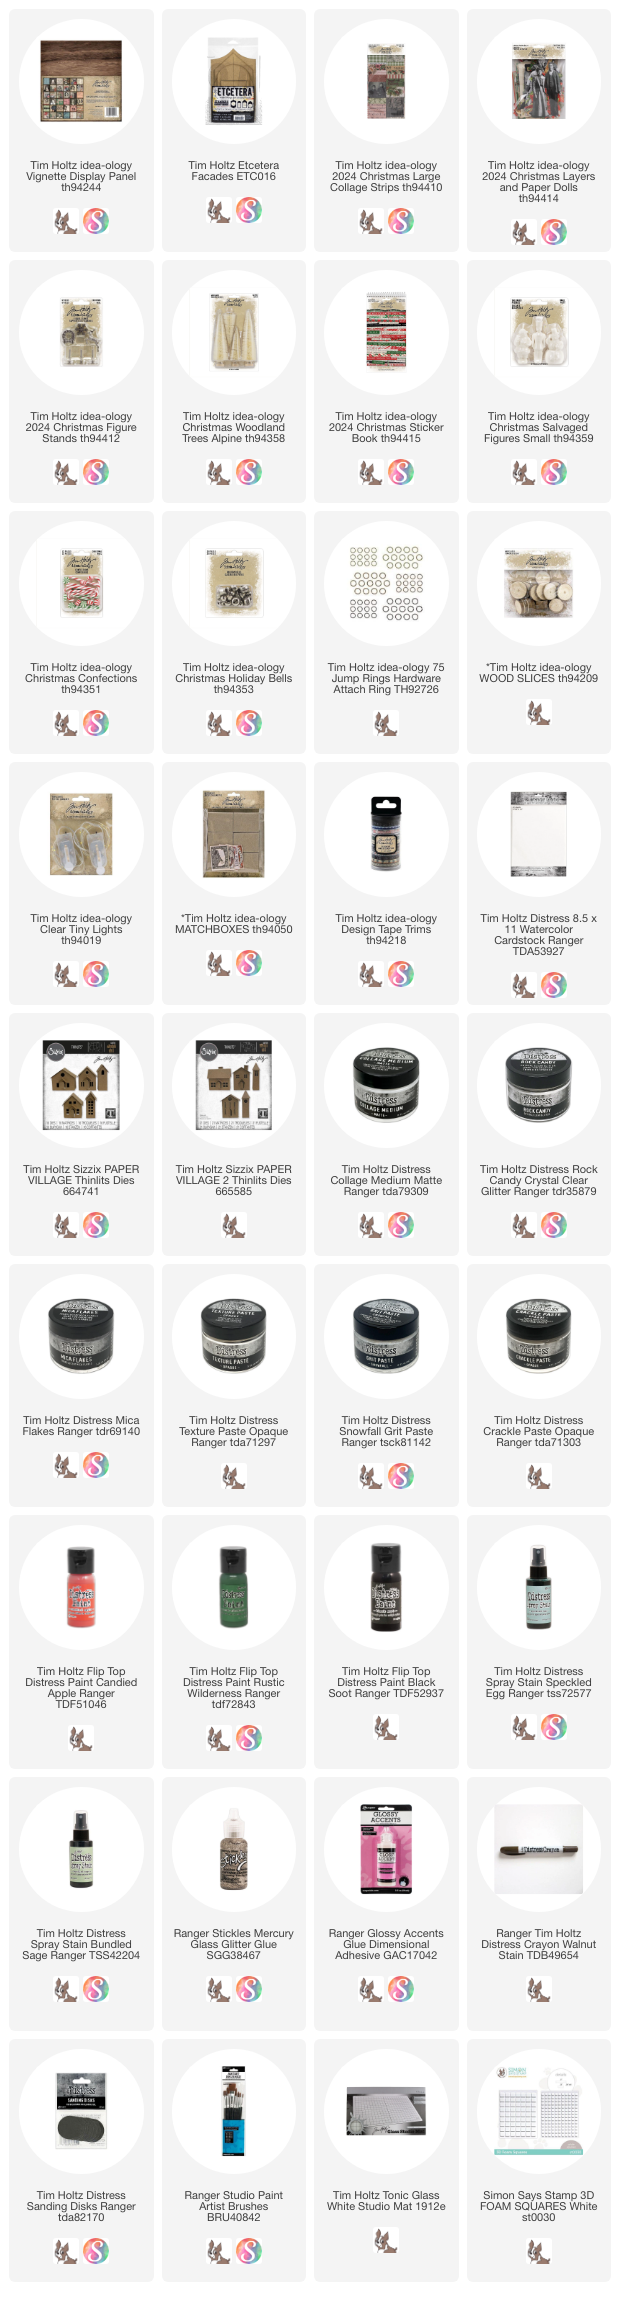
While waiting for the Crackle Paste to dry, I painted the sides (inside and outside) of my Vignette Display Panel with Rustic Wilderness Distress Paint.
Once the paint was completely dry, I added Christmas Collage Strips to the inside of the Panel. I also added another layer of Collage Medium over the top. I love all the different prints and patterns. They work together seamlessly to make a very cohesive background with ease! 
I turned the Display Panel over and added more Collage Strips to the back. The strips fit perfectly on the back, but I did cut one strip so the ladies would be at the top of the tray, not in the bottom half. That's the beauty of the Collage Strips, they can be altered so they fit your purpose!
So the crackle is complete. All along the edge where the Paste was heavier, it has a very fine crackle that really looks like old painted wood. Such a fun technique!
I painted up a few Holiday Bells in different shapes to see which would look best. Once I made my choice, I used a large idea-ology Jump Ring to add the bell to the eyelet.
Next is the Layers ephemera piece that I had in mind for the Etcetera cutout. It fits perfectly! I used 3D Foam Squares to add the ephemera. I also glued two double stacks of bingo chips together to use as risers. If you don't have any bingo chips, then use double or triple stacked Foam Squares. If you use Foam Squares you may need to make 4 separate stacks for stability.
One they are secure, add more Collage Medium.
Then place the cutout on the Display Panel. Let the Collage Medium dry in place before standing the piece up.
Find two poinsettia pieces in the Layers pack. Use Collage Medium to add one bingo chip to each. Let dry.
Add Collage Medium to the back of each bingo chip and add to the panel as shown. The poinsettias should easily slip under the cutout.


While the poinsettias are drying, you can work on all the other parts...

Spray THREE Alpine Trees - 2 small + 1 large with Bundled Sage Spray Stain. Dry with a heat tool, then rough up the branches.
NOTE: I did cut down the back of the large Alpine tree so it can eventually be pushed up (and glued to) the back of the Display Panel.
Add random spots of Opaque Texture Paste to mimic patches of snow.
Add Mica Flakes over the paste. Dry with a heat tool.
Squeeze Mercury Glass Stickles onto deli paper or Studio mat. Pick up the Stickles with your index finger and add to the trees. Use Candied Apple Distress Paint to paint the bases red. Leave to dry.
Once dry, push the large and one small tree together so the branches connect. Set aside.
Use Distress Paint to color a piece from the Figure Stand pack. I chose the wreath but you could also use the deer or the snowflake.
Paint and distress a SMALL Salvaged Figure. I chose Santa since I used the snowman and the toy soldier in a recent project.
  1. Paint the resin figure - leave to dry completely.
  2. Scribble Walnut Stain Distress Crayon on Studio mat. Pick up crayon with a damp brush. Go over figure multiple times to work the crayon into the face features and over body.
  3. Use your index finger to add patches of Glossy Accents over Santa. Sprinkle Rock Candy glitter over the top, then set aside to dry.
  4. Use Collage Medium to add Santa to a Wood Slice. Set aside to dry.
I cut a house using the Sizzix Paper Village die and Distress Watercolor paper. However, the chimney is from the Paper Village 2 set. I think you could make a chimney on your own if you didn't have Paper Village 2 (we're resourceful right?).
That being said, I altered the house making it thinner so that it would fit in the panel. I did that before I glued the house together. When you make the house thinner, you have to make the roof narrower too. My house is 5/8" thick and the roof is 3/4" wide. My roof does not overhang at the back, but sits flush with the back of the house so the house can be pushed up against the back wall.
As you can see in the photo, I mounted the house on a base (not part of the die). You could make a base from heavy paper, but I just used an idea-ology matchbox drawer that I cut in half along the 2" length and then again along the bottom edge so it is about 1/2" high. You can see the difference in the plaid base and an original Matchbox drawer in front. They are the same width but not the same height.
You can see the mechanics better from the back of the house. 
I've added two small wood blocks for stability (and an easy way to adhere to the Display Panel).
I've also cut a hole for the lights that I will add later. I should have cut the hole BEFORE I glued the house together but I didn't so the hole is a bit sketchy. I did add velum to the inside of the house to cover the windows. This will diffuse the light coming from the Tiny Lights.
The tiny red paid paper was from a Collage Strip. The words are from the Christmas Sticker Book.
I used Collage Medium to adhere the house to the base. NOTE: It was set crooked on purpose so the house sits flat against the back of the panel and the base is askew.
So next up, we need a hole for the lights to come from the back of the Display Panel. I used a drill and then an awl to smooth out the paper in the hole.
I also used the outside of the Matchbox to hide the Tiny Lights battery pack on the back.
I tried using all the lights and it was just way too bright in the house so I ended up cutting off half the lights (leaving about 10), then winding the string around two fingers. Because I made the hole in the back of the house so big, it was easy to push the lights into the space.
I used both Collage Medium and a bit of hot glue to adhere the house to the Display Panel.
Next, add the trees on the left. Again, I used Collage Medium on the base and hot glue on the back.
Small tree on the right along with Santa and the wreath tucked in the back.
Once the pieces are stable, use a small Palette Knife to add Grit Paste Snowfall. I chose Snowfall because it will give you an icy effect once it's dry. Work your way across the left side, adding the paste all the way into the back. Try not to cover all the red bases. 
Remember, if you take away some of the paste, use a wet wipe to rub away an excess paste as best as possible. It will not dry clear.
While the paste is wet, add Mica Flakes and the embellishments - Confections covered in Rock Candy and another red bell. The Mica Flakes really add a lot over the Snowfall Paste. It's like they were meant for each other.
On the right side, repeat the steps to add the Snowfall Paste, Mica Flakes and embellishments. 
Printed Green Design Tape was added with Collage Medium (for longevity) around the lip edge of the Display Panel.
And one last thing...
Make a tiny wreath to hang over the door of the house.
I took a silver metallic pipe cleaner and cut off one side the fringe. I wrapped it around a pencil to make the circle and used the needle-nose pliers to close it.
A little Mushroom Alcohol Ink took the edge off the bright silver.
A little Collage Medium and it is in place. Just perfect.
I love the way it turned out! I know that it was kind of a crazy idea to use that cutout piece that way I did, but sometimes a crazy idea works!


Now carry on,
paula