Hello Friends,
Celebrating Sizzix Halloween release today, starting with this colorful make for fall. The creamy new Halloween Mica Crayons are perfect for coloring the leaves... as long as you remember one simple step (you can read about that below). So follow along and I'll show you how I created this beautiful fall background.

Open the 3D Folder and rub Ground Espresso Archival Ink over the surface until coated. Spritz lightly with water.


While the Collage Medium was still wet, I sprayed the card with Decayed and Iron Gate Mica Stain.


NOTE: I will cover the break in the cards with the words so it does not matter as long as you keep the break at the bottom.
 Since I coated the Kraftstock paper with Collage Medium it has been sealed - that means the Mica Halloween Distress Crayons are in play.

Starting with fortune teller (purple) - scribble the creamy color onto the edges of the leaves. I'm going to add many colors so start small.
 Next up burning ember (orange). Just scribble and rub with your finger to slightly blend towards the purple.
 Next up, wicked elixir (green). I adde this one to the other side of the leaves and on the stems.
 I added harvest moon (yellow) and Walnut Stain to the acorns, completing the full background.
 To prepare the focal point, I cut a piece of purple cardstock, then cut gold metallic letters using the Alphanumeric Bold die. I did cut two sets of the letters so they could be combined to create a thicker letter.
 I used the design ruler to help me place the letters on the purple card. The ruler is see-through so you can easily see the straight line.
 Before the purple card was put into place. I added Trim Tape to the sides to cover the flat part of paper. The skinny tape fit perfectly along the edge. I think the tape comes with 10 rolls so there are plenty of designs to choose from.


now carry on,
paula


Now I added the purple strip to a piece of Kraftstock to stabilize/strengthen the paper since I wanted to add foam squares to the back. The white/gold metallic sticker "HEART" was added to the end - hard to read here but it looks nice in person.
Once the strip was in place, I added the skinny ruler strip to the top from the Memoir Ephemera Pack. The feathers, cut using the "Feathery" die and Mixed Media cardstock, were just dipped in Distress Mica.
The colors of the feathers are
fortune teller

wicked elixer

decayed

I painted an idea-ology Vintage Clip with black paint. Once dry, I brushed on Foundry Wax and used a embossing gun to change to color to metallic. I love the brushed look over the black paint.
The ribbon is silk - just something from my stash. I thought it went beautifully with the project.
The No. 251 is from the Snippets pack.

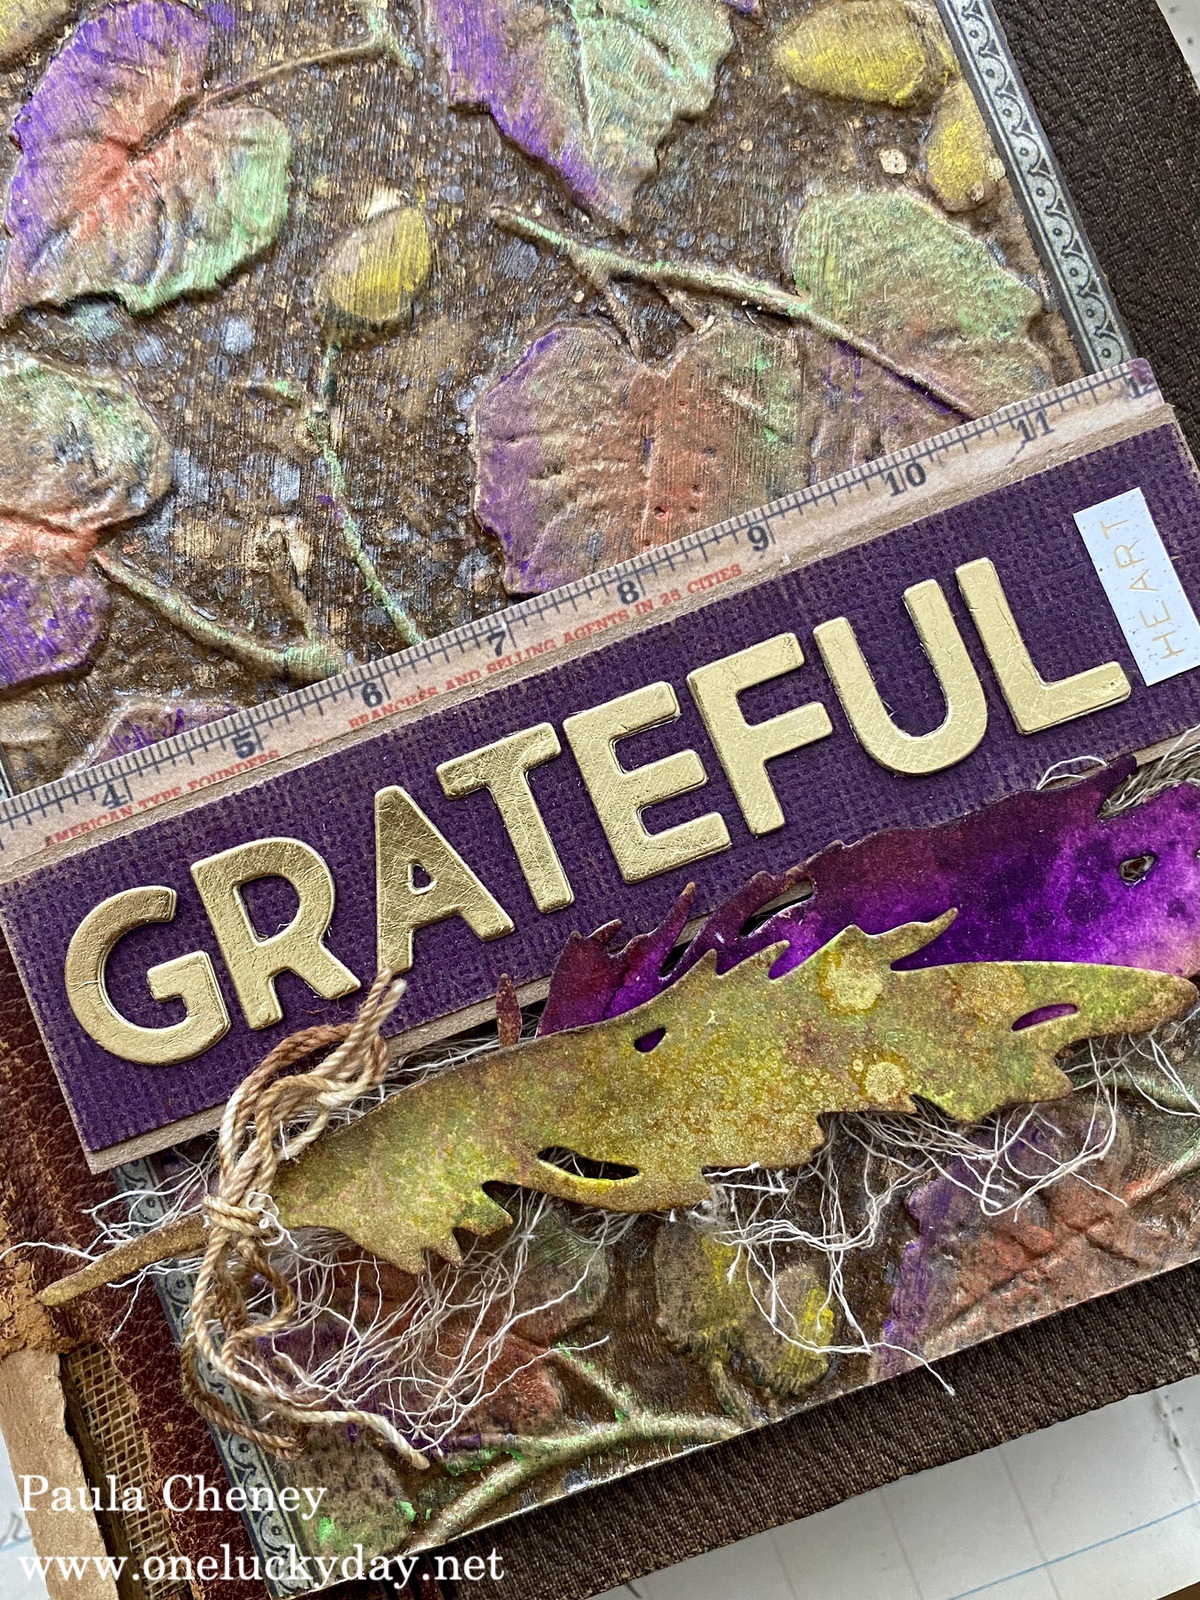

thank you for stopping by to see the coloring of the background. I hope you will try this technique on something you make - the new Halloween products are so fun to use. I am thrilled with the new colors of Mica sprays and how awesome they are on so many paper surfaces. I know you will not be disappointed!
paula