I'm excited to be here today sharing a fun project using one of my favorite products, Found Relatives. Many of you might notice something just a bit different about the pack I'm using today. Can you figure it out?
Well, about a year ago we started collecting new pictures to update our cast of characters...15 new cards have been added to the pack of 24! Of course we kept the lady with the red lips, the boy with his dog and the sailor boy and his sister. So how do you know if it's a new pack? It has a new cover (seen below). If you have a pack of Found Relatives with the lady with red lips, then it is the original pack.
Here are just a few of the new photos included in the box -
Now on to the project...
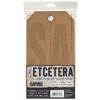
I am using a small size
Etcetera tag as the base for today's project. It is 5 1/2 x 10" (
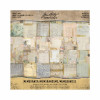
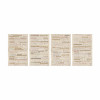
three tags come in each package). I used College Medium to adhere paper from the French Industrial Paper Stash. I added a thin coat over the top of the paper as well (don't skip this step).
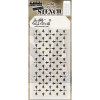
I used the new stencil Crossed, which came out in the Halloween release, but really you could use this one any darn day! Distress Grit-Paste was pulled across the stencil with a palette knife and just like that, great texture! Now to let it dry.
About 30 minutes later I came back and rubbed the surface with Distress Collage Medium "Vintage". This creamy goop will add a vintage vibe to any surface. My one word of warning is that like regular Collage Medium, it dries fast so once you start rubbing it over the surface don't stop.
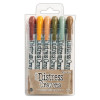
I finished off the surface by using my Gathered Twigs Distress Crayon that is part of set 10. I scribbled it on the edges of the tag, then rubbed it with my finger. This is one of the reasons I sealed the surface with the Collage Medium at the beginning. Distress Crayons need a slick surface and a touch of water to move freely. Sometimes as little as just touching your finger tip on a wet wipe will help move the crayon around.
I love letterpress.
Today I decided to paint the top of the letters Antique Linen Distress Paint. Once dry, I used the Gathered Twigs to add a bit of grunge to each letter.
Now to start putting everything together...
I covered a large Vignette panel with paper from the Memoranda Paper Stash. I decided to use this panel because it is the exact same size as the Letterpress word. A perfect fit!
Now for Found Relative (
don't you just love her?)... I like to add a VERY thin coat of Media Clear Gesso over the card to create "tooth" which will allow the Distress Marker ink to adhere to the card. This technique works well but is not without it's challenges. The biggest being "streaks" if you leave too much of the Clear Gesso on the card...
never a good thing if you are wanting to have smooth color. I would also mention that the Clear Gesso holds the color much more than if you tint the photo without it. On one hand I think the color lasts longer but on the other it is not quite as realistic of a tint. Anyway, something to think about and try.
Before I added the photo I needed to get some metal ready. My trusty go-to technique for metal is Picket Fence paint wiped on and left to dry, then Mushroom Alcohol Ink pounced over the top. Tried and true!
I also sprayed some Bouquet flowers with Antique Linen Distress Spray Stain.
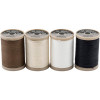
I tied the flowers to the key with Craft String that has been dyed with Distress Ink.
You will need a double stack of foam squares to hold up the top of the key.
Clippings Stickers are great for finding the perfect secondary sentiment. Can't get enough of these.
I added some vintage lace to the Hinge Clip and added it to the top of the Vignette Panel.
I love the way this piece turned out and I love the new Found Relatives. I hope you check out the new cast of characters and that you find a few projects to use them on.
How do you find a pack?
Call a local retailer and ask them to order it for you! If you don't have a local retailer, you can click on the link below. Just remember,
it has to have the right packaging to be the new set of cards. Either way, this new cast of characters is a definite must have!
carry on,
paula