Showing posts with label flower tutorial. Show all posts

Monday, June 2, 2014

The one about the really BIG flower...

I have completed all the projects I had pending on my desk and found myself with a bit of time to make something of my choosing (love those kinds of days).  I have been inspired by many of the flowers I have seen recently from Karen Hayselden and on Instagram, Aida Haron (aidaville),  so I decided give my Jumbo Tattered Florals die a try.  I admit it...I have had this die for a while and have only used parts of it.  Today is a new day, so lets see what I can do with it! 

I decided to use Ranger Manila Cardstock for the flower because it's nice and thick.  I cut 4 each of these three shapes from the die. 
Then I set about to color the pieces with Distress Stain.
You know the drill:
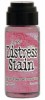
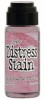
1. Squeeze out the 2 colors of Distress Stain next to each other (I like an S pattern) on your craft sheet.
2. Spritz with water.
3. Smooch each flower into the mix, then quickly pick up and dry with a heat tool, dabbing off excess stain with paper towel.
4. Repeat over and over to built layers of color.
Once dry, quickly ink the edges with Vintage Photo Distress Ink.
I made a stack of the large petals and the middle sized petals (leaving the small for later).  There is no hole in center, so I made one with my paper piercer and added a Long Fastener to secure.
I spritzed the petals with water and started rolling the petals.
I also spritzed the smaller section at the top of the flower but I wasn't sure what to do to make it look natural.
So I took drastic measures...I spritzed on more water and then crumpled the whole darn thing in a ball.
Till it looked like this.  Remember, I used the heavy weight Manila cardstock which can take a beating like this.  If you were to use regular cardstock, I'm sure the unfolding of this flower would prove to be tricky.
I left the flower to sit all crumpled up so I could concentrate on the smallest 4 petals that were still sitting on the table.
I followed the same steps as the large flower.  
Poke hole in center...
add brad to secure...
spritz with water and crumple into a ball.
I unfolded the large flower then added the small flower to the center with Multi Medium.
Once the flower was together, I arranged the petals just a bit, then dried it with a heat tool.  Once dry, the flower is super sturdy (even after all the misting, crunching and unfolding).

The final touch is to use the Spritzer tool and a Distress Marker to add a fine mist of Walnut Stain ink over the flower.
Love the texture that
I am going to be very honest - this flower is big.  About 4.5" across.  Remember, I used 4 of each size of the petals so the flower would be full.  If you choose to use fewer petals or a different configuration, the flower may turn out smaller.
So the question becomes...what to do with a flower of this size?
You will have to stay tuned to find out...i've got an idea a brewing.

now carry on,
paula