Hi everyone!
It's been busy around here
as usual! Teaching last weekend at The Creative Escape in Los Gatos, CA was a great! Sold out classes, great students, FANTASTIC classroom at the new location, and a friend who joined me to help out (
none other than Richele Christensen). Richele and I always have a great time together and this was no exception. If lots of laughs means a great time, then it was a huge success!
Well, on to today's project. I really had no idea what I was going to make when I started but I am super happy with the end result so all is well in the craft room today! Follow along and I'll show you what I made.
I'm using an 8 x 10" canvas board for the project today.
I chose 4 colors of Distress Paint to work with; Abandoned Coral, Mustard Seed, Twisted Citron, Tumbled Glass. As you can see, I just swiped the paint onto the canvas in random stripes. You can make the stripes as large or small as you wish.
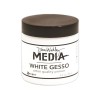
NOTE: I added a layer of Dina's White Gesso over the canvas before painting.
I used a paint brush and filled in the area between the colors, blending them to make a smooth transition from one color to the next.
Use a wet wipe to pounce over the paint, moving a bit of color from one area to another.
I squeezed a puddle of Picket Fence Distress Paint onto the craft sheet and used a Mini Blending Tool to add the paint over the "Splotches" stencil until the entire surface was covered.
Using the Mini Blending Tool to add the Distress Paint is a great way to
get an even, thin layer of paint. I like that a hint of color can still be seen
through the top layer.
While the canvas was drying, I went to my computer and in a document format, I created a square that is 8 x 10" to match the canvas size then created an oval shape inside.
I cut out the oval shape and used it as a template to draw an oval onto the canvas board. (
save the oval cut out for later)
Since this came in the mail yesterday, I couldn't help but use it, right?
Hickory Smoke, where have you been all my life? You are the perfect foil to the bright Abandoned Coral and Twisted Citron!
I pounced Hickory Smoke paint on the edge and painted around the oval shape with a paint brush.
This is what it looked like when I was done. A bit like an Easter egg right now, but I'm going to turn it on it's head, so no worries on that.
Once the paint was dry, I
lightly sanded the Hickory Smoke edges with the Sanding Grip, revealing the colorful paint beneath and the actual texture of the canvas.
Next up, I wanted to add a message. To do that, I'm using the Block Talk Sizzix die to cut letters from Sticky Back Canvas. Save the negative pieces too!
I picked the message,
"Today is full of Possibility". The Sticky Back canvas is self-adhesive so you just have to peel and stick.
If you are a regular reader of this blog, you know how much I like Dina's White Gesso. I'm using the gesso today as a sealer for the the Sticky Back Canvas and to unify the letters and the background. I just used my fingertip to add the gesso over each letter. If I you get too much gesso on the background you can wipe it up with a wet wipe or a wet Q-tip.
I added a bit of Distress Paint (
again, with my fingertip) over the dry gesso.
Once the paint was dry, I added a drop shadow around the letters with a Hickory Smoke Distress Marker and smudging with my fingertip.
Back to the jar of gesso...just needed a pop of white over the top.
Cover the center of the canvas with the oval paper again.
Using the Mini Blending Tool, add Picket Fence Distress Paint over the Lace Stencil.
The paint is very bright and I'm going for a more subtle look, so I will remove some of the paint with a paper towel.
Just by pressing a folded paper towel over the paint.
I worked around the canvas one area at a time, following each step until it was complete. Then moved to the next area until the canvas edges were covered.
I wanted to add a flower to the canvas, so I embossed one of the Flower Garden images with White Embossing Powder onto Ranger
Watercolor paper.
I colored each of the images with Distress Markers (
abandoned coral and mustard seed are a match made in heaven).
Once the images are colored, they can be cut out. The embossing lines makes this very easy.
I used the Gathered Twigs marker and the Distress Marker Spritzer to add dark speckles over the images.
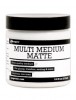
Now just add the flower to the canvas with Multi-Medium. Notice I cut the flower to the length I needed? I also moved the leaf on the left, to the right side of the stem.
Once the flower is in place and the Multi-Medium is dry, you can add the drop shadow under the flower with the Hickory Smoke marker.
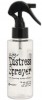
You can use the Distress Marker Spritzer to add more speckles over the canvas.
Please note that if you use
Distress Marker over the slick (non-porous) surface you will need to
spray the canvas with a Fixative designed to protect artwork. You can
find it at most craft stores.
I added a couple Remnant Rubs to the canvas with the new Remnant Rub tool.
Gotta have numbers!
Gosh that flower really makes the piece. I can see why that stamp set is so popular.
I had an 8 x 10" frame in my stash that I believe I picked up at Michaels. Great way to finish it off.
I think I found a great spot for it!
click on picture for full size image
now carry on,
paula