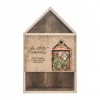
Glad to be back here on the blog to share an easy Christmas project using the Mini Mason Jar from idea-ology. I am sure you have seen these before, but I'm hoping to put a spin on it with a classic Christmas die and a few cans of spray paint.
First you need a Mini Mason Jar. They come in a set of three so it's easy to make multiples for gifts.
I added the Mini Mason Jar Photo Clip kit to each jar. That means I removed the lid that comes with the jar and added this one to it.
I spray painted the lid and clip with a red spray paint for this traditional themed jar.
I believe I found the perfect color red for the lid of the jar. It is
RUST-OLEUM in Colonial Red GLOSS. I purchased this can from Home Depot but I am sure they have it at other hardware stores.
It takes longer to dry than standard spray paints (maybe because of the gloss finish?)...in
about 20 minutes you can pick the lid up, but an hour to really handle
them. The instructions say it cures in 24 hours, which I found to
be true. Once dry, it looks and feels like a lacquer finish.
I also added Gold Alcohol Ink to the Word Band before coloring the text with Picket Fence Distress Crayon.
I used large trees from Tree Lot (bulk Woodland trees) - you get 5 trees in one package which again, makes creating multiples super easy.
1. Cut the tree to fit into the jar. You MUST use wire cutters to cut the steel center of the tree.
2. Spray with Distress Spray Stain.
I tried all of the Distress green colors and I found three favorites depending on what look I was going for.
Mowed Lawn: bright true green, great for traditional projects
Bundled Sage: my personal favorite - a softer green, beautiful mixed with platinum Stickles on the tips of the the tree.
Peeled Paint: bright green (but not a true green like Mowed Lawn) - a good all around color for trees.
I also found that adding a small piece of chipboard glued to the bottom of the tree made it easier to glue into the base of the glass jar. (thank you Richele for the tip!)
3. Add Collage Medium to the tips of the tree and roll in Clear Rock Candy. Let dry.
4. Use Glossy Accents to add colored Baubles into the tree. I used Baubles colored in Sailboat Blue, Red Pepper, and Butterscotch Alcohol Ink. One might think that using Gold Mixative is the way to go when wanting gold ornaments but I beg to differ...Butterscotch and a tiny bit of Mushroom make for the most beautiful gold ornaments!
For a more feminine look, I used a totally different color story of Tattered Rose and Antique Linen. For this jar, I sprayed the tree Tattered Rose and rolled it in Clear Rock Candy. The Baubles for the tree ornaments were left just as they came in the package, a pretty pearl.I used gold spray paint for the lid and hinge clip and then added a piece of ephemera from the Christmastime pack. The poinsettia is cut from Distress Watercolor paper using the Tattered Poinsettia die, another personal favorite. I dipped the pieces into Distress Ink Tattered Rose and Worn Lipstick (+ water) and let dry.
Gathered Twigs Distress Ink was used to age the edges of the petals before layering the individual pieces to create the poinsettia. A Bauble works perfectly for the center of the flower! To give it a bit of sparkle, I added a thin layer of Collage Medium (with a small paintbrush) on the petals and over the Bauble and sprinkled it with Clear Rock Candy. The greenery was cut using the Holiday Greens die.
I love how the Mini Mason Jar came out. I am always amazed at how a can of spray paint can really change something so plain into something special. That can of Colonial Red did just that! Then there is my all time favorite Christmas die, Tattered Poinsettia. No matter if you color is red, pink or something in between, it's beautiful. If you don't already own this one, I'd add it to your Christmas list!
Also, if you missed the Winter Wonderland shadowbox I created
for the Tim Holtz Holiday Inspiration Series, you can see the full tutorial here.
Now carry on,
paula


