Showing posts with label seasonal paper stash. Show all posts

Monday, October 20, 2014

Halloween Tags

I've had a great weekend here in Texas.  Love visiting the small town Waxahachie - not only for teaching, but for antiques, good food and friends.  Carolyn has moved her shop a couple blocks over, facing the beautiful historic courthouse.  This was the view when we came out of her shop after the first class.  What a view!
Friday was the Homecoming football game for the local high school.  So what does that mean in small town USA?  A parade of course!  We took a break from setting up for class to walk to the corner (all of about a 100ft) to watch part of the Homecoming parade - complete with a huge marching band, floats, the homecoming court. 


Just a quick thank you to all the ladies that came to the classes...so many familiar faces!  We had a great time learning a lot of techniques from creating faux snow, to working with Alcohol Ink and learning how to work with the Collection Folios.
 
 Here is the Winter Wish group - Prissy, Beth, Monica, Fairlyn, Regina, Stacy, Marilyn, Terry, Cindy, Ludi, Amy, Lisa, Rhonda, Betty, Tove, Alice, Mary, Kay, Paula D...and me, Paula.  Hey, not too bad remembering all the names!  
Although, I am sorry I didn't get pictures of the other two classes!

The Crafty Scrapper is a great local store, something we all need to support.  I am sure hope if you are even close to the area, you stop by to shop or take a class.  The new store is over 4,000 square feet...and what's not to like about that?

Today I am sharing an idea for easy Halloween tags:
I am using the 8 x 8" Seasonal - Collage Mini Stash for this project.  This Seasonal Paper Stash includes Valentines, Easter, 4th of July, Thanksgiving and Christmas papers.  Each holiday section has images and even letters that are easy to cut out for projects.
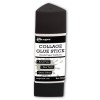
I used a Collage Glue Stick to adhere one of the papers to a piece of thin chipboard.
Cut off any excess chipboard.  Yes, I use a roller cutter for cutting my chipboard!
Then cut up all the individual pictures (I got 15 cards from the sheet).
I sanded the edges with the sanding grip.
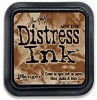
Then inked with Frayed Burlap Distress Ink.
I wanted to add some eyelets to the top but I only had silver.  Pitch Black Alcohol Ink will solve the problem.
Just squish a little Alcohol into the bag and squish it around to coat.
Dump the eyelets out onto the Craft Mat to dry for a minute before using.
Use a CropaDile to add the eyelets to the top of each tag.
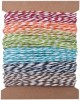
I added Paper String to the top of each card.
Then tied each to a bag of Halloween candy.
Again, a super easy way to use the paper for a quick party favor.
I will see you back here on Thursday for another Halloween project using this same paper stash.  You won't want to miss it - it's a Halloween favorite!

now carry on,
paula

 Products Used in this Project


Tuesday, August 7, 2012

Test Drive: Metallic Distress Stains

Hey all!  Another Test Drive this week with the new Ranger Metallic Distress Stains that will be arriving to stores soon.  
antiqued bronze, brushed pewter, tarnished brass
I used multi-medium to adhere paper from the Seasonal Paper stash to a wood board (4 1/4 x 12 1/2").  The size of the board is not important...it was just a leftover board that was in my work space. Once it was dry, I sanded the edges with a sanding block.
Using another sheet of paper from the same pack I cut up little strips from this paper.  Yes, I know it's images of vintage firecracker boxes but the colors complement each other.
Add the strips to the board with multi-medium.  Dry with Heat tool.
I sanded away some edges (brush away any paper pieces) and then added a coat of multi-medium over the entire surface.  Let it dry again.
Then I covered it all up.
Working quickly, I used gesso to cover the surface. 
Then wipe away with a baby wipe.
The wood is about 12" long so I worked in 4" sections down the board so I could manipulate the gesso before drying.
Now let it dry.
and clean your paintbrush.
Once dry (I helped it along with the Heat Tool), I added Frayed Burlap Distress Stain over the entire surface and let it dry again.  It gives a nice color to the white gesso...if you get too much you can blot it off.  Dry with a Heat Tool.
Squeeze out a bit of the new Distress Stain in Brushed Pewter onto a craft sheet.  In person it looks like liquid silver.
I used my finger to rub it on to the board around and on top of all the paper pieces.  Difficult to see in this shot but it adds a silver shimmer to the piece.  Very cool.
 Next I glued music paper (from the same paper stash) to a piece of Grunge Board.  I cut them into separate pieces that fit the heart die I was planning to use.
 Using the Vagabond, I cut 3 hearts using the Alterations Mini Heart set die.  Easy.
Added a word from the Chitchat sticker book, inked the edges with Vintage Photo, then ringed the edge with the tip of the bottle of Brushed Pewter Distress Stain.  I added a bit more of the silver stain with a brush (but just a bit).
I decided to try it out on metal by using a leaf shape from the Idea-ology Foliage set.  I added the Stain and dried it with a Heat Tool.  It worked perfectly.
 Then I sanded it to reveal some of the metal underneath.
Back to the board now.
Adding in some Stampers Anonymous stamps.
My favorite honeycomb stamp because this piece is about being together.
Black Archival ink of course, so it will not fade.
 Now my favorite nature stamp from this set - Nature's Discovery
You can see all the hearts waiting to be glued down.
 
Archival ink in Coffee was used to stamp all along the bottom edge, leaving a space for the hearts to be lined up on the right.  I think I like this stamp so much because it's long so you can move it around using different parts of the stamp.
 
I noticed this stamp in when I was getting out the others and wanted to use it as a sub-text almost.  So I stamped it with the Coffee ink...
 then dabbed it off until it was a very subtle ghost of an image. 
I also stamped it a couple more times in the same fashion on different parts of the board.  You might not even notice it at first, which is exactly what I wanted.  Less distraction from the main 3 words on the hearts.
I added the 3 hearts with Glossy Accents as well as the leaf shape which I used more as a flame...once again reinforcing the words, embrace-everyday-togther (or maybe I was inspired by the Olympics going on in London right now).
 Gotta have a bit of vintage...
 So I added the old pearl over the hole.
 Okay, on to the sides...a little Tissue Tape (Sketchbook) and Distress Markers.
 I covered the edge with the Tissue Tape then colored in one or two butterflies on each side.
Use a water brush to move the ink from the marker around and lighten, then add in another color. 
Once dry, I added a layer of Matte-Medium to secure the tape to the edges of the board.  Remember, Tissue Tape doesn't like to stick to itself (or it would never come off the roll) so you will need glue/matte-medium to secure it to itself or the wood.

 
I really like how this piece turned out.  The metallic stain adds just a bit of subtle sparkle.  I wish the camera could photograph it as I see it.  Very rich with a lot of subtle layers.
click picture to see in full view
The Metallic stains can be used in other ways of course.  The creative genius, Shelly Hickox made a fabulous pop up card here that uses brushed pewter distress stain on the inside to mimic metal.  Be sure to take a look.


So of course, since this is a Test Drive there is a prize...leave us a comment by Wednesday at midnight.  I will post the winners on Thursday. 
a nice Ranger apron, Antiqued bronze, and multi-medium


InLinkz.com


The WINNERS of the Idea-ology messenger bags are:


Blogger SusanK said...
What a wonderful opportunity you have! Enjoy the meetings but keep watch of the sun and heat! That's one amazing promo bag...it would like nice hanging on my left shoulder.
Blogger Blessed Serendipity said...
I would love it to be my bag ;)

Danielle
Blogger Diane D. said...
Can you pack Tim and Mario in the bag?????
Blogger connie said...
Put my name in the hopper...I would love using it!

CONGRATULATIONS winners....please email us your address so we can get them out to you.