It has been too long since I have been here! I hope to be better at posting now that my many deadlines are almost done (only one more huge one to go). Today, I'm happy to be here to talk about Lost Shadow, the new Distress color! It might be subtle, but used correctly, it is the glue that makes other colors work together! So grab a snack and sit back to read how easy it is to create with Lost Shadow!

I used an idea-ology Accordion Folio as my substrate. I set the accordion to the side so I could work on the cover first. I used only two colors of Oxide Spray: Lost Shadow and Kitsch Flamingo.
Oxide Spray:
I began by spraying both colors of Oxide Spray onto the craft sheet + spritzing water into the mix. When the folio is unfolded it is quite long, so I had to do this in stages, adding more Oxide ink to the craft mat when needed. I patted off the excess ink and dried the folio with the heat tool. It didn't look like much when I first started, but don't give up...the next few steps make the difference.
Collage Paper:
The next step is to add Collage Paper (Botanical) to the Folio. I used a water brush to add a line of water around the flower that I wanted. Then just pulled it from the paper. Make sure your flowers/leaves are cut out before you add the glue to the folio.
The only trick with Collage Paper is to make sure there is Collage Medium under the entire area you are adding your Collage Paper to. So Collage Medium, Collage Paper, then more Collage Medium over the top to smooth it out and make it transparent. It's just that easy.

Distress Paint:
Now to add Distress Paint...I laid the folio out flat on the table. I put a new foam on my Blending Tool. Squeezed out a quarter size circle of Lost Shadow Distress Paint, then picked up a SMALL amount of the paint on the foam (too much paint will run under the stencil). Place the stencil over the brighter pink areas and pounce the Blending Tool over the stencil to create the pattern. This was done quickly and very random. Even though the stenciling is random, I ALWAYS keep the stencil level, keeping the pattern the same. In my brain, the stencil pattern was once covering the page and has worn away leaving just bits of pattern showing. I hope that makes since to more than just me!


 Repeat the process with another Snapshot photo. This time a Loop Pin hold two tiny tags off to the side.
 I stamped the entire center accordion with Lost Shadow Distress Oxide then splattered it with Kitsch Flamingo. You will be able to see more of it in the upcoming photos.
 I added more Collage Paper, Snapshots and a few pieces from Field Notes Ephemera pack.


 At the bottom I punched 3 holes with my Crop-a-dile (small hole) and threaded 1/4" ribbon into the holes to secure the bottom of the flap.


 Once undone, just carefully flip the book over to sew the ribbon. I used a piece of blue tape to secure the ribbon in place before I moved to the sewing machine.
 And there you go, the stitching is done, blue tape removed and you are ready to adhere the accordion to the center!

Hope you have enjoyed the making of this Accordion Folio and that you'll give it a go. There are SO MANY options, from simple to complex when using the Accordion Folio as the base structure. The heavy Mixed Media Paper is perfect for inks and sprays, yet it works for adding paper too. I can't wait to start my next one!
now cary on,
paula


LEFT POCKET
You can see that the inside of the folio was covered in paper from the Backdrops 1 pack. This grey pattern was perfect to go with Lost Shadow and Kitsch Flamingo.
I used foam tape to secure the pocket to the folio. The foam tape gave a bit more room at the bottom for the two thick cards to slip in.

INSERTS
The photos I used came from the Snapshots pack. I used the Tonic Deckle Trimmer to cut around each photo, leaving a white edge. It might seem like I used my Blending Tool to add the brown ink, but in reality, I smooshed Gathered Twigs onto the glass mat and spritzed it with water, creating a puddle of watery ink. Because Snapshots are coated cardstock, you can simply press the Snapshot into the ink and then dry it with a heat tool. This is a trick I use every time I craft because it works with anything coated: Paper Dolls, Clipping Stickers and any Layers Ephemera.
The base of the card is 1/2 of a Mini File Folder (I just cut up one of the small file folders to get two cards and rounded the corners). The ink trick works here too because again, the cards are a coated cardstock.
The tiny tags are all cut using Tim Holtz/Sizzix "Collector".

There is a transparency covering the Snapshot where I hid a phrase from the Clippings Sticker Book.


CENTER FOLD-OUT

The front has a pocket for a small Snapshot. I just sewed the ephemera to the front panel to make the pocket.


The last section has a Snapshot, Collage Paper and a Stencil Card.

I put the Collage Paper right over the top of the Snapshot and the Stencil Card. It works under and over!
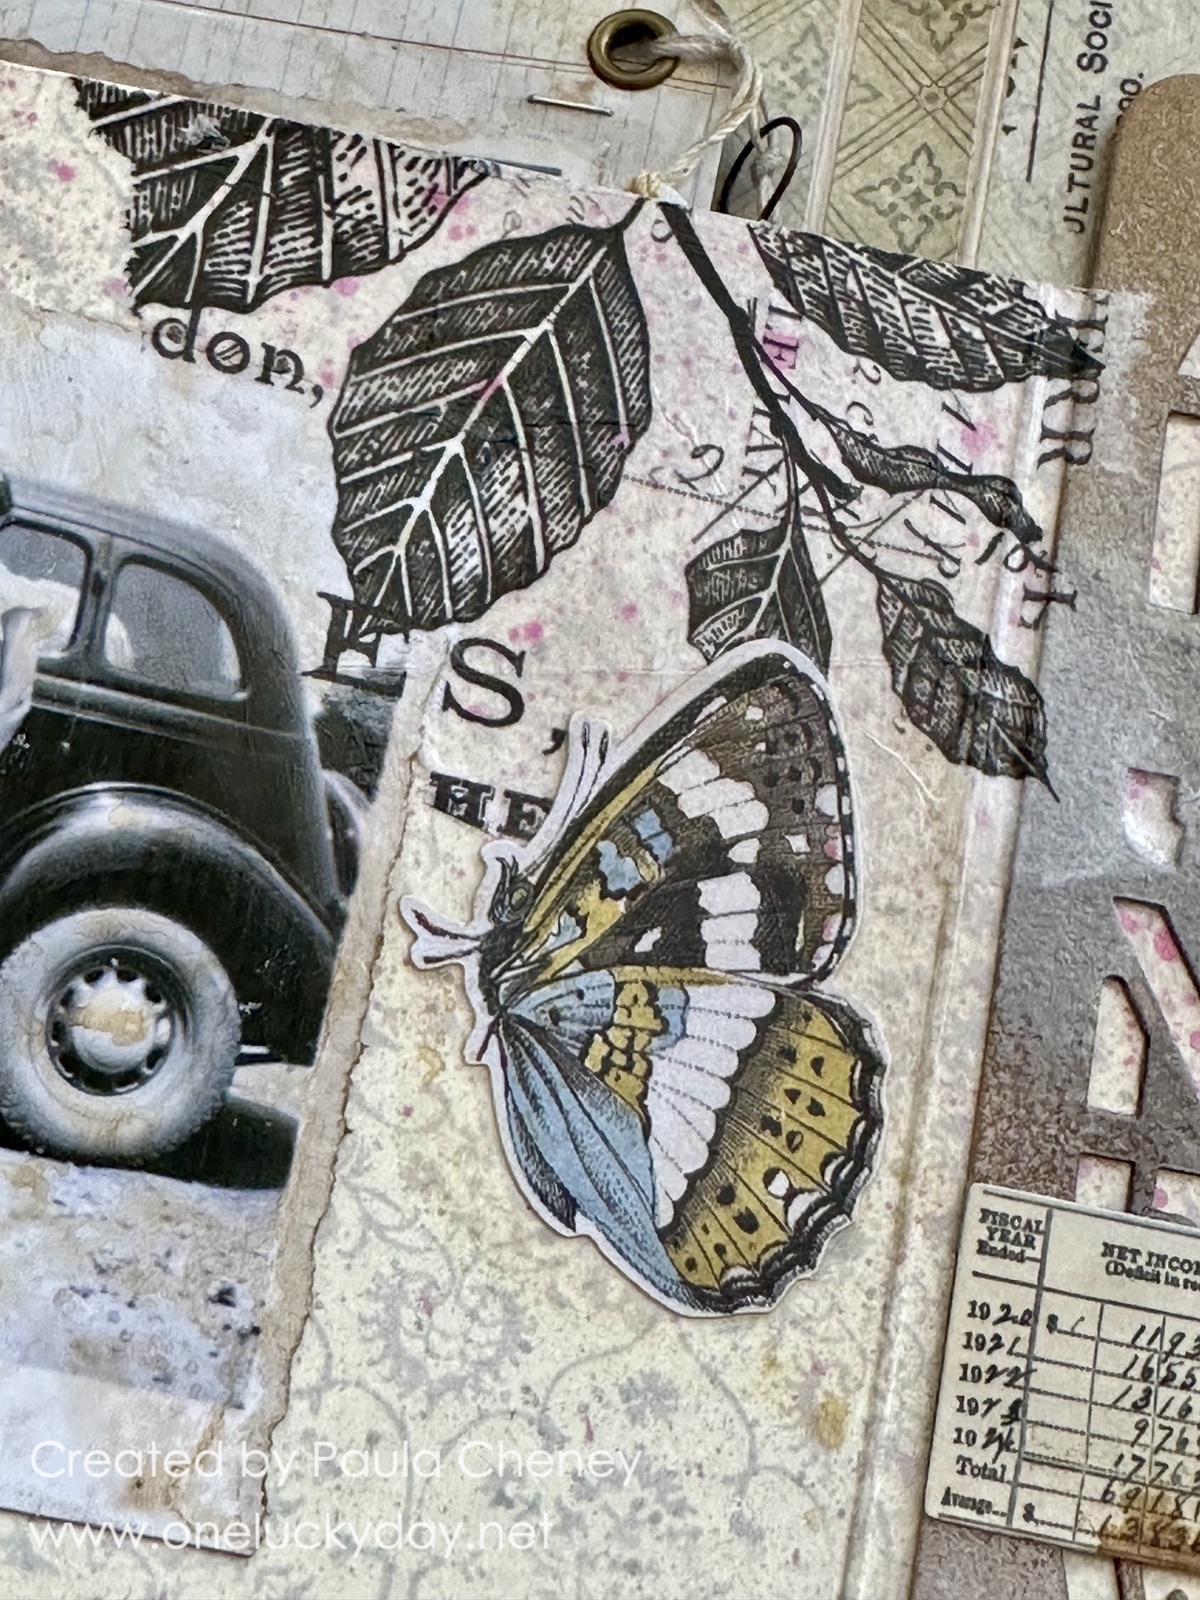
The Stencil card was Sprayed with Lost Shadow Oxide Spray. I dried it a bit then sprinkled Embossing Glaze over the damp Oxide Spray. I heated it with the embossing gun and it melted right away, no Embossing ink needed. This photo does not do it justice.

I kept the backside of accordion very clean. Just Snapshots, ephemera and Collage Paper.


RIGHT POCKET
The flap/pocket on the right can be left open or closed. I did both really. At the top, I added a Tiny Clip that will need to be removed to access the cards.


INSERTS
I managed to fit three inserts into the flap/pocket. Two started as watercolor paper with Lost Shadow Distress ink. I just added embellishments like photobooth, black floral paper from Backdrops 1, ephemera from both Memoir and Field Notes and Clippings. The last item is a large Flashcard that says, Happy. I just added the Clipping Sticker and sewed around it a few times.

Once the inserts are tucked inside the flap, you can close the folder. I love how that Kitsch Flamingo looks under the Distress Paint pattern.

I wrapped a double length of ribbon around the book and tied a bow so I could figure out where it should be sewn to the book.


Add accordion to the book with Collage Medium or Scor-Tape and the Folio is complete.
now cary on,
paula