I'm back with another Wonderland project that I created for the fabric YouTube Live. It was an idea that just came to me and I had to give it a go! It takes a bit of math to work it out, but it really was easy once I figured out the size of everything. I'll try my best to walk you though the steps and hopefully it will make sense to you.

- I always sew with a 1/2" seam, so all seams are based on that measurement.
- Each pocket is 2 x 2" when finished. Choose a tag that will fit (#2) or resize to fit the tag you are using. You really can just use the basic concept/idea and make it any size you wish.
- Pockets could be made larger if you want to add candy or toys.
- You could also make the calendar without the cotton batting if you want something lighter weight.
I cut two pieces of "Tidings Type", 13 1/2 x 24" (you'll need 2/3 yard).
I cut SIX different strips of Wonderland fabric, each 3" x 44".
I went to the sewing machine and stitched the strips together, using 1/2" seam allowance. Iron all seams flat. You will only use about 2/3 of this piece, but it also gives you options when it comes to pattern (this will make sense in just a few more steps).
NOTE: it is important that any directional fabric (like the red text) run horizontal at this stage.
STEP 4: cut strips
STEP 4: cut strips
Using a rotary cutter, cut five 3" strips of the pieced fabric. I cut a couple extra to be able to have a choice of fabric, since the collaged fabric (called "25th") has a different motif in every strip.
If you are following along, you know there are 6 patterns in each strip, but the calendar only needs 5 pockets per strip...so why did I make you sew 6? Because I did not want all the strips to be exactly the same as they run down the calendar. So this is where you get to choose which square to remove from each end. Yes, you are going to need a seam ripper.
STEP 5: pattern
Here are the 5 "pocket strips". Right now I do not care how far apart they are, I'm only looking at the patterns.
Row 1 and 5 are the same, but one is turned around (that why the red directional fabric needs to run up and down - so it can be flipped over and still be "right"). Then I just removed the square that is hanging off.
Row 2 and 3 are the same, but again, one is turned around and one square is removed.
Row 4 - I removed the holly on the right end and replaced it with a collage fabric that I had removed from one of the other strips (just because I wanted to be difficult, lol!).
STEP 6:
Go back to the ironing board to iron 1/2" hem on each pocket strip. This is the top hem of the pocket. You could sew this down but I did not. Make sure you do this one at a time so they go back into the same order.
STEP 7:Now back to the front fabric to lay out the pockets, hem side up.
NOTE: Can you see my mistake in the photo? in row 4 (third row down from the top), I ironed the hem on the wrong side, so when I added the pocket strip to the backing, it was upside down. I know that because the red square is out of place! Of course I did not figure that out till I had sew it on, so I just picked out the seam, re-ironed it on the correct side and sewed it into place again.
Using your clear fabric ruler, make a line with a fabric marker for the 1/2" seam. This was nice to have something to follow.
Make another line on the backing fabric, to the left of the strip edge (this will help to space out the pocket strips as you add them to the back).
Should look like this...
You can double check to see if you have a 2" pocket.
STEP 9:
Should look like this...
You can double check to see if you have a 2" pocket.
STEP 9:
Then go to your sewing machine and stitch on the 1/2" blue line.
There are 3 1/2" between the blue lines. You could make the marks for all pocket strips using this measurement.STEP11:
There are 3 1/2" between the blue lines. You could make the marks for all pocket strips using this measurement.STEP11:
Fold the pocket strip forward and iron flat.
I did add a pin or two to keep it in place while I sewed the other strips.
Add a second strip above the last on the 3 1/2" blue line, then repeat the steps of marking, pinning, sewing, ironing and pinning to secure...repeated 4 more times.STEP 13:
Now that you are done adding all the pocket strips, go back to the iron and iron flat once again.
STEP 15:
STEP 15:
Go back to the machine and stitch between each pocket. This time you will need to backstitch at the top of each pocket.STEP 16:
Add the cotton batting and backing.I chose to use a temporary adhesive between the top and the cotton batting to keep everything in place as I sew the top to the bottom. Totally optional.
I also pinned everything together before going back to the machine.
STEP 18:
I also pinned everything together before going back to the machine.
STEP 18:
I sewed right under each pocket strip to bind the layers together.
This is what it looks like so far! Each pocket will be 2 x 2" except for the ones on the edges, they will still be 2 x 2 1/2" because we still have to add the binding.
This is what it looks like so far! Each pocket will be 2 x 2" except for the ones on the edges, they will still be 2 x 2 1/2" because we still have to add the binding.
BINDING
You can go online to see how to make binding (lots of people on YouTube can show you how). I made very simple binding using 2 1/4" strips of "Leaf Medallion" fabric. The fabric is only 44" long (at most) so you will have to combine strips at least 2 strips to go around the calendar. Cut two, 2 1/4 x 44" strips.
Sew a diagonal line where the two strips com together.
Cut the diagonal line.
Then open and press flat.
Cut the diagonal line.
Then open and press flat.
For more information on binding anything, I will direct you to YouTube. It is best to watch someone actually sew the binding (or at least that is what helped me). I practiced a couple times on a scrap piece until I got the concept and then went to the real thing. Here is an short video to watch or just type in "how to bind a quilt.
TAGS
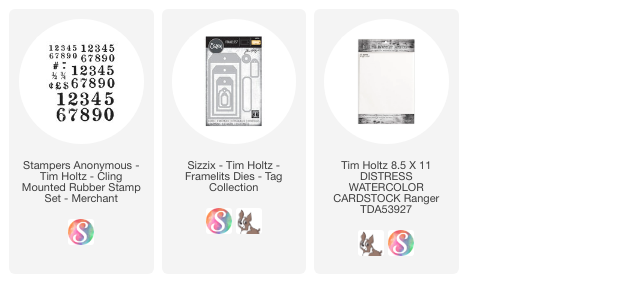
As for the tags that go in the pockets - I cut mine using Watercolor Cardstock and the Sizzix Tag Collection die because I did not want a hole at the top of the tag. If you must purchase manilla tags, you will need a #2 tag (3 1/4" x 1 5/8").
The number stamps are from Stampers Anonymous, called Merchant. One of most used stamp sets because it is timeless.
OPTIONAL:I also added a pocket on the back of the wall hanging for the tag numbers when not in use.
Well, I hope this epic blog post is helpful in making your own countdown calendar. It was a fun process to figure out the pattern and it really is doable for anyone with a ruler and a sewing machine. I added some small metal hangers on the back (Walmart) for hanging but you could clip it or pin it up too.
and
If you missed the live, you can always go back to watch a replay.
If you do watch the replay, Tim shows the Countdown Calendar at the 29 minute mark.


