Thursday, November 30, 2023

Holiday Advent Calendar

Hello Friends,

I was wondering through Target about a week ago and spotted this wood Advent calendar in the Dollar Spot (for $5 of course). I loved the wood tags with the big numbers so I decided to grab it and see what I could do to transform it into my vintage style. 

I started with the house.  
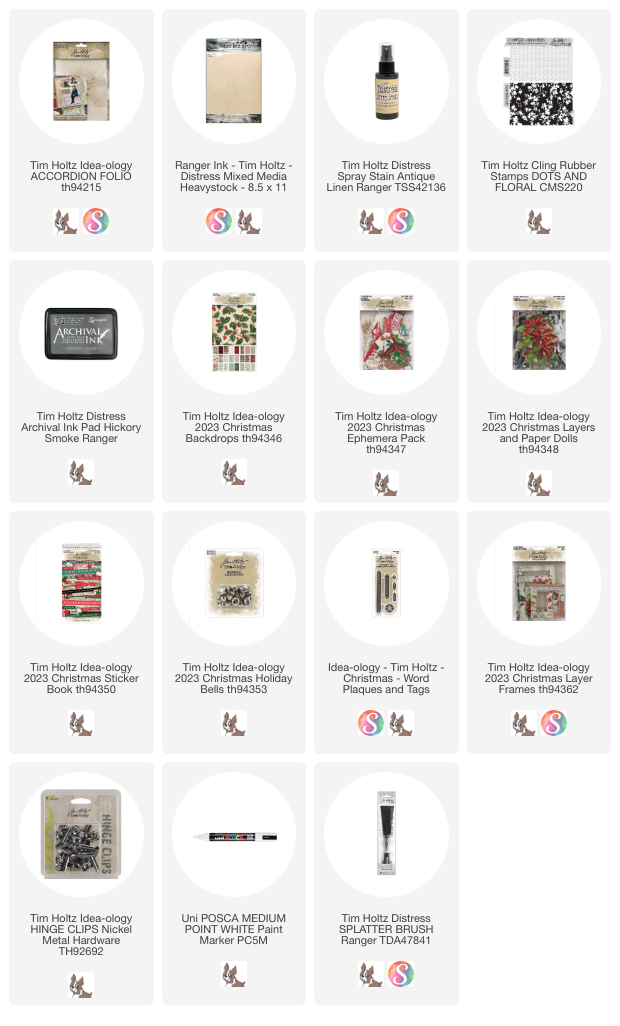
Our Christmas Backdrops paper has a brick wall image that will be perfect for the chimney.  I used my Tonic Precision Trimmer to cut the paper. I love how smooth it is and the fact that the "arm" has a spring-lift, so it is always at the ready to accept the paper. No more flipping the arm up and down like my old trimmer.
Add the paper to the chimney with Collage Medium.
Cut more patterned paper for the body of the house.
I decided that it would be easier to punch a hole in a small piece of paper (the hole is for the hook) and add it to the house individually rather than trying to match up a larger piece of paper. 
See what I mean? I only had to guess at where the hole should be and shimmy the paper to fit, then cut away the excess that hung over the edges.  From here, I can build around these two squares.
You might notice that I also painted the eaves black and added paper to the roof line. Painting it black helped to disguise any bad cuts along that diagonal edge.
Here it is with all the paper filled in.  As you can see, any configuration will work! I added a layer of Collage Medium over the paper to seal.
NOTE: If I was using another substrate, I would have drilled the holes, added the paper and then added each hook.  That would be easier than navigating the hooks.
Once the Collage Medium was dry, then add Distress Crayon over the seams to give the paper more depth.
I wanted to use one of the Festive Marquee word strips but I wanted it raised from the house.  I thought Etcetera Trims would work to do just that! I use the Sizzix Decorative Trims die to cut 2 matching shapes from red plaid paper then added them to the Scallop Trims with Collage Medium (the bottom two pieces in this photo)
I added the two pieces to the House with Collage Medium.
The connection point will not show too much in the end.
I also added pieces from the Christmas Layers Pack to the front of the house.
I decided I wanted a solid background behind the Festive Marquee so I painted another piece of trim (this is the narrower version of the scallop I used earlier) and added it right above the previous trim.
So now to paint the Festive Marquee.  I painted both phrases just to see which one I liked better for this project.  The red is Candied Apple and the green is Rustic Wilderness Distress Paint.  It really does not take long to dry (especially if you are impatient and use a heat tool).  Once it was dry, I rubbed the paint with steel wool to get the perfect aged appearance.
I decided on the green but both worked really well with the patterned paper. I used Collage Medium to add the Festive Marquee, leaving it to dry for about an hour while I cleaned up my work table.
Adding a splatter of white paint over the house really made the colors pop and of course, looked like snow!
While I waited for the paint to dry, I painted 2 holly leaves and 1 poinsettia (Christmas Adornments pack) to add to the Trim piece. I LOVE this holly!
On the left side, I added the poinsettia, then chose to add paper holly from the Christmas Layers pack...leaving them to dry while I worked on the numbers.
The package came with these wood tags. Just for reference, they are about 2 1/8 x 5" long.
I decided to stamp on the wood, but was unsure if the ink would bleed, since some wood is very porous (especially cheap wood).  I knew I could seal the wood with Collage Medium to counteract any bleeding, but this would force me to use StazOn Ink over the sealed surface. Not a problem at all, as I have StazOn in my stash for stamping on transparencies. 
So I gathered the supplies I needed for the task, using StazOn ink in Blazing Red.
It worked perfectly! The wood tags fit under the large background stamp!
The polka dots look so good!
The last thing I did was to add Grit Paste Snowfall to the Adornments and Festive Marquee. Super easy to just wipe it on with your fingertip, then just leave to dry.


I kist love how it turned out!  Thank you Target for a fun substrate to decorate for the holiday season!
On a side note...if you wanted to make your own numbered tags, I would suggest the CMS161 Numeric stamp set for the numbers. The numbers on that set measure 3 1/4" tall.  Taller than the Target numbers, but they would still fit on a wood tag of this size.

And...after a quick search on Amazon, I can see there are lots of wood tags available.  Here is a link to one that is the same size as the Target tags (2 1/8 x 5"). I am sure there are plenty of the tags to choose from in the size you would need depending on your substrate.  I would also venture to bet that your local craft store might have some too! 
 
Now carry on...
paula

Friday, November 17, 2023

Christmas Folio with Journal

Hello Friends,

Today I am sharing the Christmas Folio I created for the idea-ology Live. I absolutely love how the Folio came out.  I love the cover with the subtle Christmas theme, the elastic band that wraps around to keep it closed (just plain old black elastic from Joann) and the sweet little words of cheer!
The Folio was covered in Christmas Backdrops paper. I just picked patterns I liked.  The red label under the black strip of words is from the Ephemera pack.
PLEASE NOTE: the inside of the Folio is shown at the end of this post.

There is a journal inside the Folio that I created from Mixed Media Heavystock.  All easy cuts and easy to put together.  Let me show you how I did it.
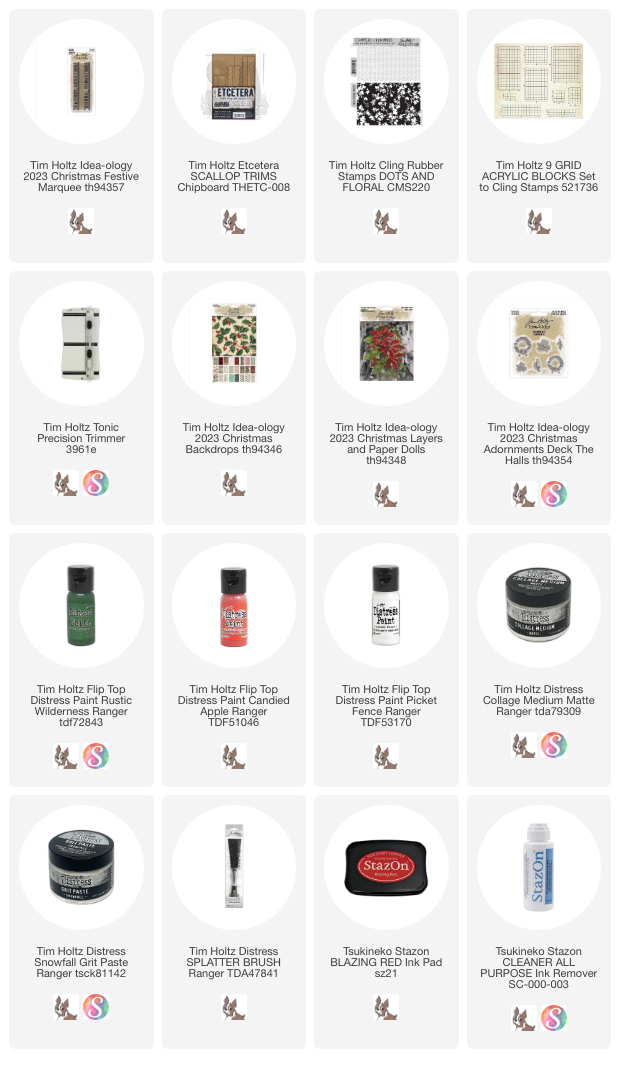
Cut 4 pieces of Mixed Media Heavystock 8 1/2 x 5 1/2".  Spray with Antique Linen Distress Spray Stain then quickly wipe across the ink with a paper towel so you get a more even finifh, instead of a "sprayed" look. Repeat on back of paper (drying with a heat tool in between).
Cut one more piece 8 1/2 x 5 1/2, then cut across the center making two pieces 8 1/2 x 2 3/4".  Repeat the process of inking the paper.
Use Archival Hickory Smoke and the polka dot stamp (CMS 220 Dots & Floral) to create a random Background (no block was used).
TIP: Once I ink the stamp, I use a wet wipe to wipe away ink on the edge of the stamp.  This gets me a more random looking edger, rather than a hard stop of the polk dots.
Repeat on the half sheets.
So in total, you have 4 large pages 

I used these pages to create the book, added pieces from the Christmas 2023 Layers and Paper Dolls pack.  This pack is exceptional!! You really can make a book with just this pack!  Admittedly, I did add a few small pieces from the Ephemera pack, just because I had it.


COVER
This was actually the last page I decorated. What I like so much about this page is the color of her dress.  I was colored with the Distress Crayon Uncharted Mariner.
Page 1 - You might notice that I sewed the 1/2 page to one of the full pages.
Layer Frame over Ephemera. Remember, Layer Frames are already stitched so it makes it look like you stitched when in reality, you just pulled it out of the bag.
PAGE 1 AND 2
You might notice that I used white paint and a Splatter Brush on each of the pages.  I love how the white paint makes the dark colored paper and Layers pop!
With the 1/2 page open
The right side of the 1/2 page was stitched down to create a pocket.  
The card in the pocket came with the Layers Pack as did the Portrait figure. I just dress him up with some holly.  I left a place at the bottom of the card to add a message.
PAGE 2 AND 3
This is an important because it shows how the first set of pages are connected to the second set. I jsut added wide Design Tape to connect the pages, then add patterned paper over the top.  The patterned paper has been stitched around the edge (totally optional) BEFORE I glued them to the page. I used Scor-tape to add the stitched paper to the substrate.
Ephemera and Layers + words from the Sticker Book 2023.
PAGE 4 AND 5
The Layers piece with the bells on the left is a flap.
I added The large, red "sparkling icicles" layers piece to the left side of page 4. I only used Scor-tape on the edges, so it could become a pocket for a card I cut 4 3/4 x 3" (then covered in woodgrain Backdrop paper). The card slips in behind the man as his left side/leg is ONLY glued to the red card, not the opening.
I added paper to the back of the bells card, then used a piece of patterned Paper (holly strip) as a hinge. That hinge bridged the gap between the red card and the bells card.
The man was added last. I used Aged Mahogany on his plaid vest and pants then added white polka dots to his coat with a white paint pen. He's so festive!

On the other side, I just added brick (Backdrops paper) behind a frame from the Layers pack.  I colored the dress with Distress Crayons, first coloring it with Rustic Wilderness, then going back with a Detail Water Brush and removing some of the green, so the plaid in her dress would show up better.
PAGE 6 AND 7
This is another flap page. Adding flaps are easy, you just have to think ahead!  
First I added the green ticking stipe to the page. Then a patchwork of patterned paper was added to the back of the "Christmas Greeting" Card. I cut the polka dot piece wider than needed so I could attach it to the top of page 6. 
Once it was secure, I added the card with the Santa in the sleigh, to bridge the gap between the green strip and the polka dot paper strip hinge.
PAGE 7
This one is an easy one. The only thing different is that I colored her suit with Chipped Sapphire and added some details with other colors.
PAGE 8 AND 9
These two pages have the second 1/2 page sewn in the crease like page 1 & 2.  I created another pocket on the left, the exact same way as the first one, by stitching it closed.  I added a frame from the Ephemera pack with plaid Backdrop paper in the center.  Words from the sticker book and holly from the layers pack.
Inside the pocket is one of the Santa's from the Layers pack and a big tag from the Ephemera Pack.  I added the green words from the Sicker Book.
On the right side there is the other half of the 1/2 sheet page. It's hard to tell from this photo but the girls (after coloring them) were added to the 1/2 sheet page. Their heads stick up beyond the page so they look like they are part of the winer scene.  I added the girls with thin foam squares so they are raised from the page just slightly.
When the page flips over, it opens to the winter scene and a December calendar.
I added some ribbon to the Special Delivery tag, then stitched it down so it stayed in place. I did this stitching BEFORE I added the girls to the other side.

This is the back.  You can clearly see that I added the piece of patterned paper to the spine to hold it all together. The paper is only glued to the front and back covers.
The book should fit into the folio, right in the center.

I had a pack of Christmas Baseboard and this green door was calling to me!  I cut the door right down the middle to create two sides. The left side of the door is glued to the Folio. The right side is glued to the closed flap. A small hinge clip holds the door closed until you are ready to open it.
To reveal a lady behind the door (dress colored with Aged Mahogany) and her little friend that has come for a visit.
I also created a sweet Christmas message using the Clipping Stickers from the Sticker Book.
Everything about this book makes me happy.  I am glad to have been able to share it with you!

Now carry on,
paula