Friday, April 17, 2020

Wishful Thinking

Hello friends,

I posted a photo a day ago stating that my ode to Collage Paper was still going on!  Well it has been a fun week in studio creating with it (I'm not sure I'm done yet), making another Collage piece with a grungy background.  Follow along and I'll show you the steps.
(click on picture to enlarge)
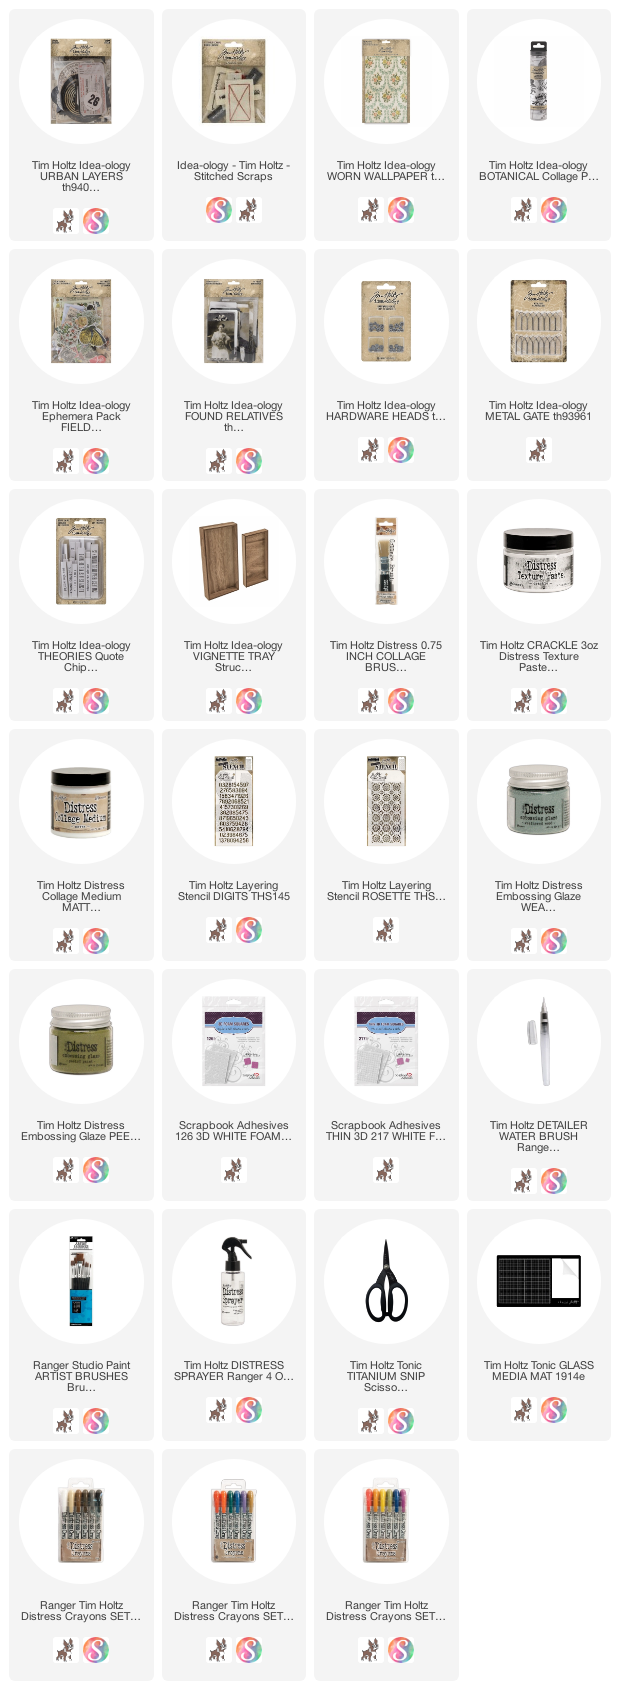
I'm starting with a large Vignette Tray (6 x 12") that I have turned over to use the back side.  I used Collage Medium to adhere pieces of Worn Wallpaper to the surface then added a layer over Collage Medium over the top to seal (do not skip this step).  Let dry.
Today I'm using Botanical Collage Paper for the big flowers.  I used a Detailer Water Brush to draw a line of water around the flower that I wanted.  The paper easily pulls apart along the water line.
First, add Collage Medium to the surface where the flower will go, then lay the flower directly into the glue.  It is very important that there is CM under all areas before you start the top layer of glue.  Collage Paper is porous but it will never become as translucent as it could be unless there is glue underneath.
For the top layer of Collage Medium, working quickly, start from the center and work your way out to the edges of the paper until it is secured to the surface.  This is the best way to avoid wrinkles.
You can LIGHTLY rub the Collage Paper into the surface IF there are any white areas. You need to be very careful not to tear the Collage Paper as it will be at its weakest stage until the CM dries.  I find it helps if you make sure you have a bit of glue on your fingertips so they do not stick to the surface.  If they stick, you can rip the paper.  We all know Collage Medium is very fast drying when it comes to paper to paper contact, so this step must be done right away or not at all.
You can see in the next two pictures how translucent the Collage Paper has become over the patterned Worn Wallpaper.  Having a patterned paper background, even if it is subtle, can make all the difference in the final outcome.

Once the Collage Paper is dry, lay a stencil (Rosette) over random parts of the surface to add more pattern.  I'm using Crackle Texture Paste to add more visual texture.  Much of the center will be covered with a collage so I'll concentrate on the edges.
I'm using the tray horizontally so now I'll add a few numbers here and there using the Digits Layering Stencil.
The Texture Paste dries pretty quickly, about 30-40 minutes is usually good where I live in CA.  Drying time will range depending on where you live.
Once dry, I scribbled Walnut Stain Distress Crayon on my glass mat then picked it up with a damp paintbrush to color over the paste.  I also scribbled directly over the edges that did not have paste.
The last thing I always do when using Crayons is pounce over the surface with a wet wipe.  This takes away the brush strokes and gets rid any super dark areas.
This is the finished left side of the tray.

For the next step you will need a few colors of Distress Crayons to color the flowers (I'm using Seedless Preserves and Fossilized Amber).  Scribble a bit of color onto each petal as shown.
Then take a small brush (damp) and blend the colors together, still keeping it sheer enough to see the patterned paper underneath.
I chose Peeled Paint and Pine Needles to color the leaves in the same manner.  Your colors will fade slightly (or maybe I should say become more mellow) as the crayon dries.
I used a cotton swab to color the berries.
Now that the flowers are done, I'm turning my attention to a simple collage for the center of the tray. I need a focal point and I have chosen one of my favorite Found Relatives.  I cut away the card background using scissors and a cutting knife (between the arms and the body).  I love this lady because of the hat and flowers! So, so fun to color with the Distress Crayons and the Detailer Water Brush.
dress: faded jeans, peeled paint
flowers: aged mahogany, worn lipstick, peeled paint
buttons: peeled paint
hat: brushed corduroy 


Now to choose some Distress Embossing Glaze.  I made a swatch book so I can easily see what color would look best.
I thought this would be the perfect phrase to use during this time of social distancing and self-quarantine.  As for the glaze, I used the Distress Embossing Dauber to quickly rub across the surface of the Quote Chip then poured the glaze particles over the top.  Melted as usual with an embossing gun, you get this great pebbly texture over the surface.
Adding the brown from the Distress Crayon fills in the gaps in the glaze. The black dot on the end is just my mark to add a Hardware Head later on.
This card is from the Urban Layers pack. I stamped an image from Faded Type (CMS397) with Embossing ink, then added Peeled Paint Glaze over the image and repeating the embossing technique.
So here are all the the pieces I think I might use in the collage:
Found Relative
Butterfly and Private Collection - field notes ephemera
Transparency slide - vintage
2 hour time limit - Urban Layers
Buttons - vintage
Quote Chip
Lined card - Urban Layers
Metal Gate - painted white then Alcohol inked with Mushroom
green threads
Start the bottom layer by adhering the Metal Gate and the ephemera.  The 2 hour time limit has been added with thin Foam Squares - as you know, I like Scrapbook Adhesive brand.
I added the lady with double stacks of regular Foam Squares so she is higher than the 2 hour time limit.  I also decided to add the tiny key around her wrist.  Kinda like she has the key to get out of the gate but she can't leave (her face says it).
Now add the Transparency slide (because her face is saying it all - very transparent - like I'm waiting to leave!), buttons, Quote Chip, Stitched Scrap and the green string.
Here are some close up shots of the collage elements.  You might notice I ended up coloring the transparency slide - it was just too white and stuck out like a sore thumb.
I added the Hardware Head to the end of the Quote Chip and the Stitched Scrap (so easy to use)...take out of bag, glue on project, done (no sewing involved).
And of course, a little Clippings Sticker sarcasm underneath.

(click on photo to enlarge)
The Collage Paper Flowers become part of the entire collage even though they are in the background.


This is an absolutely doable project for any level.  The Collage Paper/Crackle Paste background is what makes the simple collage work.  The background technique could be used on a myriad of different projects and with so many variations...skys the limit really.

Tim had a Facebook Live last Saturday where he talked about and demoed Collage Paper.  If you missed it, you can catch the replay HERE.

Have a great weekend .  I'll be "staying home together".
now carry on,
paula

Tuesday, April 14, 2020

Something Good is about to Happen

Hello friends,

Hope you all had a wonderful Easter weekend.  Ours was peaceful and even included a drive up the coast because the weather was so beautiful and the hills were so green from all the rain last week.  One thing about the mountains and the ocean, you can still enjoy the beauty just driving by.

I didn't have a specific idea for a project to work on so I chose to prep a few different substrates and see if any ideas flowed from there.  I ended up painting a Vignette Tray, two flat canvas panels and one thick canvas panel, which is the one I used for today project.   I had all the substrates in my art room, which made them not only easily accessible, but also a fun way to challenge myself.

I didn't take many step-out photos since this is more of a "gut instinct" project (meaning you work quickly without thinking too much) but I have a few just so you can get the basic progression.  Follow along and I'll show you what I did...
The wood frame stretched canvas is 8 x 10 x 1 3/8".  I used Collage Medium to adhere vintage paper to the surface and then added coat over the top to seal.  You can see that there are a few bubbles and creases but you will never see them in the end so don't worry about that.  Vintage paper is usually thin and can be very unforgiving compared to using todays patterned paper, but it's absolutely worth it to create the perfect base.
I added a postcard from the Layers Remnants pack.  I picked this one because I thought it looked so peaceful and I love the color green against the vintage paper.
So here is a big jump!  Let me explain what I did:
1.  I cut random sized strips of patterned paper with my rotary cutter then used Collage Medium to adhere them to the surface, criss-crossing on the left side.
2. I cut out the girl from a Photobooth picture and glued her into place.  The small flower is from the Layers Botanical pack.
3. One everything was dry, I scribbled Walnut Stain Distress Crayon over the surface and rubbed it in with a damp finger, making sure I built it up at seam lines and corners.
4. With a 1/2" paint brush I brushed on some Tumbled Glass Distress Paint.  The Distress Paint is thin compared to acrylic, so it lets the vintage paper shows through.  Don't think about the paint too much.  Just paint it on to balance the surface space and let the paint dry.
5. I wanted to add black circles but I was not sure what to use...I had just thrown away an empty jar of Collage Medium so I dug it out of the garbage and used the lid as a stamp tool.  I just spread the black paint on my glass mat and pressed the lid into the paint and onto the canvas.
6. A few phrases from the new Clipping Sticker book (seriously where would I be without it?) we're chosen.  I found enough to go together that I decided to separate them into two word blocks.  Remember to adhere the strips close together so they read like poetry.  I painted Collage Medium over the stickers to secure to the canvas.
When I was painting with the Tumbled Glass Distress paint I had some leftover on the small brush.  This allowed me to paint around the girl and make her stand away from the surface of the postcard.  Almost like her shadow behind her.  I did use a Detailer Water Brush to tint the girl with Distress Crayons.
Cheeks: Aged Mahogany (remember...tap, tap, tap for cheeks)
Scarf: Mustard Seed and Aged Mahogany
Coat: Walnut Stain
Now to balance out some of the empty spaces...I added the butterfly and the flower dictionary cutout, both from the same Field Notes Ephemera pack.  A layer of Collage Medium was added over the top of each so I could use Crayon to color (as in the case of the dictionary flower).
Large numbers from Typeset Collage Paper were added.  I used the Detailer Water brush to cut away numbers from the roll then used Collage Medium to add them to the surface.  You will see in the final piece that I ended up adding more numbers at the top and to the right.  I love that with the right application, Collage Paper becomes translucent over the printed background (that is key).  Such a great product no matter the pattern.
Peeled Paint and Walnut Stain Distress Crayon was rubbed onto the Tumbled Glass paint.  This really added depth to the circles.
White marks were added with a Posca pen.  Once dry, I sanded over the marks with steel wool and rubbed more crayon over the top.

And that does it.
I love the additions of the Collage Paper numbers, the Peeled Paint crayon over the blue paint and the Posca pen marks.  This was a fun project to create in a short time.  I think creating the canvas with the vintage paper one day and making the collage the next was key for me.  Somehow walking to the art room with a substrate ready to go made everything seem easier and more fluid.  Now to make something with the three other substrates!
Oh, and by the way...did you notice that all the creases and bubbles in the vintage paper have disappeared?

Thanks for stopping by,
Now carry on,
paula

Tuesday, April 7, 2020

Destination Divided Box

Hello friends,

Today I am sharing a project I made for Creativation.  This was one of my favorite makes from the show and I toyed with teaching it as a class this spring...well as we all know flying somewhere to teach or even being in a group is out of the question so I've decided to share it here instead.
I started with a Divided Box, one of my favorite substrates because it is adaptable for so many projects.  I drilled a hole in the back of the center section for the Tiny Lights that illuminate the center section of the box (you could use an awl if you don't have a drill).
I painted the front edges as well as the inside of the top and bottom compartments with Weathered Wood Distress Paint.  After I waited for the paint to dry, I used Collage Medium to add layers of Worn Wallpaper to the sides of the box, overlapping as needed.  No rhyme or reason to the layering, I just used the paper I liked.  Once the Worn Wallpaper was added to the box,  I added a coat of Collage Medium over the top to seal the paper.  Do not skip this step because the Crayon needs a slick surface to work effectively and the Collage Medium will provide that.
Once the surface was dry I added Texture Paste Crackle to some of the edged of the box.  NOTE: Be sure NOT to add the paste to the center area because the Velum Scene will be glued directly to the center section.
Once the Texture Paste Crackle is dry, you can begin to add the Walnut Stain Distress Crayon over the surface.  Use as much or as little as you want.  I scribble it on and then use my finger to rub the crayon over the surface.  A small damp paint brush can be helpful to get it into the Texture Paste.  And I ALWAYS have a wet wipe near by to pounce over the surface to remove the excess.  
I threaded the Tiny Lights from the back of the tray to the front (so the on/off switch is on the outside of the box).  From there I wound them around in a circle and used scotch tape to adhere them to the back of the tray. NOTE:  I completed the rest of the box before adding the Velum Scene to the center section so I wouldn't get glue on it!  
Inside the top compartment are large wood numbers from the new Number Blocks pack.  I painted each of the three numbers a different color, then sanded them back once the paint was dry.  They are thick enough to stand up by themselves which makes them easy to stack.  The photo comes from Photobooth and the tiny name comes from the new Clippings sticker book (it now contains not only new sayings but many names).  Of course the popular Tiny Clip is holding the name in place.  The Mushrooms are from the Field Notes Ephemera (as well as the Specimen tag on the Finial).
I painted the Finial with Weathered Wood Paint and added the Texture paste just as I did on the box itself.
You may not even notice the tiny crown (from Adornments Treasures) in front of the photo.  I love that little crown and it just seemed to go there.  I've added more ephemera from Field Notes onto the background as well as the cute bird button from the Vintage Flair Pack (one of my favorite new products).
On the bottom right compartment I created a little garden scene.  First, Worn Wallpaper in the background with added Ephemera.  The bingo card is from Junk Drawer, which is a Baseboard product, meaning it is thick board that won't bend.  The butterfly from Field Notes was the perfect addition to the center.  I used bingo chips on the back to pop it out from the back of the box.
The Metal Gate was added after painting, adding Alcohol Ink and then bending until it broke into two pieces (it sounds hard but it's not).  I scribbled a bit of Walnut Stain Distress Crayon onto my mat and picked it up with a damp paint brush.  I used the brush to add the crayon over the Heirloom Florals as well as the inside corners of the box.  It ages the Worn Wallpaper and the Weathered Wood paint to marry the two together.  I had a stick on my desk so I broke off a small piece.  After gluing the fence into the box, I added the tiny piece to the one end as if it was the garden gate.  It was only AFTER I did this that I went looking for a Clipping Sticker to use under the butterfly.  I think what I found could not be more perfect for the scene...
On the bottom left I used an awl to create two holes for yet another stick.  You could absolute use a drill here but I just didn't want to walk out to the garage again.  I know...stubborn.
I created a bunch of embellishments with some random idea-ology pieces from my stash, a bit of chain and some jump rings. Idea-ology jump rings come in two sizes.  I used the larger size to go through the chain then slide down the twig.  
Here is the list of charms used (left to right):
key - Locket Keys
clover - Adornments Treasures
no.247 - Story Sticks
glass bottle - Tiny Vials
letter G - Type Chips
bird - Adornments Treasures
pen nib - Pen Nib
heart - Adornments Treasures
spoon - Adornments Silverware
stylized cross - Milagros
hand of friendship - Milagros
*all words from Clipping Sticker book
I used a bone folder to add the Remnant Rub to the Vellum Scene. It was only then that I added Collage Medium around the center compartment to adhere it to the box.  Three sizes of scenes come in the pack, this being the largest size of the group.  Each scene is different with both horizontal and vertical choices.
Well, I hope you were able to get the gist of this piece.  It's not hard to make, just very detailed so give yourself time if you try it.  I looks so cool when the light is on during the evening.
Thanks for stopping by!
Now carry on,
paula

Friday, April 3, 2020

Alcohol Ink Easter Tag

Hello Friends!

With Easter approaching I wanted to create something special for the occasion.  I used an idea from a project I did back in December but this time I used the new Alcohol Ink Alloys. What a difference that made!  Let me show you what I did...
Lets start with the substrate - Today I'm using a Mini Etcetera Tag.  I've used Collage Medium to cover the tag with paper from Abandoned, then sanded the edges to remove excess paper.  You'll notice that I covered  the reinforcer in the same paper and glued it to the tag.
Even though I loved the background paper I found this old book cover in a drawer and decided to use it (I mean, couldn't fit any better?).  The cover has a lot of rough spots and crazing which makes me love it even more.  I bought three of these at a flea market a few years ago and they have just been sitting in the drawer waiting for the right project.  Well today is the day.  
I colored a piece of Watercolor Cardstock with Distress Inks.
Then used the paper to cut the Funky Wreath Die.  This Thinlit die comes with two wreaths, one leafy and one more stick like (think grapevine wreath).  I'm using the one with the leaves today.
Each of the wreaths has the wreath die plus 4 extra stems used for layering.
I added Antique Linen Distress Embossing Glaze over the top to give it a shiny appearance.
I also wanted to use the small frame that comes with the Cathedral windows from Etcetera line.  They come in a medium brown color but I wanted it to eventually look like a stained glass window so I added Hickory Smoke Glaze over the top.  I did two coats so it was nice a thick over the surface.
It absolutely worked like a charm.  Super rich looking and easy to do.
Next comes the "glass" portion of the window.  This is the part that was reused from a post I did for Simon Says Stamp (you can find it HERE if you are interested).  I cut a piece of Mirrored to fit the window.  Remember to remove the plastic protective coating sheet before moving to the next step.
I placed the piece on a folded paper towel so I could move it without touching the Mirrored piece (and the ink).
Using Alcohol Ink over Mirrored is easy because the surface is slick, so when you add a bit of 91% Isopropyl Alcohol to the surface (I use an eye dropper) and then the Alcohol Ink it almost slides right off the surface...but it really doesn't.
Now the fun part.  Use the Alcohol Air Blower to move the Alcohol Ink around, adding more drips of ink and more Isopropyl as needed.  Again, the paper towel makes it easy to turn the surface when you want to blow a different direction.  The combination of Boysenberry, Moss and Monsoon work beautifully together and really set the stage for the rest of the tag.
So whereas last year we only had Mixatives to work with, this year we have Alloys.  And boy are they awesome.  You don't need much to make a big impact so start with one or two small drops, add more Isopropyl over the top and watch the Alloy break into flakes.  Use the Air Blower to move the pieces around till you get the look you want.  Remember, you are still able to add more of the regular Alcohol Ink into the mix if you wish.
This is my finished piece.  It's much shinier in person than in the photo due to the Mirrored surface underneath. Hence the strange camera angle!  I kept getting the reflection of my iPhone in the Mirrored.
Add a little Collage Medium to the back of the Cathedral Window and position over the Mirrored piece.  I placed a book on top for about 15 minutes to secure the two pieces together.
So next we can start to build.  I added 3D Foam Squares to the Window and secured it to the vintage book cover.  The Funky Wreath was added next with Collage Medium.
My Funky Wreath needs some Funky Flowers.  Did you know that the wreaths are scaled to fit the Funky Flowers?  That Tim thinks of everything!  
I used flowers from two sets: Funky Floral 1 + Funky Foliage.  I cut 4 flowers from Watercolor Cardstock and colored them with Distress Ink.  I wanted colors that are light for spring and yet coordinate with the Alcohol Ink colors.  So lots of purples and blue, with yellow and pink as an accent. 
Once the flowers are dry, I like adding Rock Candy glitter over the top of the flowers but that is totally optional if you are not a glitter person.  NOTE: I cut one flower from Funky Floral 1 into three pieces.
I added Collage Medium to the back of each flower to adhere to the surface, with the exception of the blue flower.  I used a 3D Foam Square for that one so it sits higher than the rest.  I have also added in the 4 loose stems that were part of the die set.
Some vintage lace was tucked under the left side of the frame as well as a light blue bow of worn ribbon.
Lots of layers!
I found a sentiment in the new Clipping Sticker Book that is perfect for the Easter theme.
I hope you enjoyed todays tutorial and that you might try a few of the techniques, especially the Alcohol Ink over Mirrored.  It's a great surface for the beginner as it is very forgiving.
Thanks you for popping by.  I really appreciate it!
Now carry on,
paula